Category Archives: Tutorials

Tutorial and How-to posts.

Running Fldigi Flmsg and Flwrap on the Raspberry Pi 2

With the popularity of the Raspberry Pi and the growing need of NBEMS, I wondered if it was possible to run NBEMS programs on the Pi. This maybe of interest to those who want to make a Go Kit (box) with digital or a club wants to replace older computers in their operations center with more efficient devices.

Fldigi is the program used and developed for Narrow Band Emergency Messaging System, but it does so much more. It’s also the standard for many Ham Radio operators because of the number of modes the software will operate.

Fldigi stands for Fast Light Digital modem application created by W1HKJ (David Freese, Jr.) and associates. Flmsg is a forms manager with standardized forms like MARS, plaintext messages, Radiograms, Red Cross, and Weather report forms. Flwrap is a file encapsulation and compression tool allowing for reception of a file exactly like the original.

The Fldigi application is open source, public license software meaning it’s free and available for auditing. With the source code available for Linux, I wondered if it was possible to compile the application on the Raspberry Pi.

At first I had some problems with the project. After (wasting) alot of time on it, I had given up. Only to find out the power supply I had been using was the cause of the issues.

Requirements

Work with my SignaLink USB. As a standard with my projects, the Pi can administered through SSH and VNC if needed. On Windows, I use PuTTY and TightVNC.

Assumptions

This guide is step-by-step in nature, meant for beginners, with brief explanations of the steps. It will help to have an understanding of Linux commands and scripting. Capitalization is important in Linux!

Check my other posts for setup guides on using your radio interface (though written for Windows) and Fldigi, Flmsg, and Flwrap.

Program versions

Applications and versions used in this writeup:

  • Windows 7 64 bit
  • Raspbian Jessie 2015-09-24
  • Win32DiskImager 0.9.5
  • PuTTY 0.65
  • TightVNC 2.7.10 64 bit
  • Fldigi 3.23.04
  • Flmsg 2.0.12
  • Flwrap 1.3.4

Build times

I did a face off for build times between the later model Pi versions: B+, 2, and 3. Later iterations will be faster. The results are in the format of the Linux command time, which contrary to it’s name does not set the time. It gives statistics about this program run. They consist of the elapsed real time between invocation and termination, the user CPU time, and the system CPU time. Later versions than listed above were used in this face off: Raspbian Jessie 2016-05-27, Fldigi 3.23.10, Flmsg 3.0.0, Flwrap is the same at 1.3.4.

Raspberry Pi B+

Failed. Apparently there is an issue running the Make command for Fldigi with versions later than the ones I originally used in this writeup. By the error messages this is an internal g++ compiler error. Make does not fail on the Pi 2 and 3 which probably means it’s a hardware issue (out of memory).

The error is “Warning: partial line at end of file ignored” for dialogs/fldigi-confdialog.o.

Raspberry Pi 2

real 21m49.783s
user 72m9.970s
sys 2m39.290s

Raspberry Pi 3

real 12m50.129s
user 42m8.980s
sys 1m19.160s

Parts list

Listed below are all the parts needed to get this project working. It is noted when items can be left out or substituted.

That’s all the parts needed for this project. Check out the AdaFruit Raspberry Pi page for other hardware that might be useful, like the USB to PS/2 adapter for example. Many of these parts are included in the Raspberry Pi Starter Pack.

If the Pi is setup where there may not be Internet, want to consider purchasing a Real Time Clock (RTC) addon. The Pi will keep time after power has been removed. Of course the time would just have to be set each time.

Flmsg custom forms

In order for custom forms to be used in Flmsg, version 2.0.17 or later must be used. There was a bug in previous versions that didn’t allow the forms to be parsed correctly. In addition, another browser needs to be installed as the default is unable to connect to the webserver created by Flmsg. Thanks to Ken – W0KAH for determining this issue and getting it resolved with the program author.

Linux package installer

The version available from the package manager could be installed but that version is several revisions behind which won’t have the latest enhancements. Some repositories don’t have Flmsg and Flwrap which makes it hard for NBEMS operation.

sudo apt-get -y install fldigi

sudo apt-get -y install flmsg flwrap
If it doesn’t work, you’ll get a message like:

E: Unable to locate package flmsg
Getting Started with MMSSTV

Table of Contents

Introduction – page 1

Download and installation – page 2

Configuration – page 3

RX – page 4
-Logging

History – page 5
-Saving images

TX – page 6
-Modes
-Loading images
-Picture clipper
-Transmitting an image from s.pix
-Transmit loaded image

Template editing- page 7

Introduction

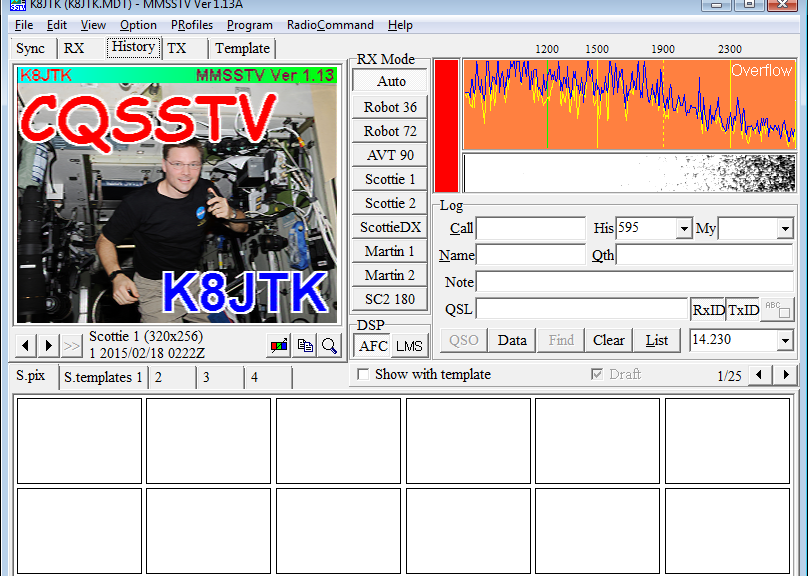
This document will demonstrate installation, setup, and basic use of MMSSTV. MMSSTV stands for Makoto Mori (JE3HHT, creator) Slow Scan TV. It has been the defacto standard SSTV application for many years.

This is written with the beginner in mind and many concepts outlined step-by-step. It will provide direction for further experimentation on your own or on the net and direction for troubleshooting.  For SignaLink and audio setup, visit the Radio Interface Setup post.

Prepared for The Lake Erie Amateur Radio Association’s Digital Net (http://www.leara.org/).

Program versions

Program versions used in this document.

Windows 7 – 64 bit
MMSSTV 1.13A – only available on the Windows platform.

Resources

http://en.wikipedia.org/wiki/Slow-scan_television – Wikipedia, history and current systems.

http://hamsoft.ca/pages/mmsstv.php – MMSSTV homepage, sample audio files (to route through the Windows audio system), and help files.

http://www.wb9kmw.com/WB9KMW/sstv_files/tutorial/SSTV_tutorial.pdf – SSTV for beginners. WB9KMW answered some questions with MMSSTV. I’ll plug his introduction. His website has a collection of HF SSTV receivers that can be used to check reception and propagation.

Calibration

Sound card calibration is important in SSTV.  See the “Sound card clock calibration” section in the “Radio Interface Setup – For getting started with Ham Radio Sound Card digital modes” document.  MMSSTV methods: http://www.wb9kmw.com/WB9KMW/sstv_files/tutorial/That_Pesky_Slant.pdf. I prefer this method: http://www.wb9kmw.com/WB9KMW/sstv_files/tutorial/That_Pesky_Slant_WWV_Alternative.pdf.

Getting Started with Fldigi – Including Flmsg and Flwrap

Updated: 03/26/2017

Table of Contents

Introduction – page 1

Download and installation – page 2
-All 3 programs

Configuration – page 3
-Fldigi
-Flmsg

Receiving
-Fldigi – page 4
-Flmsg – page 5
-Flwrap – page 6

Transmitting
-Fldigi – page 7
-Flmsg – page 8
-Flwrap – page 9

Introduction

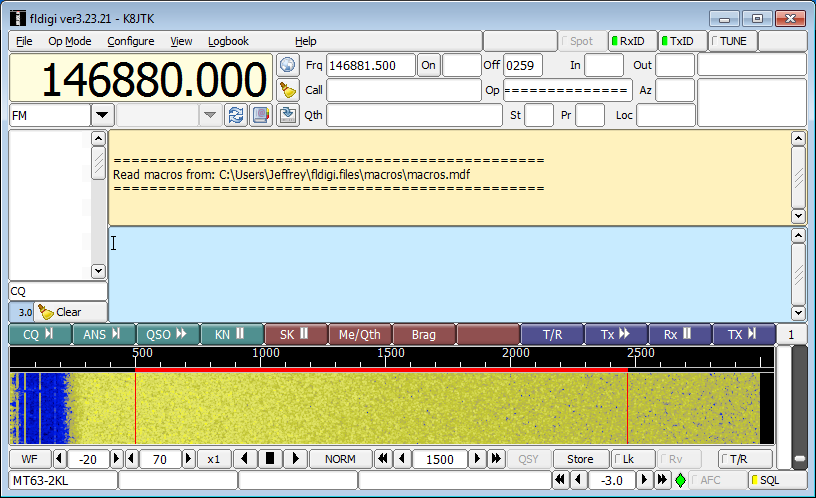
This document will show installation, setup, and basic use of Fldigi, Flmsg, and Flwrap. Fldigi stands for Fast Light Digital modem application created by W1HKJ (David Freese, Jr.) and associates. Flmsg is a forms manager with standardized forms like MARS, plaintext messages, Radiograms, Red Cross, and Weather report forms. Flwrap is a file encapsulation and compression tool allowing for reception of a file exactly like the original.

The Fldigi suite has many applications and can operate many, many different modes. For the list of modes, click the “Op Mode” menu in Fldigi. A quick description of the Fldigi suite from W1HKJ:

Fldigi – Digital modem program.
Flarq – AutomaticReQuest file transfer program (works with Fldigi).
Flamp – Amateur Multicast Protocol file transfer program.
Flwrap – File encapsulation for error free transfers over amateur radio.
Flmsg – Formatted message manager – 25 forms including Radiogram.
Flrig – Transceiver control program.
Flwkey – Winkeyer control program.
Fllog – Logbook program – works with Fldigi, Flwkey etal.
Flnet – Net management and database program.

The Digital Net typically operates Fldigi using NBEMS standard methods for VHF and UHF communication. NBEMS stands for Narrow Band Emergency Messaging System (or Software) (http://www.arrl.org/nbems). NBEMS VHF/UHF operating mode is MT63-2KL and Olivia 8/500 or 16/500 for HF operation. HF digital operation is considerably different than VHF/UHF FM digital. HF station operating tips are not covered however application usage is similar.

Flwrap is no longer considered part of NBEMS but is a useful program to send small files.  If only operating NBEMS, Flwrap can be omitted and ignored.

This is written with the beginner in mind and many concepts outlined step-by-step. It will provide direction for further experimentation on your own or on the net and direction for troubleshooting.  For SignaLink and audio setup, visit the Radio Interface Setup post.

Prepared for The Lake Erie Amateur Radio Association’s Digital Net (http://www.leara.org/).

Program versions

Program versions used in this document.

Windows 7 – 64 bit

Fldigi 3.23.21

Flmsg 4.0.1

Flwrap 1.3.4

Resources

http://www.w1hkj.com/beginners.html – Beginners guide to Fldigi.

http://www.w1hkj.com/FldigiHelp/index.html – Fldigi help.

http://www.w1hkj.com/flmsg-help/index.html – Flmsg help.

http://www.w1hkj.com/Flwrap/index.html – Flwrap help.

Calibration

Sound card calibration for some modes Fldigi supports is important; it is recommended regardless of mode. See the “Sound card clock calibration” section in the “Radio Interface Setup – For getting started with Ham Radio Sound Card digital modes” document. Fldigi method: http://www.k8jtk.org/2015/10/19/nbemsfldigi-sound-card-calibration/.

Radio Interface Setup – For getting started with Ham Radio Sound Card digital modes

Table of Contents

Introduction – page 1

Configuration
-Playback settings – page 2
-Recording settings – page 3

Testing and troubleshooting – page 4
-Transmit
-Receive

Recording with Audacity – page 5
-Recording settings
-Record all received and transmitted audio
-Timer recording
-Saving
-Playback

Sound card clock calibration – page 6

Introduction

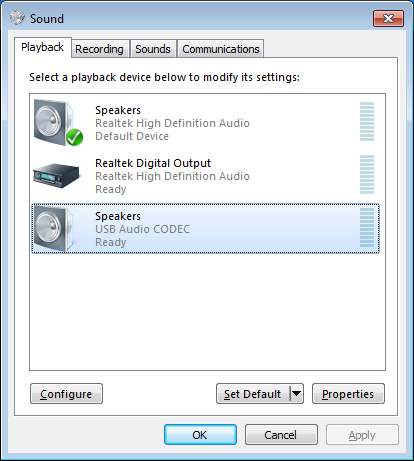
This document will demonstrate basic setup of a radio interface device in the Windows Sound Control Panel to use with Ham Radio Sound Card digital modes. Programs include: Ham Radio Deluxe DM780, MMSSTV, Fldigi, wsjtx, FreeDV, Easypal. In addition, it will demonstrate how to record digital transmissions and play them back.

This is written with the beginner in mind and many concepts outlined step-by-step. It will provide direction for further experimentation on your own or on the net and direction for troubleshooting.

The SignaLink USB was used but these instructions can be adopted for similar devices. Those using other methods may find the settings and techniques useful.

SignaLink and many other external interfaces have external volume controls. Set these controls at half to start. Adjust these controls first as they are the easiest to adjust and fine tune while operating. If a situation occurs where you have too much/little audio with the volume controls set low/high, then adjust the Windows audio levels second.

It is important to point out:

  • Plugging the same device into a different USB port will be recognized as a new device by the system. This means the audio settings will need to be re-configured. In addition, the audio device settings in the digital mode program may need to be re-configured as well.
  • The process of setting audio levels is not exact.  Each system is different, drivers are programmed differently, hardware interacts differently with the operating system. It will take some time to fine tune audio levels.

Prepared for The Lake Erie Amateur Radio Association’s Digital Net (http://www.leara.org/).

Program versions

Windows 7 – 64 bit
Audacity 2.0.6

Resources

Still having trouble after using this tutorial? Read through the product manual and support documentation. Below are links for popular devices.

Specific instructions can be found online typically by searching: [name of application] [radio interface device]. Example: Fldigi SignaLink USB.

SignaLink

Homepage: http://www.tigertronics.com/

General support, operating tips, manuals, and modifications (all models): http://www.tigertronics.com/sl_suprt.htm

SL USB troubleshooting: http://www.tigertronics.com/slusbts.htm

Rigblaster

Homepage: http://www.westmountainradio.com/

Knowledge base: http://www.westmountainradio.com/knowledge_base.php

Drivers and manuals: http://www.westmountainradio.com/content.php?page=wmr-downloads

P25 Trunked Tracking and Decoding with RTL-SDR, Unitrunker, and DSDPlus

The project that got me really into experimenting with the RTL-SDR dongles is using them to decode P25 digital trunked public service radio systems.  I have been a casual scanner listener for years and like to listen to emergency calls nearby.  In college it was great to listen in on a party weekend hearing fights, disturbances, or why my street suddenly filled with cars at 3 AM.

Narrowbanding

That was when most agencies were analog.  To get more use out of the radio spectrum, the FCC decreed a narrowbanding mandate requiring a “maximum of 12.5 kHz bandwidth across the private land mobile bands between 150-174 and 421-512 MHz.”  This means going digital for much of that radio spectrum because traditional FM transmissions are 15 KHz.  Ironically they will “go digital” but move to 700/800 MHz.

As a casual listener, I wasn’t exactly thrilled with spending at least $500 for a scanner capable of digital (P25 mostly) and trunked system tracking (also Radio Reference wiki).

$40 RTL-SDR trunked scanner

Lurking around the Radio Reference forums, I saw references to being able to use the RTL-SDR dongles for trunked digital decoding.  I had to try it.  I had played around with these dongles and read about the many projects people were doing with them.  In actuality this project cost me $65.

About the project

You will need at least two RTL-SDR dongles ($20/each) and a copy of Virtual Audio Cable ($26).  I already had a premium Radio Reference account.  You can do the project with one dongle but you loose many features in Unitrunker like talkgroup priority.  Theoretically, the single dongle listens to the system control channel and then tunes to voice calls, then back to the control channel.  You will miss calls because that notification comes across the control channel while the dongle was tuned to a voice transmission.  I will cover a two dongle setup and do not plan to cover a single dongle setup.

This project is still very complicated but it is MUCH easier than it used to be.  This manly thanks to Rick, the developer of Unitrunker who implemented support for the RTL-SDR chipset in his program.  Previously, there needed to be a plug-in for both Unitrunker and SDRSharp, there were all kinds of “moving parts.”  In one respect, being able to see the signal waveform on a spectrum analyzer made it much easier to fine tune the PPM correction on-the-fly as opposed to guessing on a modulation scope.  This setup is much cleaner and the Unitrunker developer has implemented advanced features like drift correction.  It will take some time and patience to understand, research, and know the types of systems and system specifics.

There are some advantages like cost and being software based.  Changing modulation types is often as easy as changing programs.  As an example, DSDPlus will decode MotoTrbo as opposed to no standalone scanner being able to do so currently.  However, portability of this setup is limited as you have to have many pieces of equipment with you.  You’ll need an Internet connection to find sites to program and a PC to tweak settings.

Two very specific and key things to note about trunked radio systems in general:

  • You cannot tell the tower your’re listening to which talkgroup you want to monitor.  Doing so would require the ability to transmit and IS ILLEGAL because you are not authorized to do so.  If the talkgroup is not transmitted by the tower, you’re out of luck.  You can’t be in Dayton and tell the system you want to listen to a talkgroup originating from Cleveland.
  • Nothing here (and no program I know of) will defeat encryption, even if you own the keys.  Decoding encrypted transmissions is not implemented in any of these programs.  On the flip side, be aware that using this tutorial and feeding the audio to Radio Reference and Broadcastify may not make agencies happy.  You could get a take-down notice or even worse, it is trivial to turn on encryption at the system level and you just blocked reception for all scanner listeners.

Thanks to those whose tutorials I first used getting this setup working: $20 trunking police scanner and RTL-SDR Tutorial: Following Trunked Radio With Unitrunker.

Program versions

I used a Windows 7 64 bit PC. Applications and versions used in this writeup:

  • SDRSharp: 1.0.0.1330
  • Virtual Audio Cable: 4.14
  • DSDPlus: 1.51
  • UniTrunker: 1.0.30.10

Parts list

Listed below are all the parts needed to get this project working.

  • Computer with some processing and memory horse power.  It is recommended to have a computer with a recent Intel Core i5 processor and 8GB of RAM, or better.
  • Receive antenna that covers 700 & 800 MHz where P25 trunked usually resides. For an external antenna, splitters and coax runs maybe needed.  The stock RTL-SDR dongle antennas worked fine for me.
  • Two RTL-SDR Dongles.  To decode more than one voice transmission, increase the number of dongles needed.
  • Virtual Audio Cable.  Not free but trial version available.
  • Radio Reference account.  Premium account.  If you don’t want to fork over the money, become an audio feed provider.
  • Recommend a USB hub.  Couple years ago I picked up a Rosewill RHUB-300 USB 2.0 Hub 7-Port HUB.  I recommend this hub because when the dongle is plugged in, the antenna connector is pointed up.  This makes it easier to connect an adapter and a Pryme RD-98.  If available, connect the hub to an Intel USB chipset on your motherboard.  I’ve had far less issues using Intel based hardware.

ADS-B Decoding with RTL-SDR, ADSBSharp, and Virtual Radar Server

Update: ADSBSharp (ADSB#) is no longer available and has been deprecated.  Copies can be found by doing some searching.  It is not available from the authors site as described in this post for the RTL-SDR. A program like RTL1090 or Dump1090 (or any of its forks) can be substituted.  The author is focusing on AirSpy devices and ADSBSpy is available from the same site as SDR#.


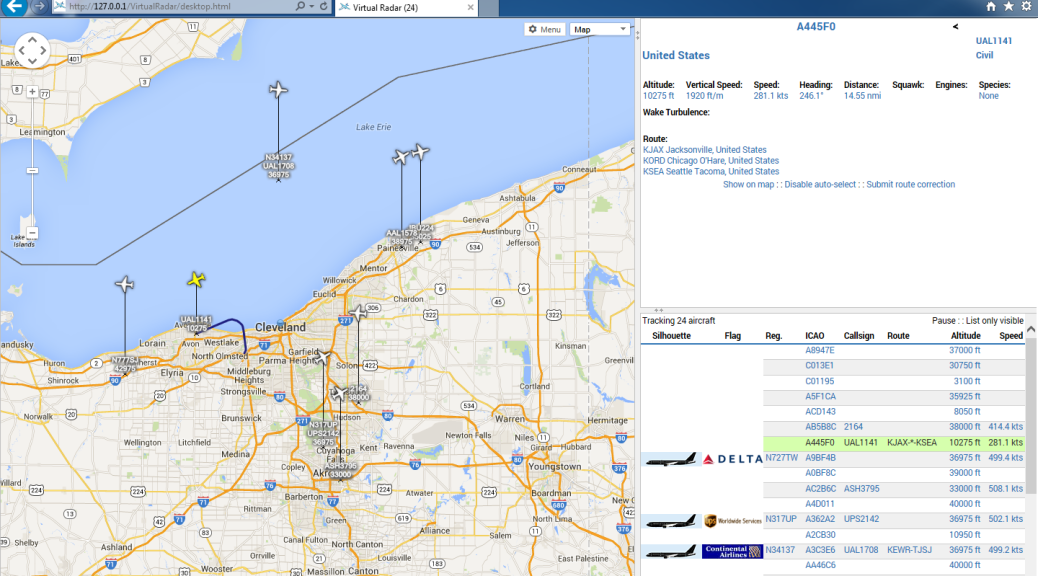
An interesting project I came across using the RTL-SDR dongle is to decode ADS-B data.  ADS-B stands for Automatic dependent surveillance – broadcast allowing aircraft to be tracked by ground stations and provide situational awareness to nearby aircraft.  It is part of the FAA’s NextGen project and mandated by agencies across the globe.  ADS-B uses a frequency of 1090 MHz.

Thanks goes out to Robert Nickels – W9RAN and his article in the January 2014 edition of QST which covers this project and how to make a Collinear Array for 1090.  HAK5 also did a couple episodes showing how to make an antenna and configure Virtual Radar Server.

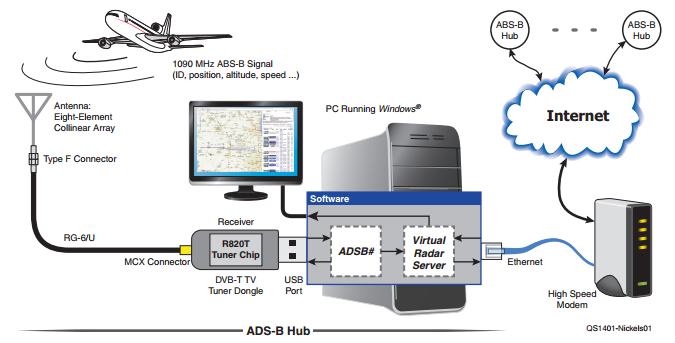
adsb-hub-diagram
Block diagram of the ADS-B Hub setup. From: QST, January 2014.

Program versions

I used a Windows 7 64 bit PC.  Applications and versions used in this writeup…

SDRSharp: 1.0.0.1330
ADSBSharp: 1.0.11.1
Zadig: 2.1.0.658
Virtual Radar Server: 2.0.2
SBS Resources: 6.7

Parts list

Listed below are all the parts needed to get this project working.

Antenna with receive coverage of 1090 MHz.
RTL-SDR dongle.

I had a ham radio antenna that I used.  It is the MP Antenna 08-ANT-0860 Ultra Mobile Antenna if you’re interested.  To build an antenna, see the QST article above.  The one that comes with the dongle will work but at short range.

DVAP Pi Hotspot

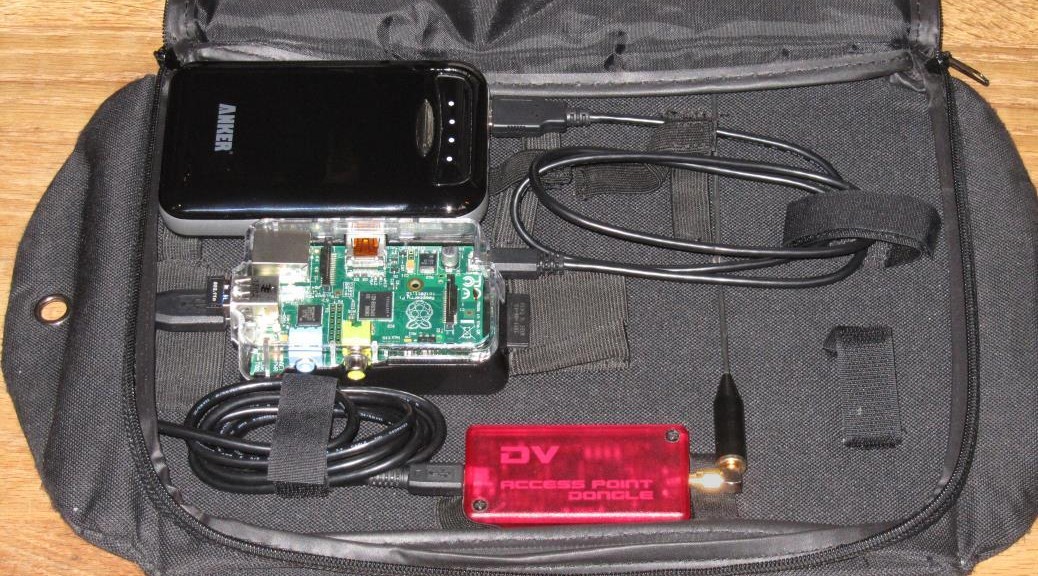
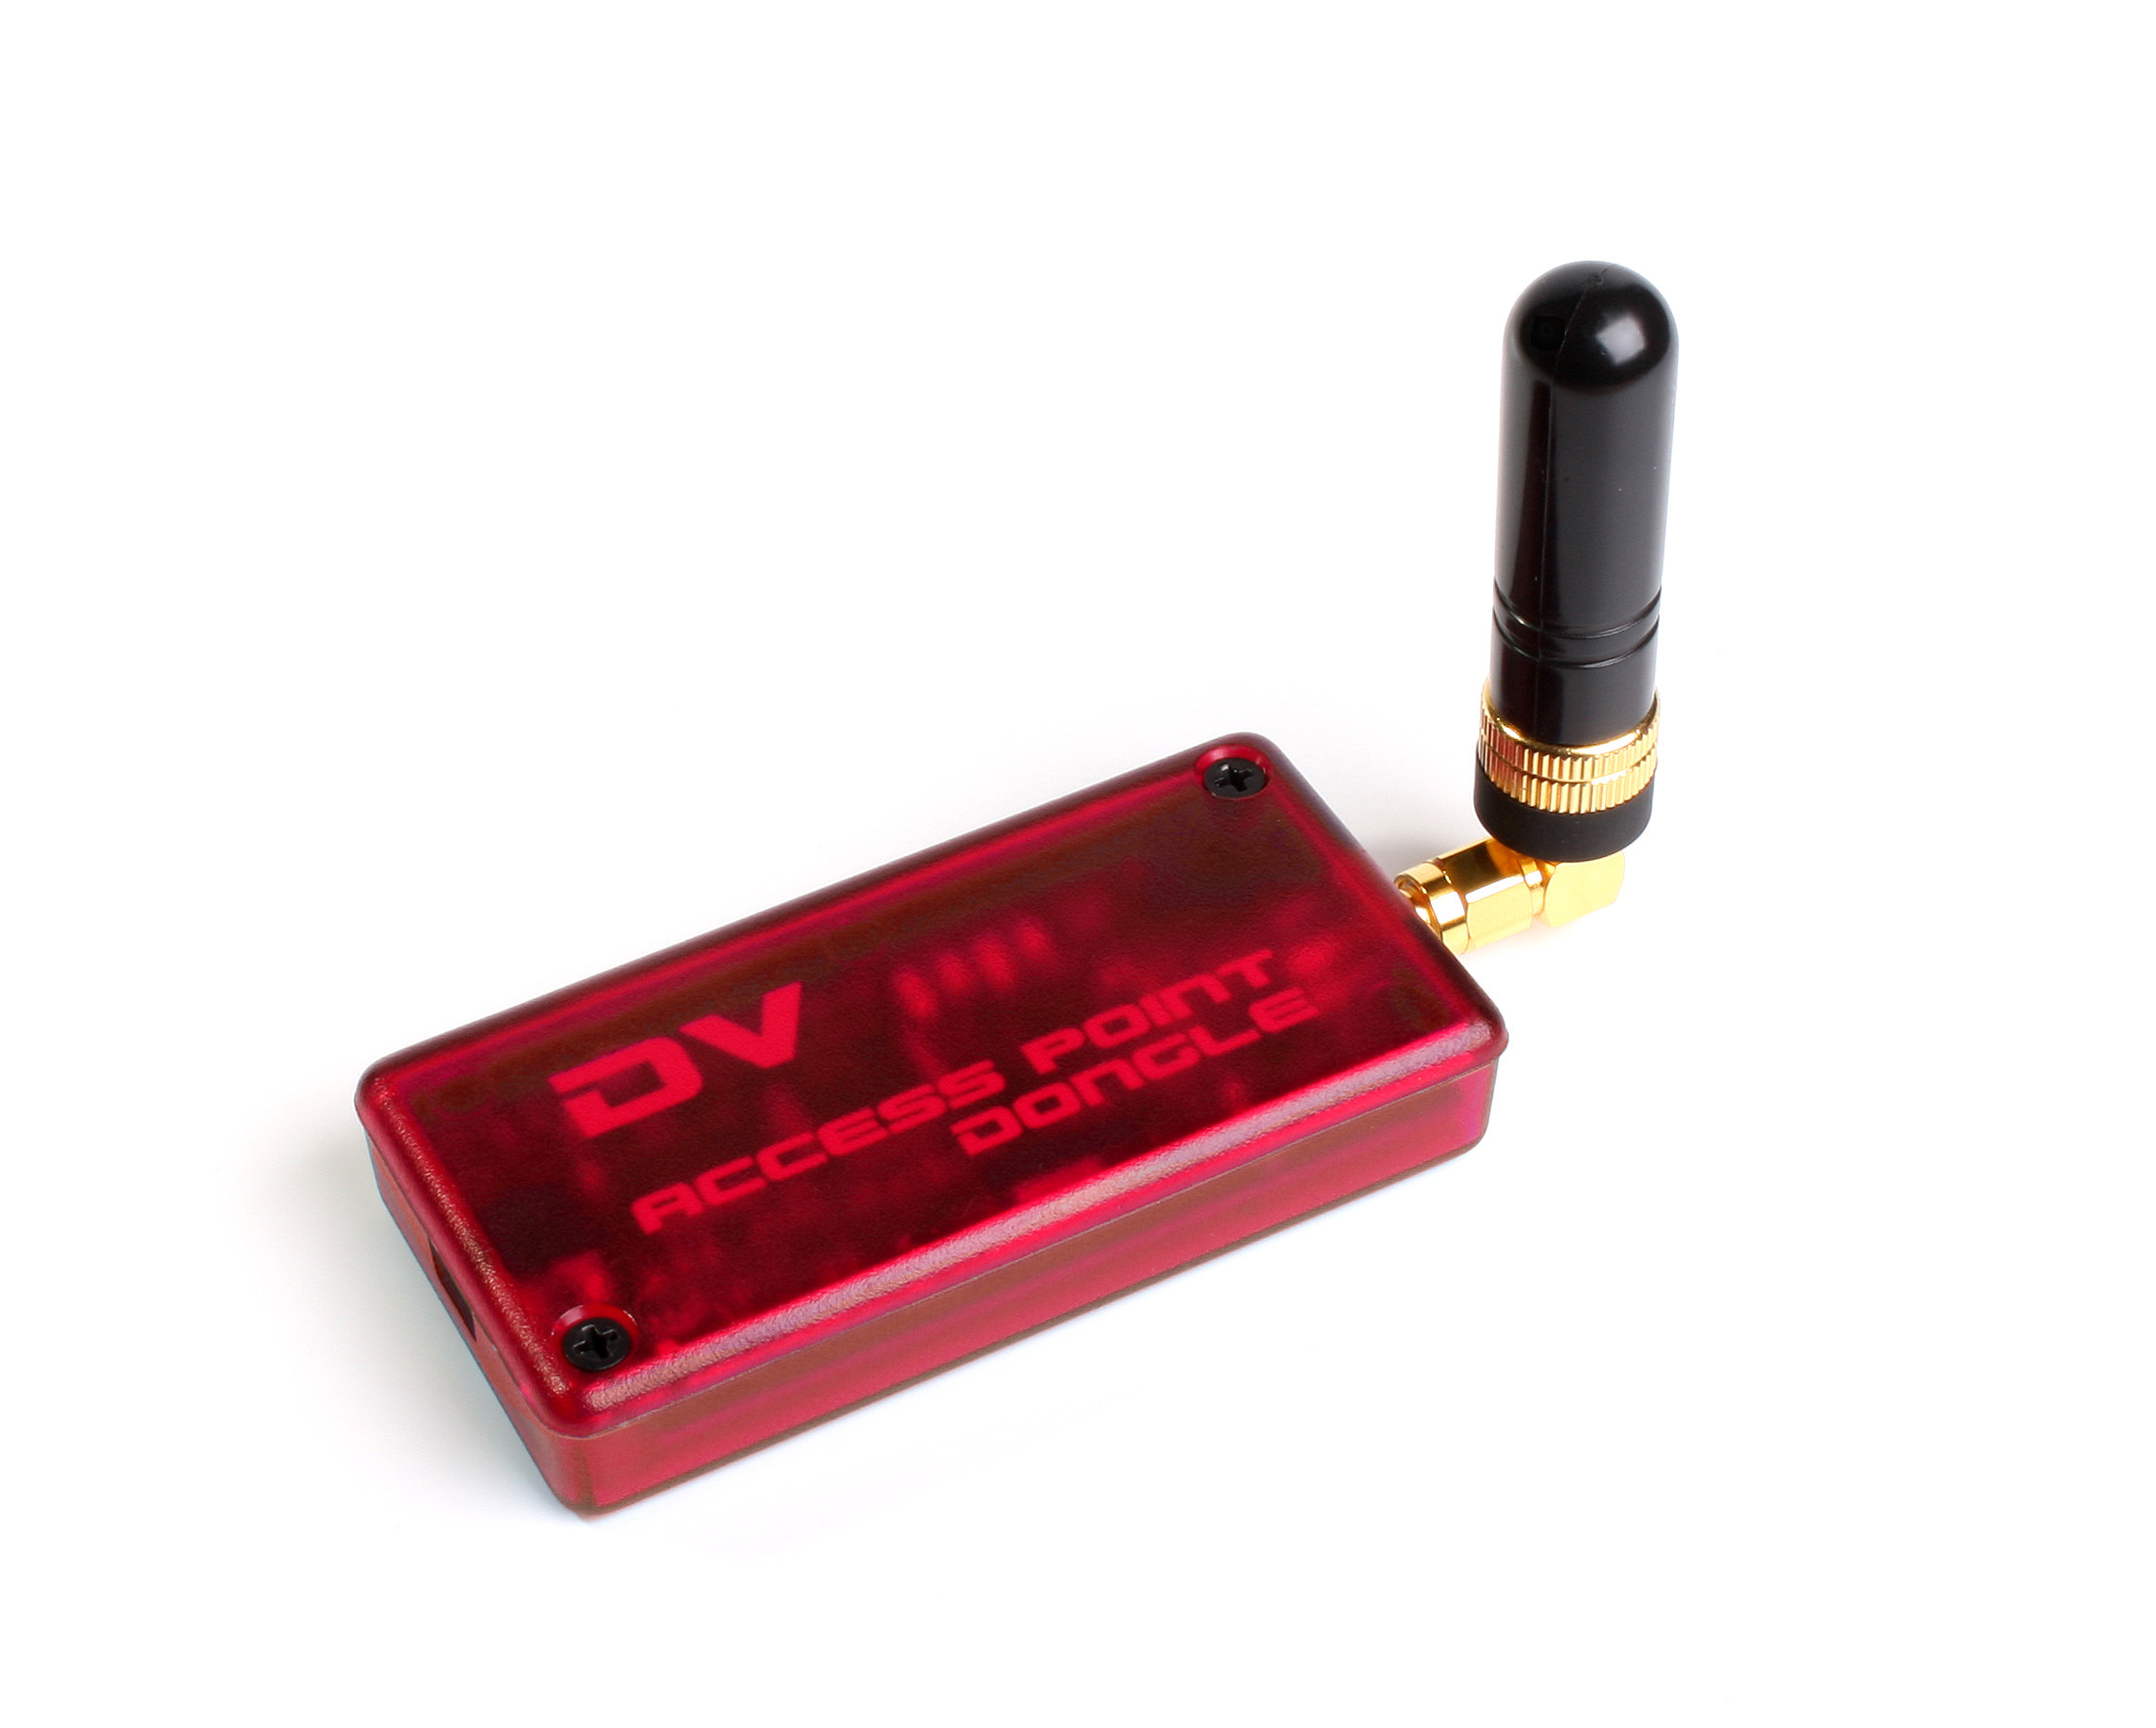
DVAPDongleOne of my interests is digital modes, so I’m a D-STAR fan.  My first project with the Raspberry Pi would be the DVAP Pi Hotspot.  The DVAP normally connects to a computer and has a low power, 10 mW 2m or 440 transceiver that works with a D-STAR radio.  It passes the bits from the Internet & D-STAR network over the air to your D-STAR radio and vice versa.  The radio does the encoding and decoding.

Thanks goes out to the guys over at AmateurLogic.TV.  Tommy, N5ZNO, did a DVAP Pi segment in episode 57 that I used to build mine.

Requirements

Much like Tommy, my DVAP Pi had to be portable (battery operated), headless (no monitor, autostart), use a cellphone WiFi hotspot, and administered through SSH and VNC if needed.  On Windows, I use PuTTY and TightVNC.  On Android, I use JuiceSSH and PocketCloud.

Assumptions

With this tutorial, I’m assuming anyone setting this up is already familiar with D-STAR, registered on the D-STAR network, and familiar with using the DVAP on a PC.

This guide is step-by-step in nature, meant for beginners, with brief explanations of the steps.  It will help to have an understanding of Linux commands and scripting.  Capitalization is important in Linux!

DPRS problem

I was hoping to use the DVAP Pi as a portable DPRS (D-STAR APRS) iGate to report location data to the APRS network.  It currently does not.  It only reports D-PRS data to the gateway system you’re connected to.  No further.  It will show up on the gateway’s DPlus Dashboard but the DVAP Tool nor the gateway/reflector/repeater will not pass location data to the APRS network.

If you come over the RF side of a repeater with a GPS enabled radio, it will pass the location data to the APRS network.  The repeater will not pass location data to the APRS network when transmitting through a DVAP linked to the system.

This is true when the DVAP is connected to a PC or the Pi.

Program versions

I used a Windows 7 64 bit PC. Applications and versions used in this writeup:

  • Wheezy Raspbian 2014-01-07
  • Win32 Disk Imager 0.9
  • PuTTY  0.63
  • TightVNC 2.7.10 64 bit
  • DVAPTool 1.04
  • Mobile Hotspot ? (added after publishing)
  • JuiceSSH ? (added after publishing)
  • PocketCloud ? (added after publishing)

Parts list

Listed below are all the parts needed to get this project working.  It is noted when items can be left out or substituted.

That’s all the parts needed for this project.  Check out the AdaFruit Raspberry Pi page for other hardware that might be useful, like the USB to PS/2 adapter for example.  Many of these parts are included in the Raspberry Pi Starter Pack.

Downloads

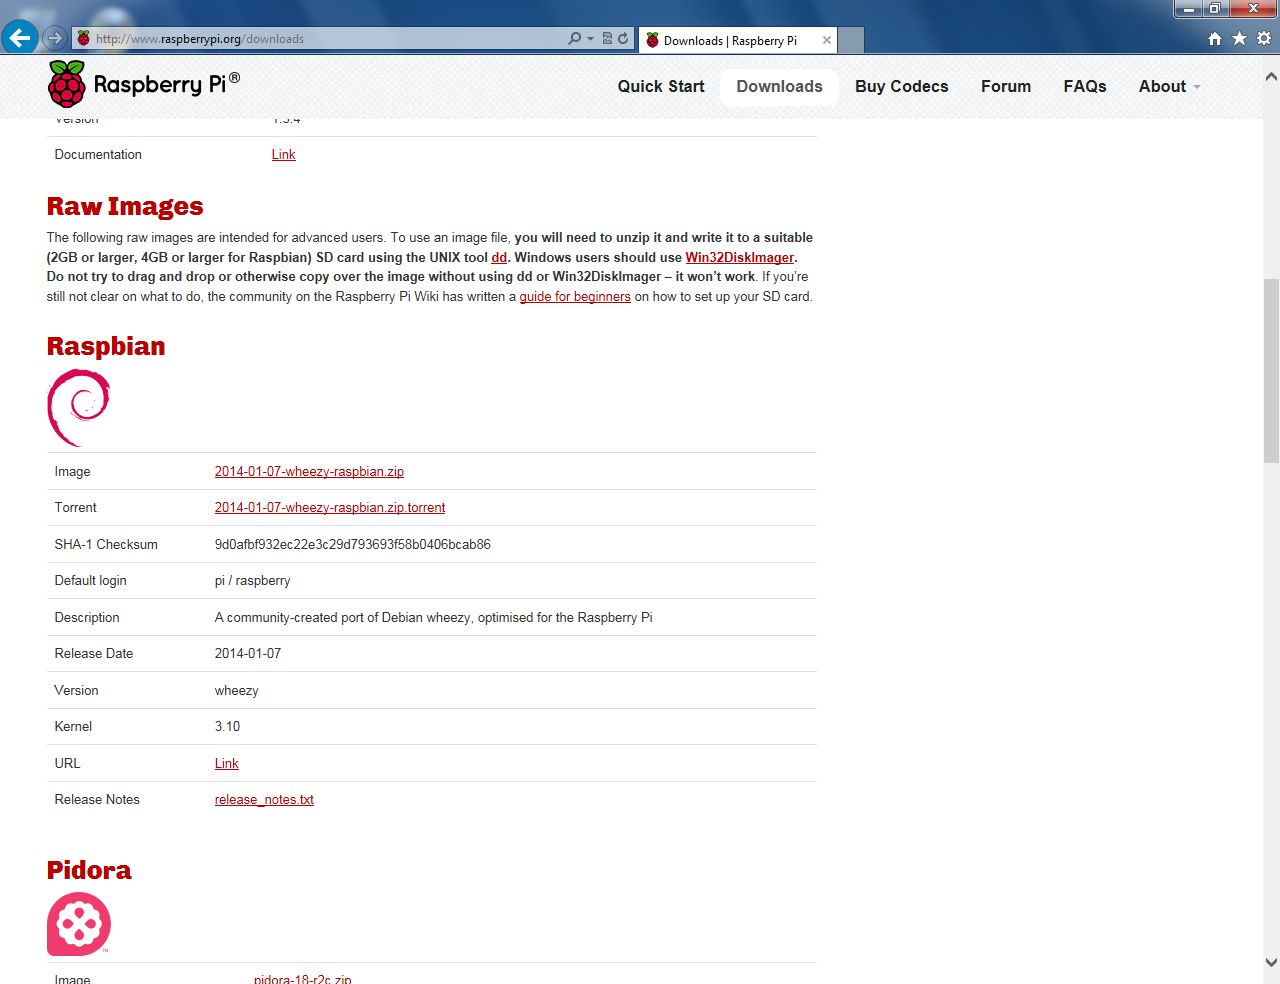
01_raspberry_pi_downloads

Go to http://www.raspberrypi.org/downloads and find the “Raw Images” section.

Download the Win32DiskImager and Raspbian image (800 MB).  Save them in your Downloads folder.