Tag Archives: SSH

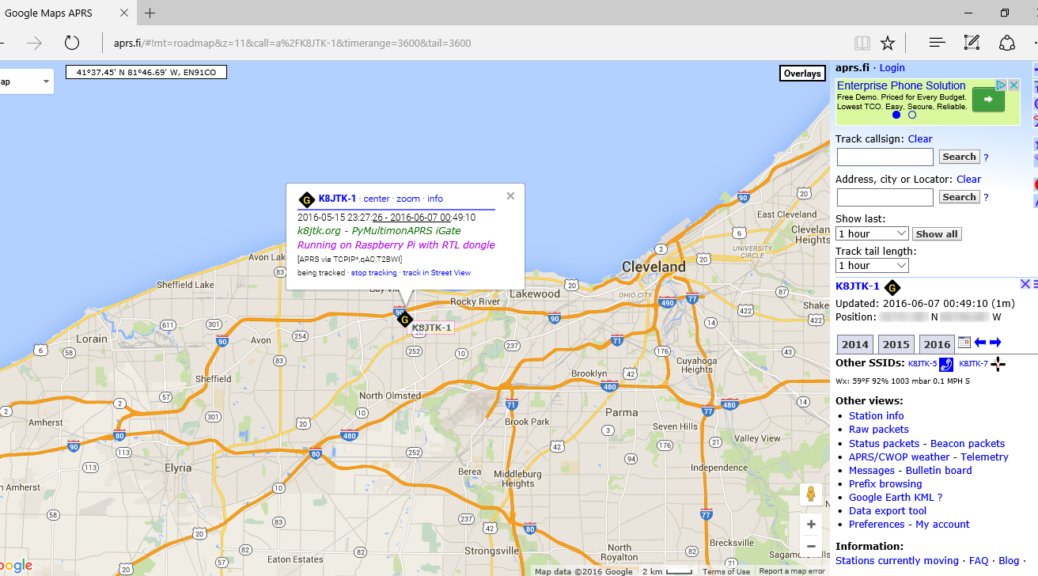
APRS RX IGate with RTL-SDR and Raspberry Pi

For sometime I wanted to experiment with an APRS IGate. Coverage was spotty at best in my area. There is an IGate in my city but it doesn’t receive so well. Recently there have been more IGates blanketing the area.

APRS stands for Automatic Packet Reporting System and has been developed since the late 1980s by Bob Bruninga – WB4APR. It’s a digital communication mode amateur radio operators use to primarily broadcast location information, though this wasn’t the intended use. It handles text messages, alerts, announcements, bulletins, and information of interest like weather station reports. APRS operates typically on a single frequency.  A system of relay stations and digipeaters repeat messages over a wide area. APRS Internet System (APRS-IS) are Internet connected receivers (IGates).

Any ham can add an icon or information to the APRS map.  The information is available on the Internet or to users on the local RF network.  Data is automatically tracked over time. APRS is frequently used to track mobile stations in a public service event or volunteers in a search and rescue event to visualize locations and track progress.

This project will utilize the Raspberry Pi and RTL-SDR dongle. The Raspberry Pi is a credit-card sized micro-computer intended for teaching computer science to students but became popular with the makers. RTL-SDR dongles are DVB-T (European standard) TV tuner dongles. It was found the signal data could be accessed directly which allowed them to be converted into wide band software defined radio receivers. The Pi costs about $35 and RTL-SDR about $20.

Since the RTL-SDR dongles are meant to receive high power wide bandwidth TV signals, they are not as as sensitive or frequency stable as a ham radio or scanner. Receiver performance will be a little less than an equivalent radio performing the same task but depends on the usual variables: amount of APRS activity, antenna height, antenna gain, propagation, etc, etc. With my antenna about 15 feet high, I get about 5+ miles of coverage. With band openings I’ve heard stations on the opposite side of town and across Lake Erie into Canada.

Even though this IGate will be non-transmitting (cannot relay packets from the Internet), packets are forwarded to APRS-IS. The higher profile – higher power Digitpeaters in the area will relay packets received by your IGate to the local RF network.

Assumptions

This guide is step-by-step in nature, meant for beginners, with brief explanations of the steps. It will help to have an understanding of Linux commands and scripting. Capitalization is important in Linux!

My setup is on my home LAN. The IGate could be installed at a remote site using a shared Internet connection. Be aware that firewalls that might block connection to the APRS-IS network on a shared connection. You may want to request or have port 22 open on your router for SSH to establish a remote connection.

If all wired options fall through, look for a cellular hotspot device such as a MiFi to install along with the Pi. Use the built in WiFi on the Pi 3 or approved WiFi dongles for earlier Pi devices. Associate the MiFi with your Pi (turning on WPA2 so no one else piggybacks on your connection). Test the setup before installing it. Don’t find out after leaving the site that the MiFi times out after a few hours.

Program versions

Applications and versions used in this writeup:

  • Windows 10 64 bit
  • Raspbian Jessie 2016-05-27
  • Win32 Disk Imager 0.9.5
  • PuTTY 0.67
  • SDR Sharp 1.0.0.1444
  • RTL-SDR 0.5.3
  • Multimon-NG ?
  • Pymultimonaprs 1.3.0

Parts list

Listed below are all the parts needed to get this project working. It is noted when items can be left out or substituted.

That’s all the parts needed for this project. Check out the AdaFruit Raspberry Pi page for other hardware that might be useful, like the USB to PS/2 adapter for example. Many of these parts are included in the Raspberry Pi Starter Pack.
Running Fldigi Flmsg and Flwrap on the Raspberry Pi 2

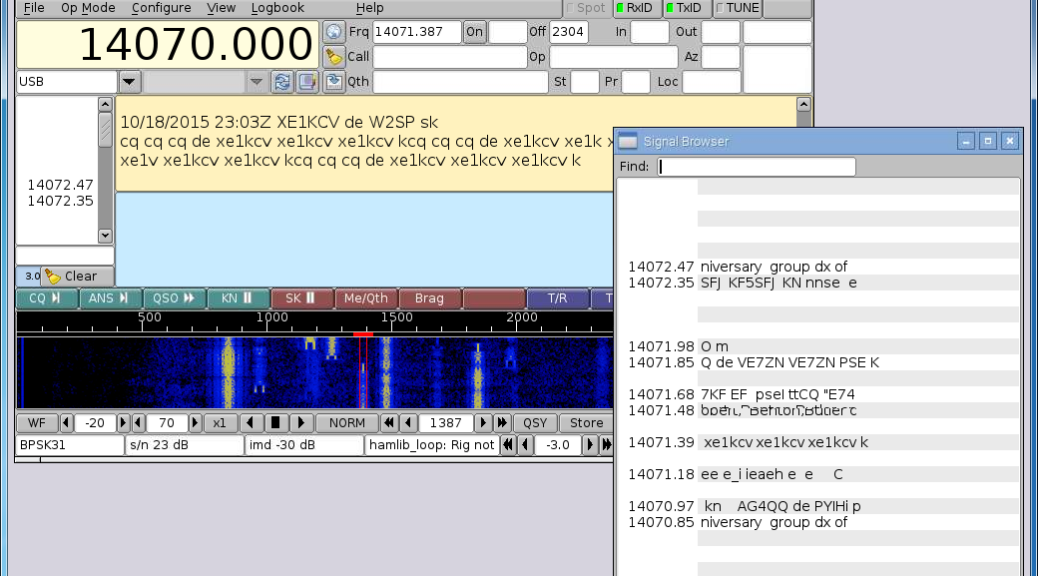
With the popularity of the Raspberry Pi and the growing need of NBEMS, I wondered if it was possible to run NBEMS programs on the Pi. This maybe of interest to those who want to make a Go Kit (box) with digital or a club wants to replace older computers in their operations center with more efficient devices.

Fldigi is the program used and developed for Narrow Band Emergency Messaging System, but it does so much more. It’s also the standard for many Ham Radio operators because of the number of modes the software will operate.

Fldigi stands for Fast Light Digital modem application created by W1HKJ (David Freese, Jr.) and associates. Flmsg is a forms manager with standardized forms like MARS, plaintext messages, Radiograms, Red Cross, and Weather report forms. Flwrap is a file encapsulation and compression tool allowing for reception of a file exactly like the original.

The Fldigi application is open source, public license software meaning it’s free and available for auditing. With the source code available for Linux, I wondered if it was possible to compile the application on the Raspberry Pi.

At first I had some problems with the project. After (wasting) alot of time on it, I had given up. Only to find out the power supply I had been using was the cause of the issues.

Requirements

Work with my SignaLink USB. As a standard with my projects, the Pi can administered through SSH and VNC if needed. On Windows, I use PuTTY and TightVNC.

Assumptions

This guide is step-by-step in nature, meant for beginners, with brief explanations of the steps. It will help to have an understanding of Linux commands and scripting. Capitalization is important in Linux!

Check my other posts for setup guides on using your radio interface (though written for Windows) and Fldigi, Flmsg, and Flwrap.

Program versions

Applications and versions used in this writeup:

  • Windows 7 64 bit
  • Raspbian Jessie 2015-09-24
  • Win32DiskImager 0.9.5
  • PuTTY 0.65
  • TightVNC 2.7.10 64 bit
  • Fldigi 3.23.04
  • Flmsg 2.0.12
  • Flwrap 1.3.4

Build times

I did a face off for build times between the later model Pi versions: B+, 2, and 3. Later iterations will be faster. The results are in the format of the Linux command time, which contrary to it’s name does not set the time. It gives statistics about this program run. They consist of the elapsed real time between invocation and termination, the user CPU time, and the system CPU time. Later versions than listed above were used in this face off: Raspbian Jessie 2016-05-27, Fldigi 3.23.10, Flmsg 3.0.0, Flwrap is the same at 1.3.4.

Raspberry Pi B+

Failed. Apparently there is an issue running the Make command for Fldigi with versions later than the ones I originally used in this writeup. By the error messages this is an internal g++ compiler error. Make does not fail on the Pi 2 and 3 which probably means it’s a hardware issue (out of memory).

The error is “Warning: partial line at end of file ignored” for dialogs/fldigi-confdialog.o.

Raspberry Pi 2

real 21m49.783s
user 72m9.970s
sys 2m39.290s

Raspberry Pi 3

real 12m50.129s
user 42m8.980s
sys 1m19.160s

Parts list

Listed below are all the parts needed to get this project working. It is noted when items can be left out or substituted.

That’s all the parts needed for this project. Check out the AdaFruit Raspberry Pi page for other hardware that might be useful, like the USB to PS/2 adapter for example. Many of these parts are included in the Raspberry Pi Starter Pack.
If the Pi is setup where there may not be Internet, want to consider purchasing a Real Time Clock (RTC) addon. The Pi will keep time after power has been removed. Of course the time would just have to be set each time.

Flmsg custom forms

In order for custom forms to be used in Flmsg, version 2.0.17 or later must be used. There was a bug in previous versions that didn’t allow the forms to be parsed correctly. In addition, another browser needs to be installed as the default is unable to connect to the webserver created by Flmsg. Thanks to Ken – W0KAH for determining this issue and getting it resolved with the program author.

Linux package installer

The version available from the package manager could be installed but that version is several revisions behind which won’t have the latest enhancements. Some repositories don’t have Flmsg and Flwrap which makes it hard for NBEMS operation.

sudo apt-get -y install fldigi

sudo apt-get -y install flmsg flwrap
If it doesn’t work, you’ll get a message like:

E: Unable to locate package flmsg

DVAP Pi Hotspot

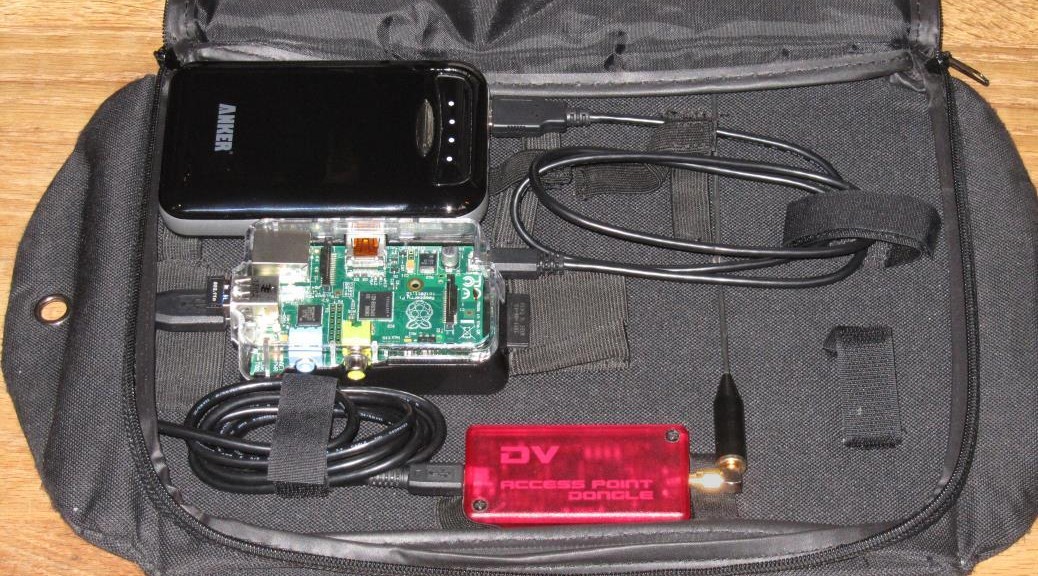
DVAPDongleOne of my interests is digital modes, so I’m a D-STAR fan.  My first project with the Raspberry Pi would be the DVAP Pi Hotspot.  The DVAP normally connects to a computer and has a low power, 10 mW 2m or 440 transceiver that works with a D-STAR radio.  It passes the bits from the Internet & D-STAR network over the air to your D-STAR radio and vice versa.  The radio does the encoding and decoding.

Thanks goes out to the guys over at AmateurLogic.TV.  Tommy, N5ZNO, did a DVAP Pi segment in episode 57 that I used to build mine.

Requirements

Much like Tommy, my DVAP Pi had to be portable (battery operated), headless (no monitor, autostart), use a cellphone WiFi hotspot, and administered through SSH and VNC if needed.  On Windows, I use PuTTY and TightVNC.  On Android, I use JuiceSSH and PocketCloud.

Assumptions

With this tutorial, I’m assuming anyone setting this up is already familiar with D-STAR, registered on the D-STAR network, and familiar with using the DVAP on a PC.

This guide is step-by-step in nature, meant for beginners, with brief explanations of the steps.  It will help to have an understanding of Linux commands and scripting.  Capitalization is important in Linux!

DPRS problem

I was hoping to use the DVAP Pi as a portable DPRS (D-STAR APRS) iGate to report location data to the APRS network.  It currently does not.  It only reports D-PRS data to the gateway system you’re connected to.  No further.  It will show up on the gateway’s DPlus Dashboard but the DVAP Tool nor the gateway/reflector/repeater will not pass location data to the APRS network.

If you come over the RF side of a repeater with a GPS enabled radio, it will pass the location data to the APRS network.  The repeater will not pass location data to the APRS network when transmitting through a DVAP linked to the system.

This is true when the DVAP is connected to a PC or the Pi.

Program versions

I used a Windows 7 64 bit PC. Applications and versions used in this writeup:

  • Wheezy Raspbian 2014-01-07
  • Win32 Disk Imager 0.9
  • PuTTY  0.63
  • TightVNC 2.7.10 64 bit
  • DVAPTool 1.04
  • Mobile Hotspot ? (added after publishing)
  • JuiceSSH ? (added after publishing)
  • PocketCloud ? (added after publishing)

Parts list

Listed below are all the parts needed to get this project working.  It is noted when items can be left out or substituted.

That’s all the parts needed for this project.  Check out the AdaFruit Raspberry Pi page for other hardware that might be useful, like the USB to PS/2 adapter for example.  Many of these parts are included in the Raspberry Pi Starter Pack.

Downloads

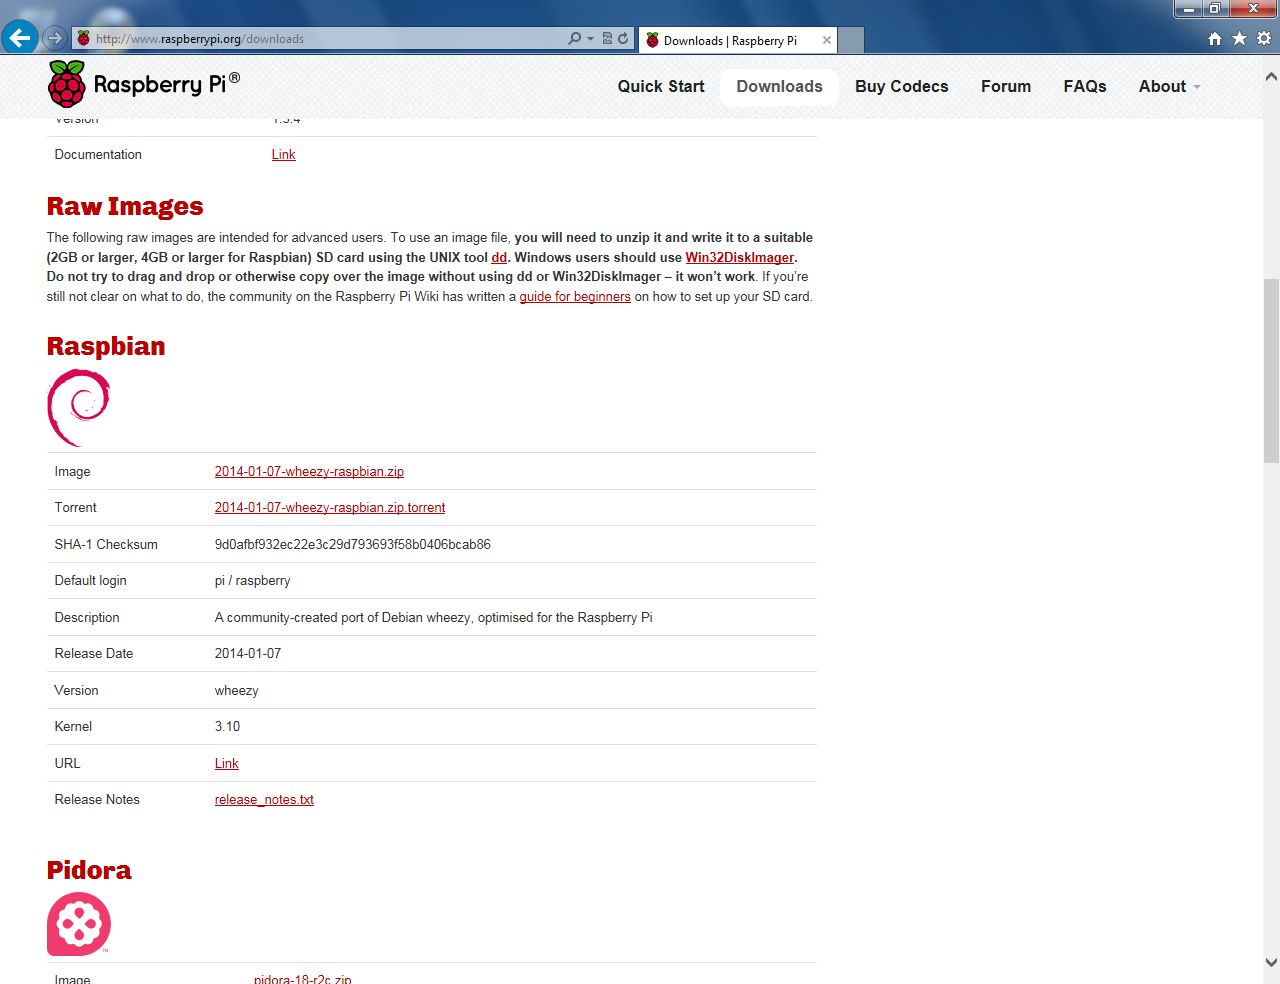
01_raspberry_pi_downloads

Go to http://www.raspberrypi.org/downloads and find the “Raw Images” section.

Download the Win32DiskImager and Raspbian image (800 MB).  Save them in your Downloads folder.