Tag Archives: Projects

Ohio Section Journal – The Technical Coordinator – March 2020 edition

One of the responsibilities of the Technical Coordinator in the Ohio Section is to submit something for the Section Journal. The Section Journal covers Amateur Radio related things happening in and around the ARRL Ohio Section. It is published by the Section Manager Scott – N8SY and articles are submitted by cabinet members.

Once my article is published in the Journal, I will also make it available on my site with a link to the published edition.

You can receive the Journal and other Ohio Section news by joining the mailing list Scott has setup. You do not need to be a member of the ARRL, Ohio Section, or even a ham to join the mailing list. Please sign up!

If you are an ARRL member and reside in the Ohio Section, update your mailing preferences to receive Ohio Section news in your inbox. Those residing outside the section will need to use the mailing list link above.
Updating your ARRL profile will deliver news from the section where you reside (if the leadership chooses to use this method).
Go to www.arrl.org and logon.
Click Edit your Profile.
You will be taken to the Edit Your Profile page. On the first tab Edit Info, verify your Email address is correct.
Click the Edit Email Subscriptions tab.
Check the News and information from your Division Director and Section Manager box.
Click Save.

Now without further ado…


Read the full edition at:

THE TECHNICAL COORDINATOR
Jeff Kopcak – TC
k8jtk@arrl.net

DSCF5081 K8JTKHey gang,

Now that we’re all sequestered to our homes, what the heck do we do to not go iNsAnE? Idle down time is an opportunity to learn something new, catch up on lingering projects, or improve operating skills – all while staying sane. Improve operating skills can mean getting on the air, making conversation with new friends, checking in on our brethren, or practice being a better operator.

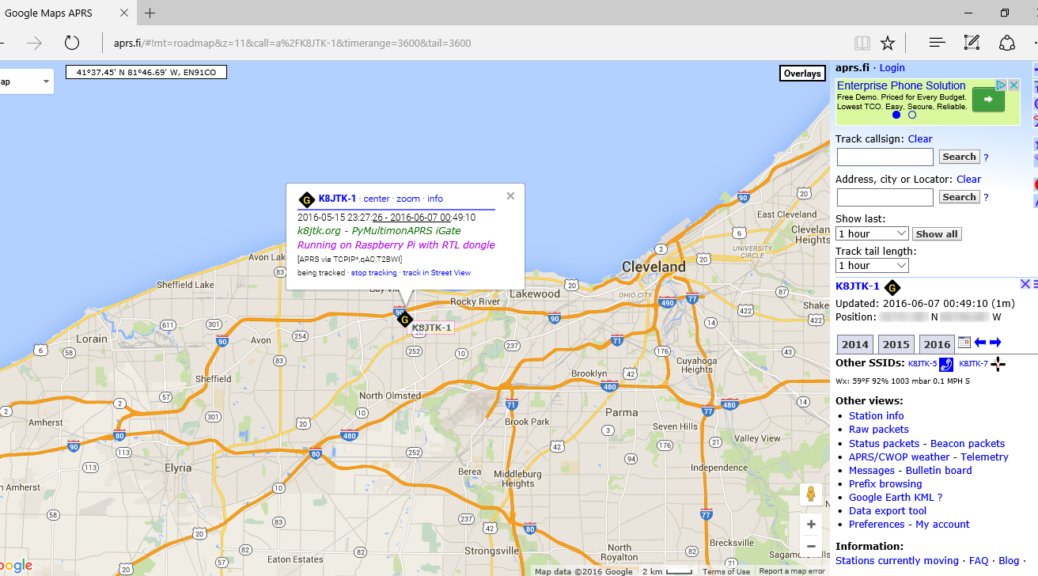
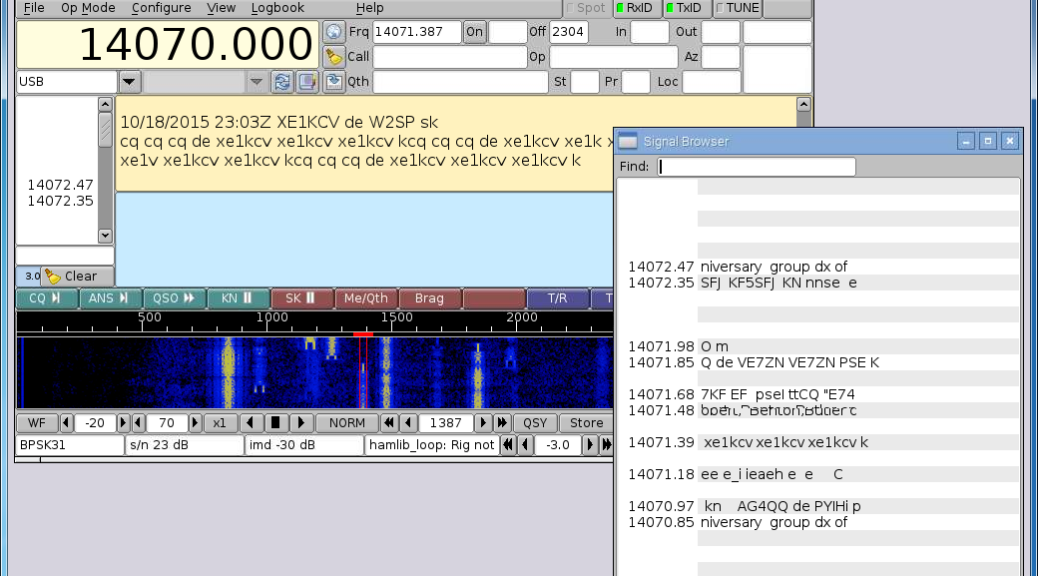
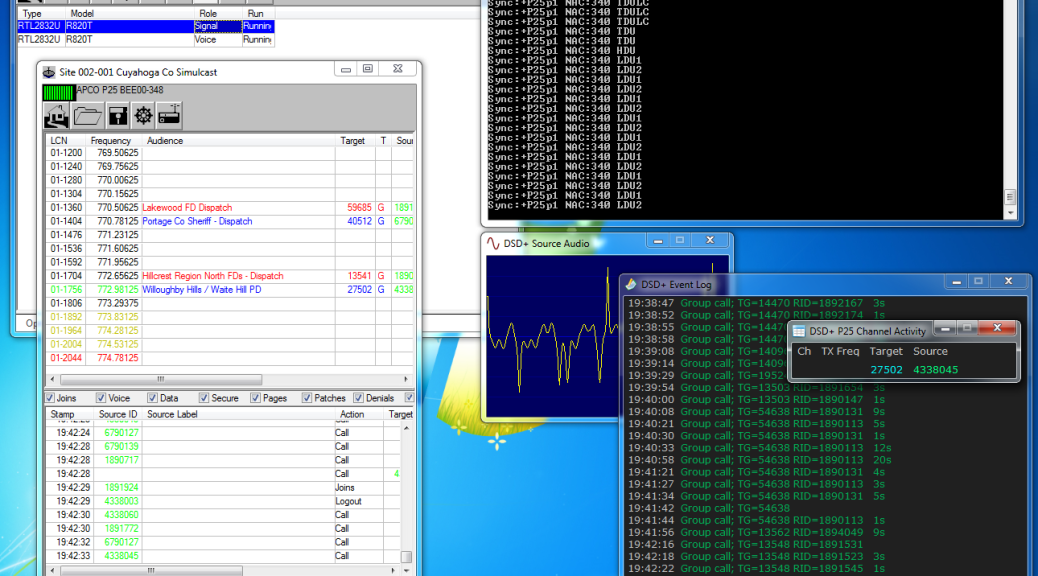
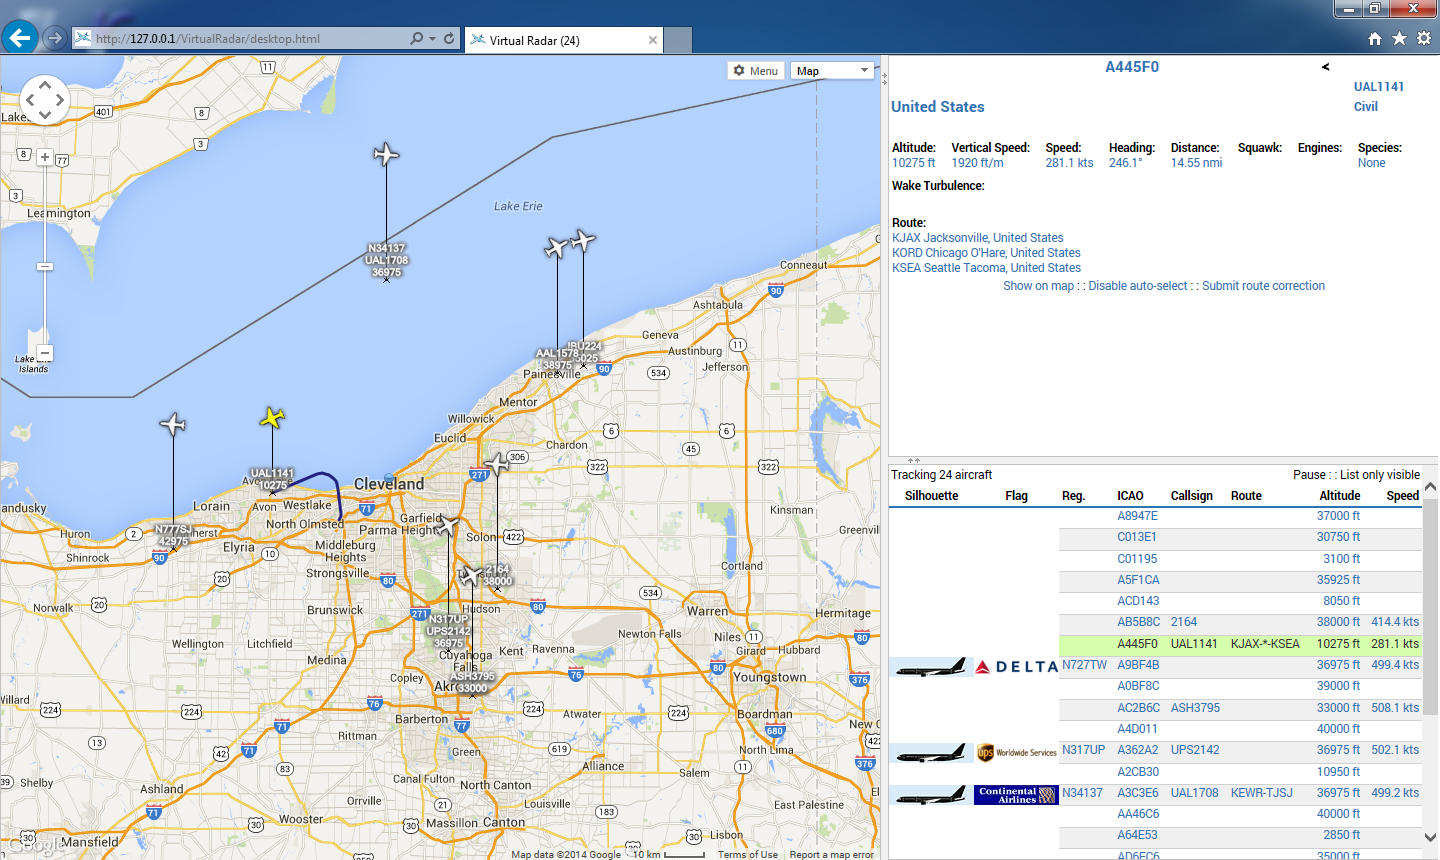
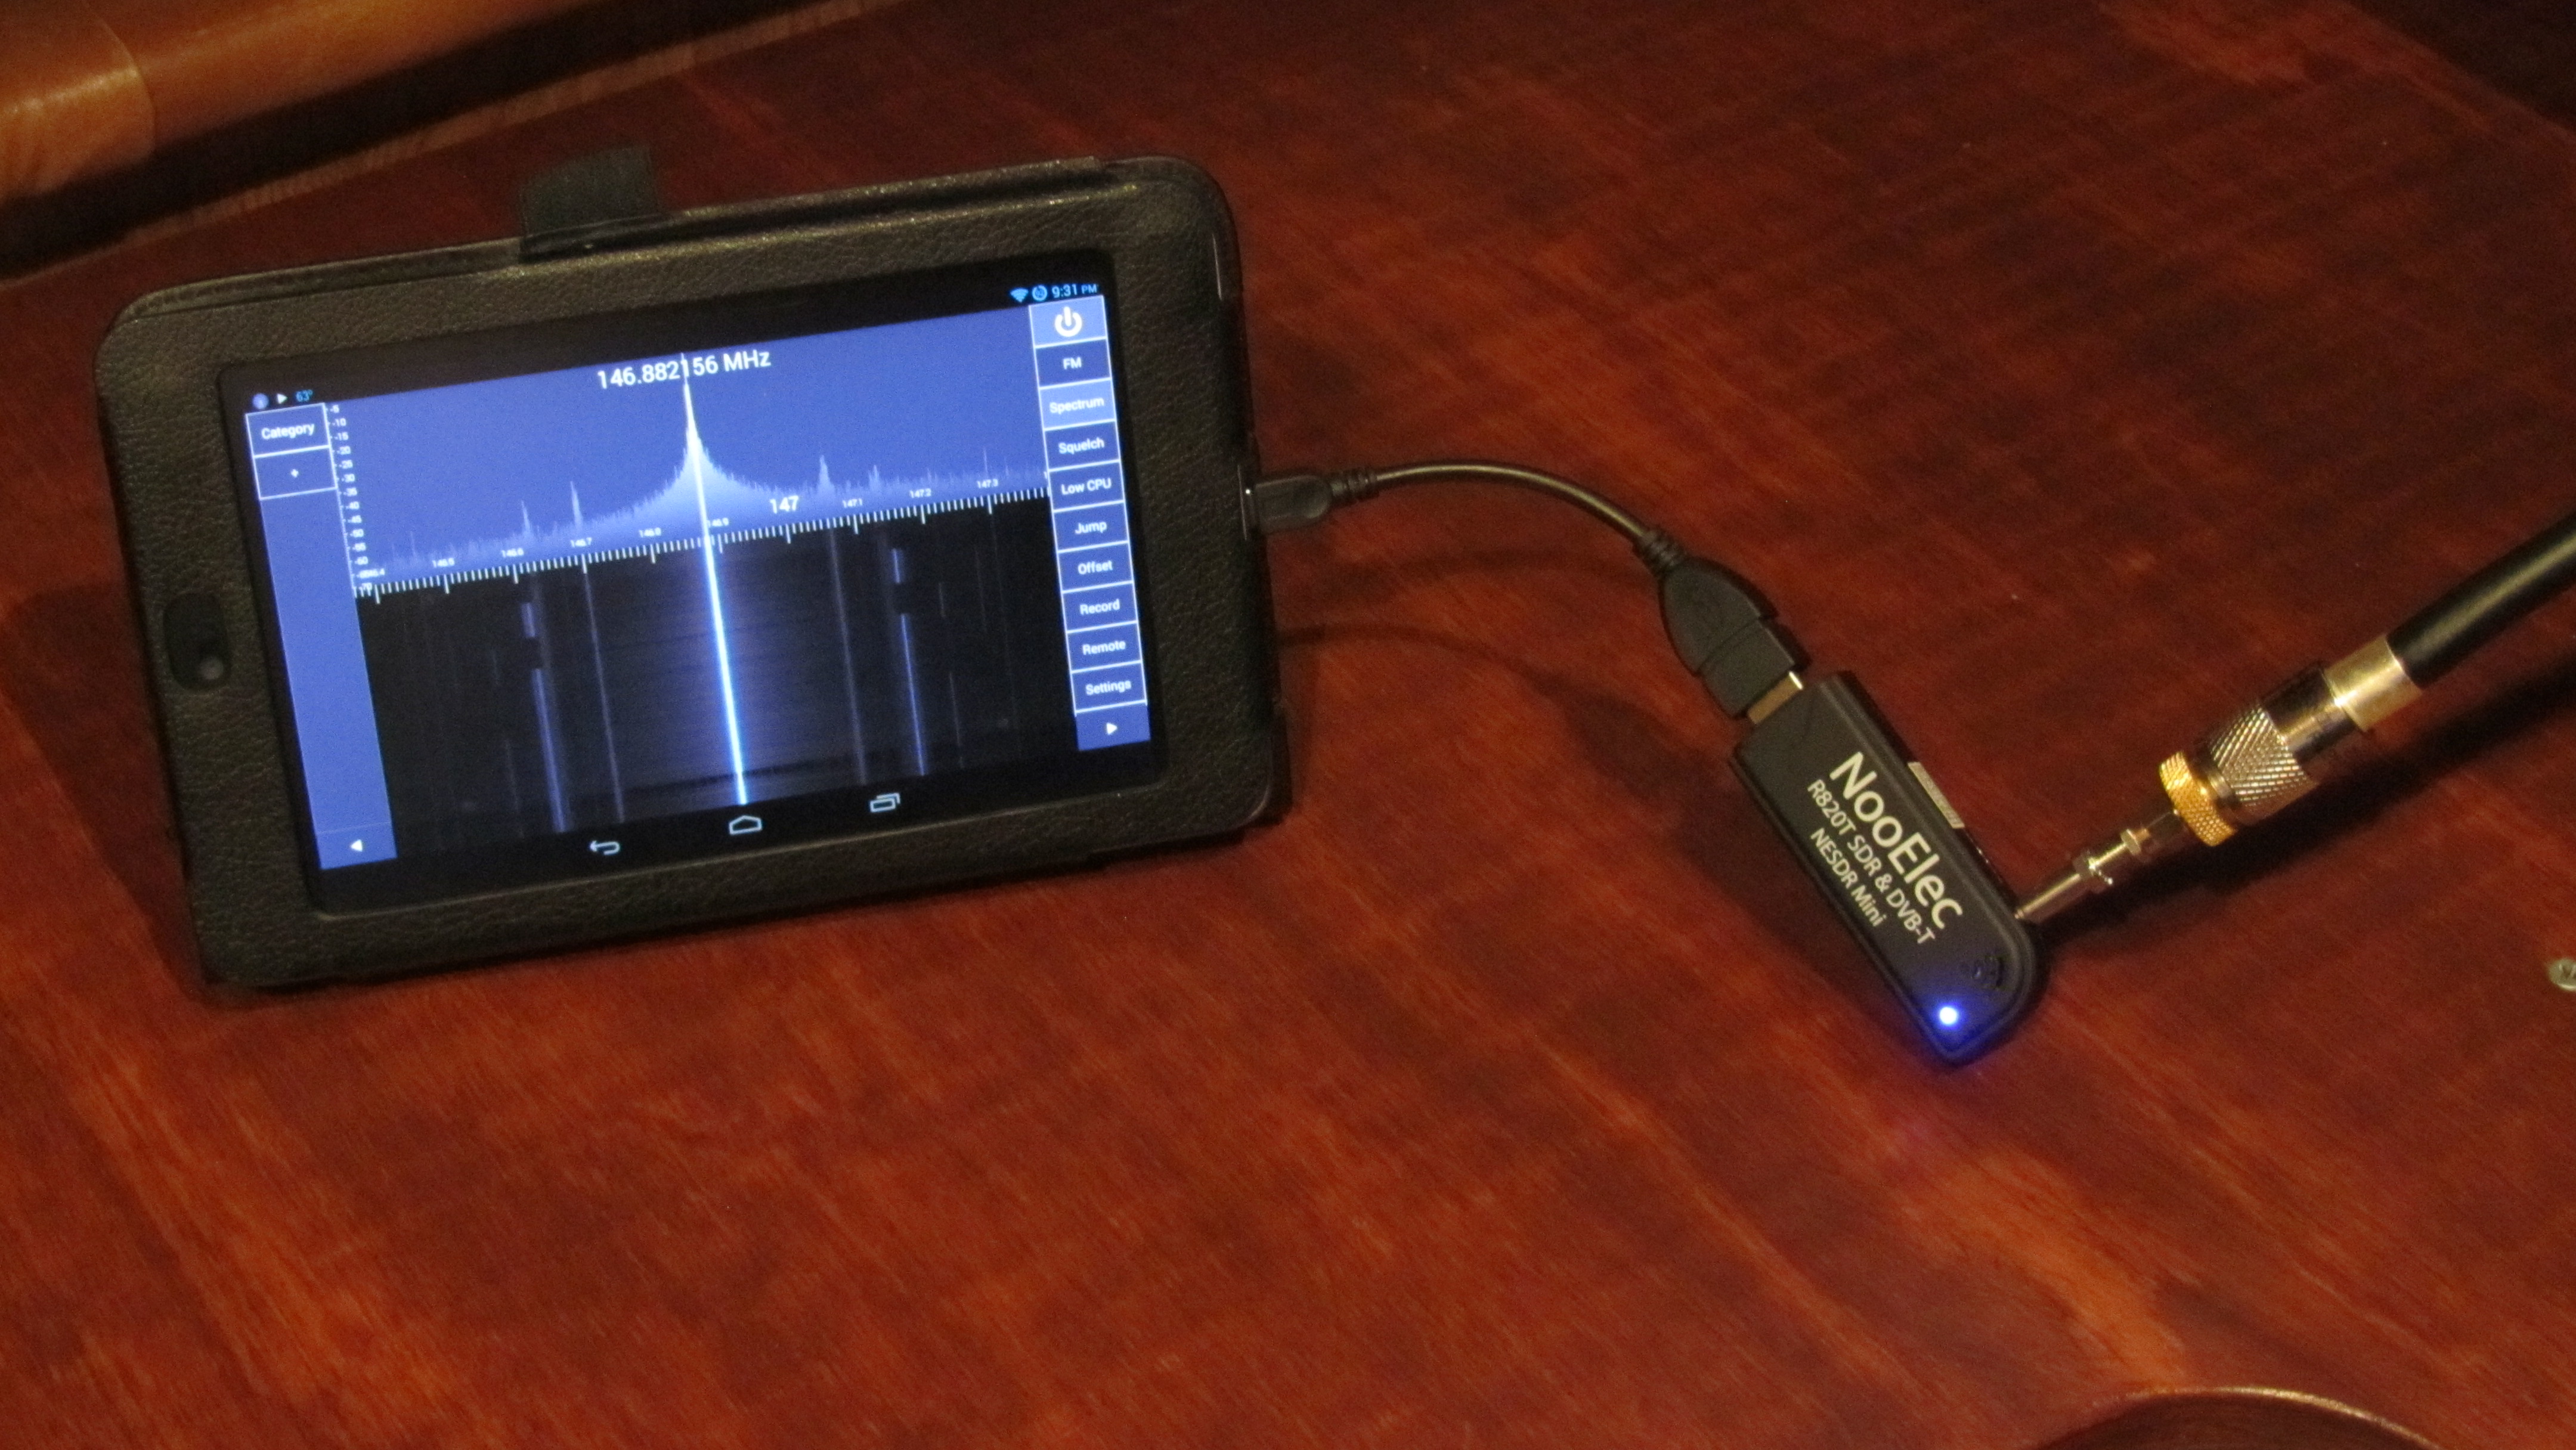
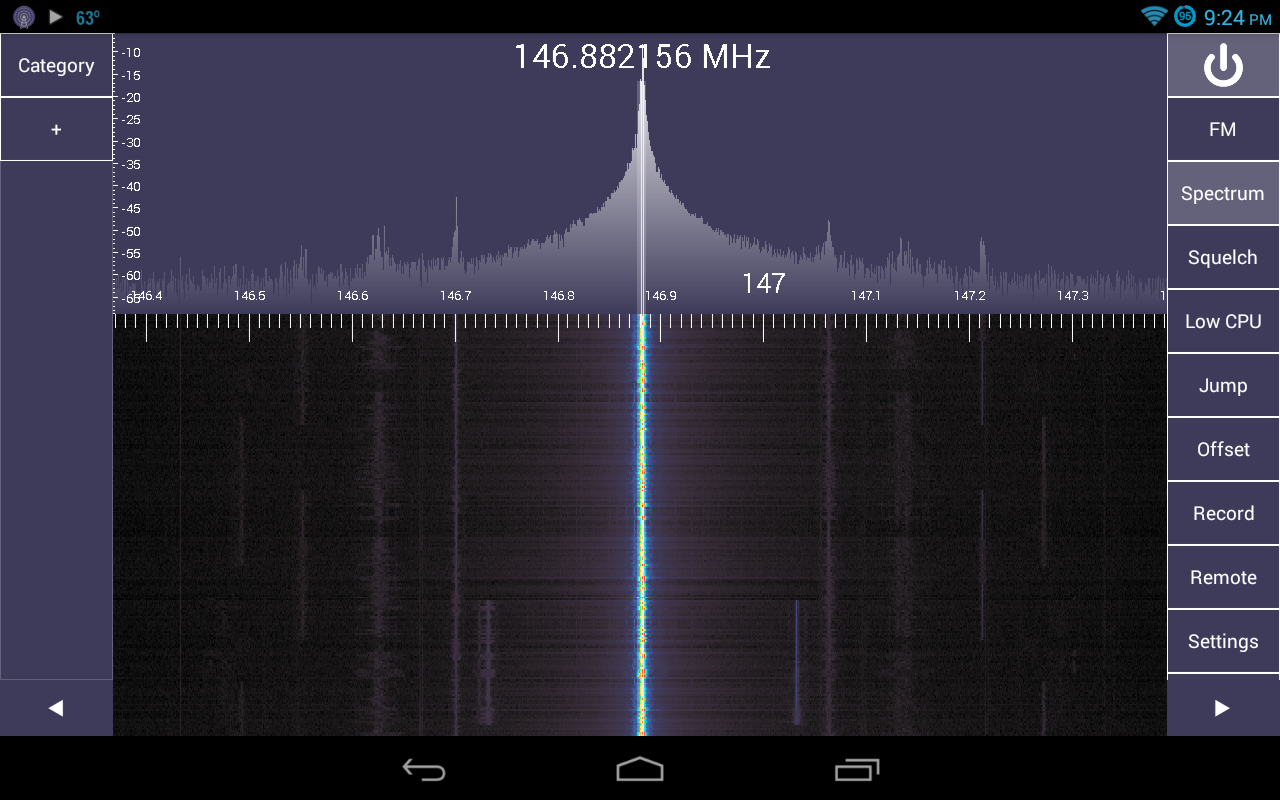
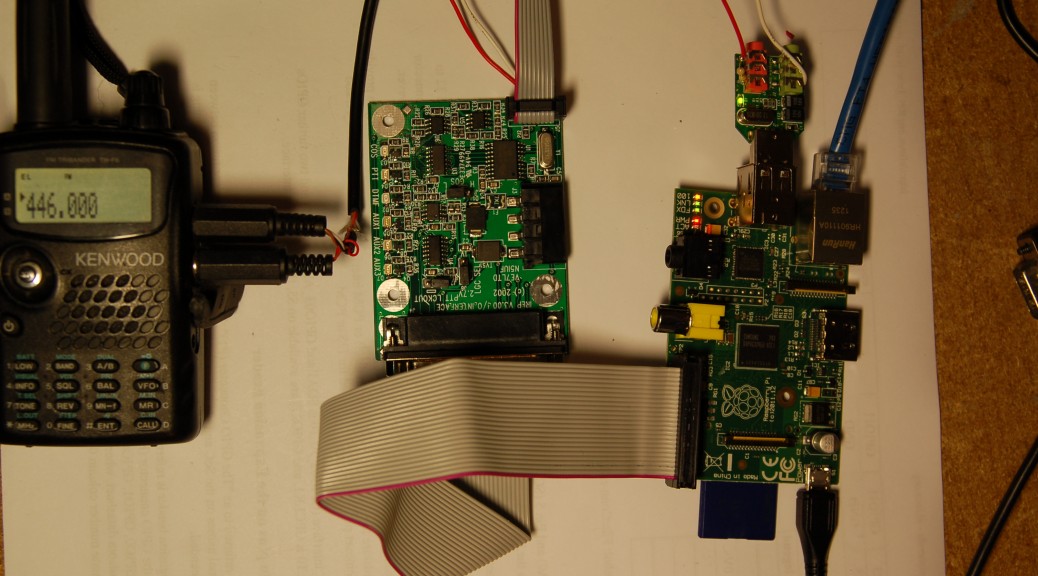
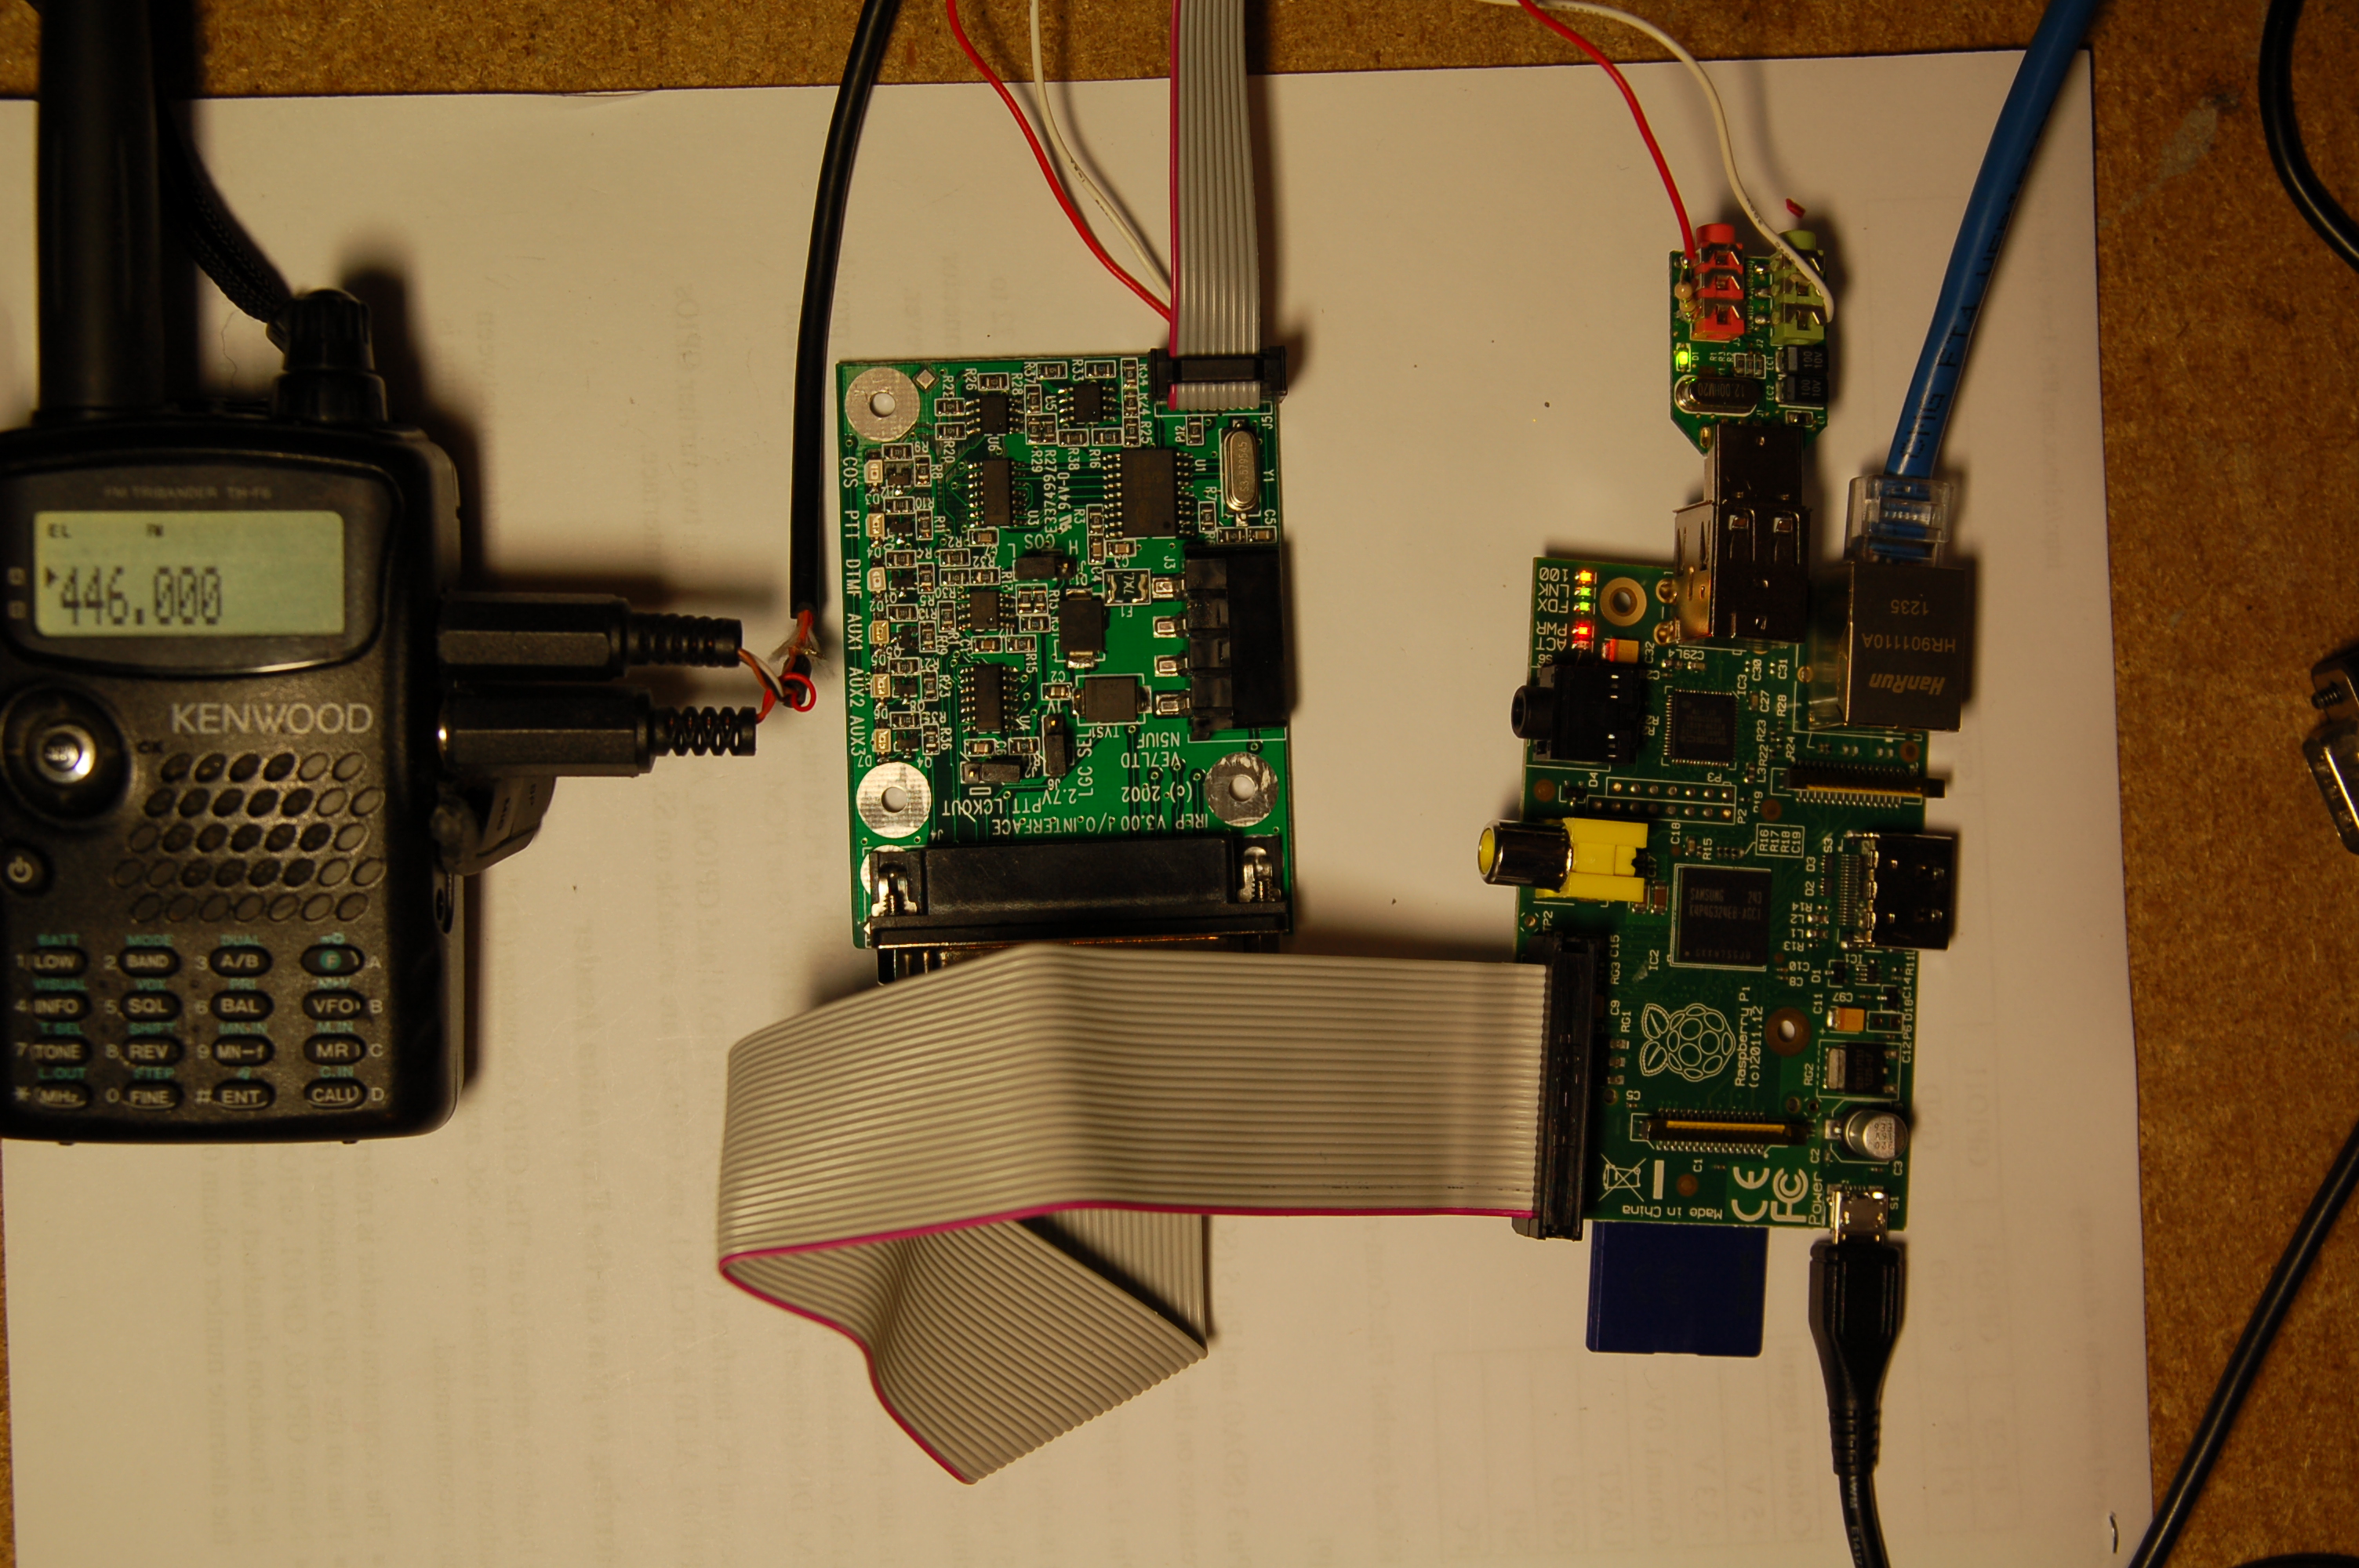
Ideas for learning something new: study for a license or upgrade, learn a new mode or Morse Code, configure your station for digital modes and get on the OHDEN net, make or update a DMR code plug, setup a hot spot, configure a Raspberry Pi to learn Linux or Python, make an APRS RX IGate with an RTL-SDR, setup Hamshack Hotline, make an AllStar node, or learn about MakerSpaces and how we can draw like-minded people into the hobby.

Free time is a good time to tackle the “I’ll get around to it” tasks, aka “the to do list.” That maybe fix/repair/replace a broken antenna, spring cleaning of the shack, selling or getting rid of unused equipment, organize or clean out junk piles, install that new radio, configure the new radio, figure out a lingering problem, clean out old data files and documents on a computer, phone, or cloud storage account, or purge and clean out email messages.

Pirates

While everyone has downtime, not everyone is using it for good. I’ve received reports since the imposed staycation of what can be described as pirate “preppers” appearing on local repeater systems and simplex frequencies. Preppers, as they are often referred, sometimes called survivalists, “is a movement of individuals or groups who actively prepare for emergencies, including possible disruptions in social or political order, on scales from local to international.” Survival preparations range from job loss to stockpiling supplies to building self-sufficient structures. They appear to be “testing” and asking for text message signal reports from their buddies. The have also been holding informal nets on simplex frequencies. It’s funny they want to communicate off-the-grid but are using the grid to receive text messages. Obviously, they don’t present a call sign and do not properly identify. One can only speculate that they obtained a wonderful (read: crappie) BaoFeng radio for a couple bucks, figured out how to program it or are passing around a codeplug someone found or programmed for them.

When these stations appear, first kindly remind them they are using a licensed service and obtaining a license is easy. Provide them resources for obtaining a license through the ARRL study manuals, an online resource like HamExam or Ham Test Online. While they maybe illegally transmitting now, encouraging them to take a license exam will strengthen numbers and get them legal regardless.

If, after repeated attempts of encouragement to become licensed, they continue to appear on frequencies, politely ask them to immediately stop transmitting. Keep calm, cool, and collected on the air. DO NOT become irate. Continuing to transmit in this manner qualifies as willful or malicious interference. Do not engage them further. Contact the repeater owner or control operator and see if disabling the repeater is an option. If shutting the repeater is not desired, see if the owner wants you to document incidents. If they do, you are the repeater owner/control operator, or they are using a simplex frequency, record audio as part of documenting process. The FCC requires specific information that includes dates, times, and frequency(ies). Audio recordings dramatically strengthens the case. A VOX activated recording program with logging, such as Scanner Recorder, and feeding the audio into the computer from the radio’s speaker jack makes this easy. Scanner Recorder automatically logs the date and time of the recordings. Verify the audio is clear and understandable by doing a sample recording.

KerberosSDR

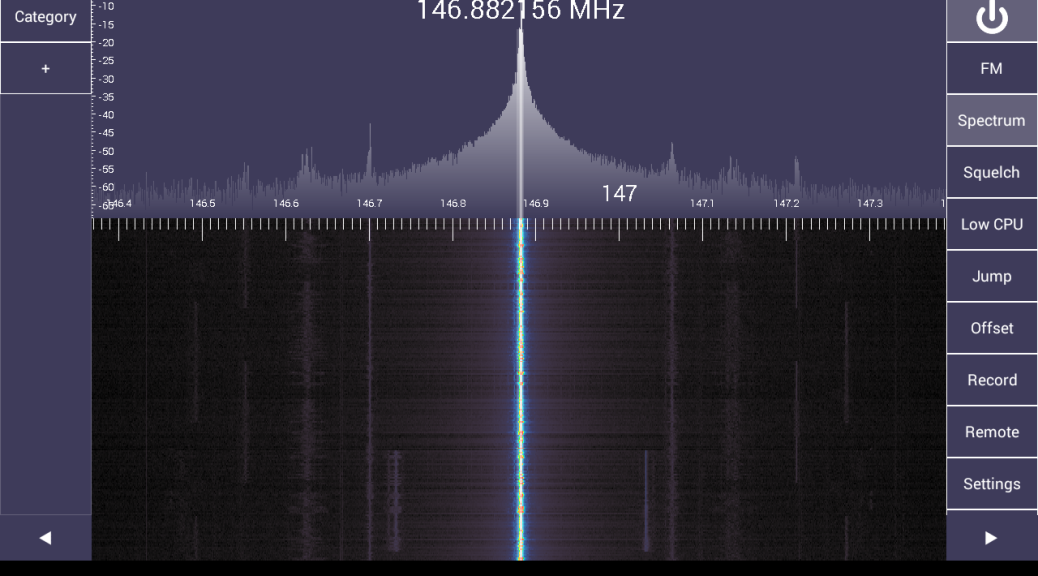
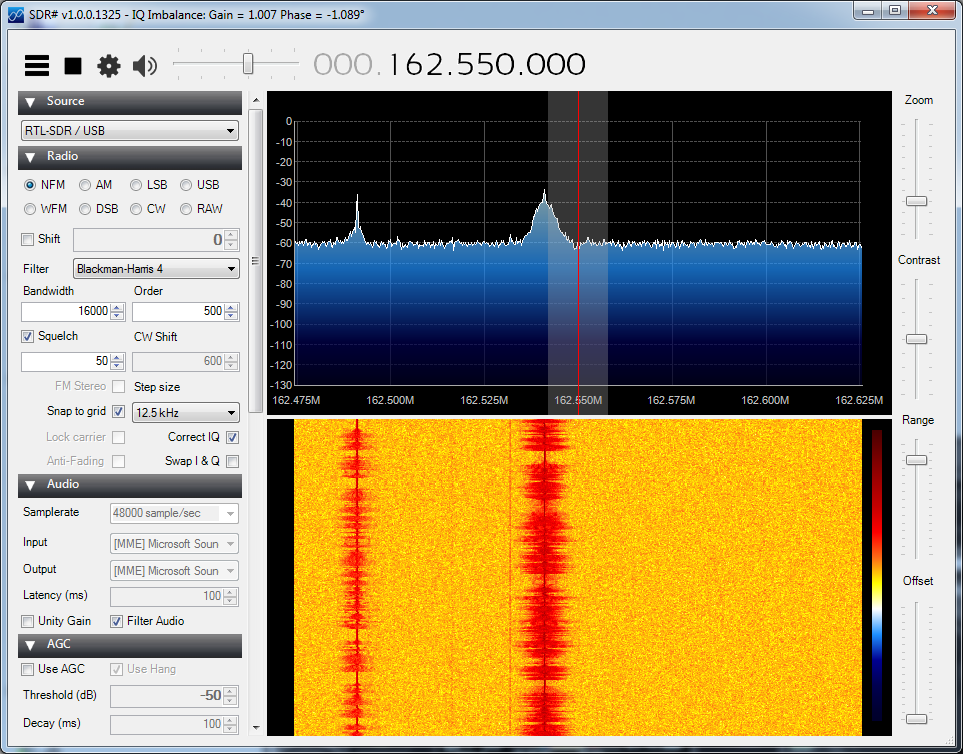
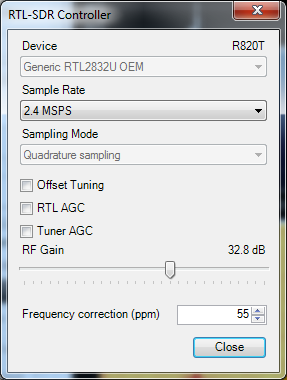
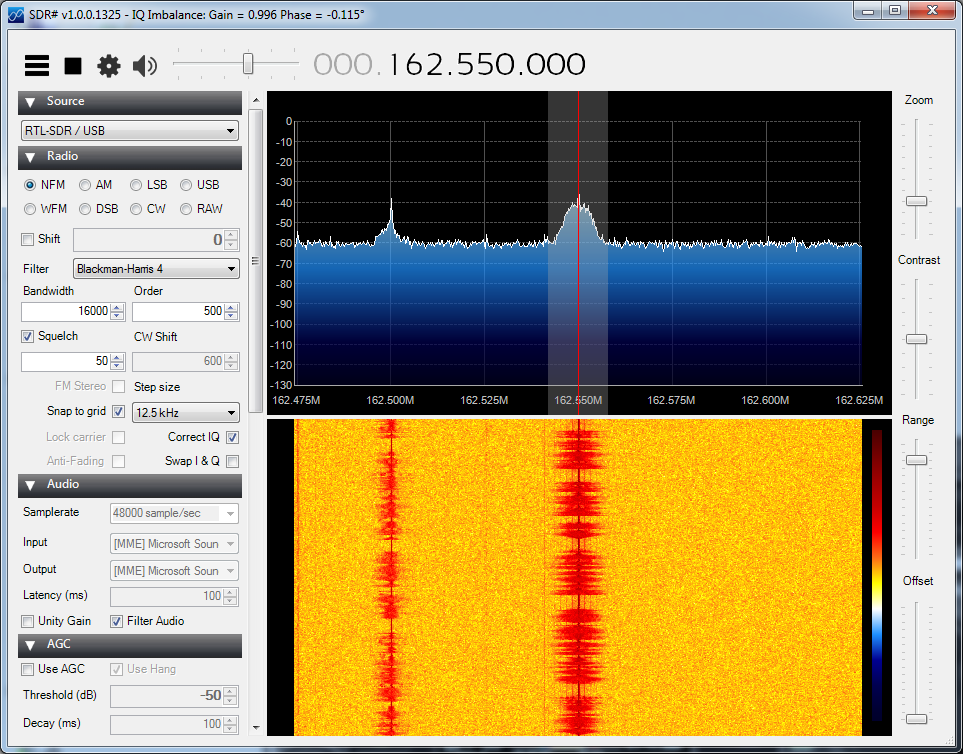
Locating the offending station will take some work. Contact someone who has access to direction finding equipment. Some of our Technical Specialists have access to this equipment. KerberosSDR is a low-cost direction-finding alternative option which employs four RTL-SDR devices. There are a number of YouTube videos on setting up and using the KerberosSDR on their site. It might be “good enough” but not as good as professional equipment.

Do not indicate to the other station they are being tracked or located as they will likely cease transmissions, preventing an accurate location fix. Multiple readings and triangulation techniques will be utilized to pin-point the origin. If a location is determined, DO NOT engage. Document the findings and file a complaint with the FCC. Local authorities will likely be of little help unless one is active in the ham community and really understands the situation.

Windows 10 Free Upgrade

I ran into my neighbor, John WG8H, who is a long-time friend of my dad, at a local hamfest before they were all canceled. He said ‘I read your article on Windows 7 but couldn’t find anything about taking advantage of the Windows 10 free upgrade.’ I found references online that indicated the upgrade was still active and available but had not gone through the process recently. Figured the ‘out of support’ messages that appeared in Win7 would instruct a user how to do this. They did not.

Officially, the free upgrade program has ended. However, this process gave me an upgraded version of Windows 7 to Windows 10. It’s really in Microsoft’s best interest to have as many machines upgraded as possible. Check this forum post for more details or if you run into issues. As always, backup first! On a Windows 7 
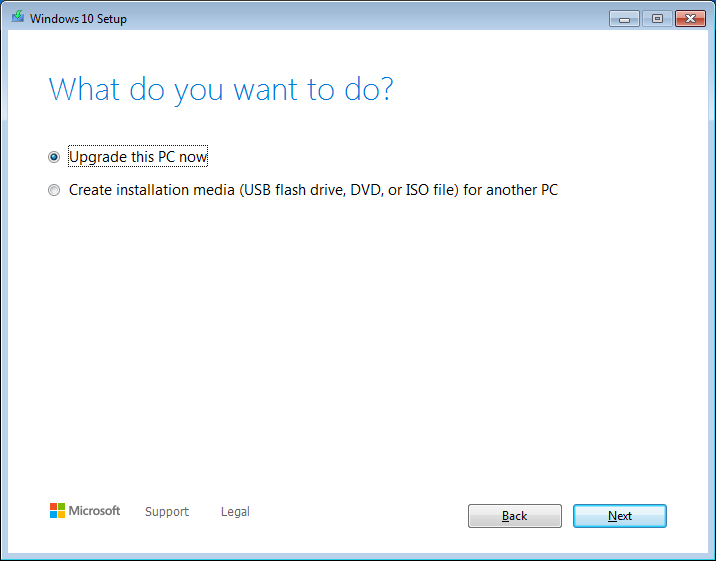
machine you wish to upgrade, it must have Internet access.

  • Go to: https://www.microsoft.com/en-us/software-download/windows10
  • Under “Create Windows 10 installation media,” click Download tool now
  • Signed in with an administrator account, run the downloaded Media Creation Tool on the local machine. “Run as administrator” will not work and it will tell you to sign into an administrator account first.
  • When the tool starts up, accept the license agreement
  • On the “What do you want to do?” screen, select Upgrade this PC now
  • Click Next
  • Follow the rest of the on-screen prompts to completion

I was testing on a machine that had an unsupported Win10 driver. If this message appears where drivers are not supported in Windows 10, I clicked Confirm and it proceeded. Upgrade these afterwards.

When the upgrade to Windows 10 is complete:

  • Click Start
  • Click Settings (gear)
  • Click Update & Security
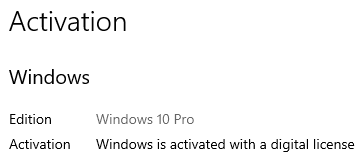
  • Click Activation
  • Confirm the resulting window shows “Activation: Windows is activated with a digital license.” If activation failed, there was not a valid key installed on Windows 7 prior to upgrade.

Click Windows Update and apply updates – including the cumulative optional updates.

To tie the activation to you and the PC requires signing into Windows 10 with a Microsoft account. On the Settings home screen, click Accounts and follow the links to create a Microsoft account or login to an existing account. Otherwise, try following Reactivating Windows 10 after a hardware change if activation fails after a reinstall or hardware change.

It might be possible to update a Win7 machine that does not have Internet access by selecting the Create installation media option when prompted in the Media Creation Tool. Though I did not validate this.

K8JTK Hub Interlink System

Anyone wanting a place to meet-up for checking on friends and fellow hams or looking for something to do can use a system I’ve been working on the last few months. Currently, it offers 6 full-time ham radio VoIP modes interlinked for interoperability. Ways to access the system:

  • EchoLink: K8JTK-R 233196
  • AllStar Link: 50394
  • Hamshack Hotline: 94026
  • DMR: Brandmeister TG 31983
  • D-STAR: DCS/XLX983 A
  • YSF: K8JTK Hub 17374

Since I’m working from home, I’ve linked up my Wires-X room: K8JTK-ROOM 40680

More information or updates on the system: http://www.k8jtk.org/ham-radio/k8jtk-hub-digital-voip-mutimode-interlink-system/

Thanks for reading, stay sane, and 73… de Jeff – K8JTK

APRS RX IGate with RTL-SDR and Raspberry Pi

For sometime I wanted to experiment with an APRS IGate. Coverage was spotty at best in my area. There is an IGate in my city but it doesn’t receive so well. Recently there have been more IGates blanketing the area.

APRS stands for Automatic Packet Reporting System and has been developed since the late 1980s by Bob Bruninga – WB4APR. It’s a digital communication mode amateur radio operators use to primarily broadcast location information, though this wasn’t the intended use. It handles text messages, alerts, announcements, bulletins, and information of interest like weather station reports. APRS operates typically on a single frequency.  A system of relay stations and digipeaters repeat messages over a wide area. APRS Internet System (APRS-IS) are Internet connected receivers (IGates).

Any ham can add an icon or information to the APRS map.  The information is available on the Internet or to users on the local RF network.  Data is automatically tracked over time. APRS is frequently used to track mobile stations in a public service event or volunteers in a search and rescue event to visualize locations and track progress.

This project will utilize the Raspberry Pi and RTL-SDR dongle. The Raspberry Pi is a credit-card sized micro-computer intended for teaching computer science to students but became popular with the makers. RTL-SDR dongles are DVB-T (European standard) TV tuner dongles. It was found the signal data could be accessed directly which allowed them to be converted into wide band software defined radio receivers. The Pi costs about $35 and RTL-SDR about $20.

Since the RTL-SDR dongles are meant to receive high power wide bandwidth TV signals, they are not as as sensitive or frequency stable as a ham radio or scanner. Receiver performance will be a little less than an equivalent radio performing the same task but depends on the usual variables: amount of APRS activity, antenna height, antenna gain, propagation, etc, etc. With my antenna about 15 feet high, I get about 5+ miles of coverage. With band openings I’ve heard stations on the opposite side of town and across Lake Erie into Canada.

Even though this IGate will be non-transmitting (cannot relay packets from the Internet), packets are forwarded to APRS-IS. The higher profile – higher power Digitpeaters in the area will relay packets received by your IGate to the local RF network.

Assumptions

This guide is step-by-step in nature, meant for beginners, with brief explanations of the steps. It will help to have an understanding of Linux commands and scripting. Capitalization is important in Linux!

My setup is on my home LAN. The IGate could be installed at a remote site using a shared Internet connection. Be aware that firewalls that might block connection to the APRS-IS network on a shared connection. You may want to request or have port 22 open on your router for SSH to establish a remote connection.

If all wired options fall through, look for a cellular hotspot device such as a MiFi to install along with the Pi. Use the built in WiFi on the Pi 3 or approved WiFi dongles for earlier Pi devices. Associate the MiFi with your Pi (turning on WPA2 so no one else piggybacks on your connection). Test the setup before installing it. Don’t find out after leaving the site that the MiFi times out after a few hours.

Program versions

Applications and versions used in this writeup:

  • Windows 10 64 bit
  • Raspbian Jessie 2016-05-27
  • Win32 Disk Imager 0.9.5
  • PuTTY 0.67
  • SDR Sharp 1.0.0.1444
  • RTL-SDR 0.5.3
  • Multimon-NG ?
  • Pymultimonaprs 1.3.0

Parts list

Listed below are all the parts needed to get this project working. It is noted when items can be left out or substituted.

That’s all the parts needed for this project. Check out the AdaFruit Raspberry Pi page for other hardware that might be useful, like the USB to PS/2 adapter for example. Many of these parts are included in the Raspberry Pi Starter Pack.

Running Fldigi Flmsg and Flwrap on the Raspberry Pi 2

With the popularity of the Raspberry Pi and the growing need of NBEMS, I wondered if it was possible to run NBEMS programs on the Pi. This maybe of interest to those who want to make a Go Kit (box) with digital or a club wants to replace older computers in their operations center with more efficient devices.

Fldigi is the program used and developed for Narrow Band Emergency Messaging System, but it does so much more. It’s also the standard for many Ham Radio operators because of the number of modes the software will operate.

Fldigi stands for Fast Light Digital modem application created by W1HKJ (David Freese, Jr.) and associates. Flmsg is a forms manager with standardized forms like MARS, plaintext messages, Radiograms, Red Cross, and Weather report forms. Flwrap is a file encapsulation and compression tool allowing for reception of a file exactly like the original.

The Fldigi application is open source, public license software meaning it’s free and available for auditing. With the source code available for Linux, I wondered if it was possible to compile the application on the Raspberry Pi.

At first I had some problems with the project. After (wasting) alot of time on it, I had given up. Only to find out the power supply I had been using was the cause of the issues.

Requirements

Work with my SignaLink USB. As a standard with my projects, the Pi can administered through SSH and VNC if needed. On Windows, I use PuTTY and TightVNC.

Assumptions

This guide is step-by-step in nature, meant for beginners, with brief explanations of the steps. It will help to have an understanding of Linux commands and scripting. Capitalization is important in Linux!

Check my other posts for setup guides on using your radio interface (though written for Windows) and Fldigi, Flmsg, and Flwrap.

Program versions

Applications and versions used in this writeup:

  • Windows 7 64 bit
  • Raspbian Jessie 2015-09-24
  • Win32DiskImager 0.9.5
  • PuTTY 0.65
  • TightVNC 2.7.10 64 bit
  • Fldigi 3.23.04
  • Flmsg 2.0.12
  • Flwrap 1.3.4

Build times

I did a face off for build times between the later model Pi versions: B+, 2, and 3. Later iterations will be faster. The results are in the format of the Linux command time, which contrary to it’s name does not set the time. It gives statistics about this program run. They consist of the elapsed real time between invocation and termination, the user CPU time, and the system CPU time. Later versions than listed above were used in this face off: Raspbian Jessie 2016-05-27, Fldigi 3.23.10, Flmsg 3.0.0, Flwrap is the same at 1.3.4.

Raspberry Pi B+

Failed. Apparently there is an issue running the Make command for Fldigi with versions later than the ones I originally used in this writeup. By the error messages this is an internal g++ compiler error. Make does not fail on the Pi 2 and 3 which probably means it’s a hardware issue (out of memory).

The error is “Warning: partial line at end of file ignored” for dialogs/fldigi-confdialog.o.

Raspberry Pi 2

real 21m49.783s
user 72m9.970s
sys 2m39.290s

Raspberry Pi 3

real 12m50.129s
user 42m8.980s
sys 1m19.160s

Parts list

Listed below are all the parts needed to get this project working. It is noted when items can be left out or substituted.

That’s all the parts needed for this project. Check out the AdaFruit Raspberry Pi page for other hardware that might be useful, like the USB to PS/2 adapter for example. Many of these parts are included in the Raspberry Pi Starter Pack.

If the Pi is setup where there may not be Internet, want to consider purchasing a Real Time Clock (RTC) addon. The Pi will keep time after power has been removed. Of course the time would just have to be set each time.

Flmsg custom forms

In order for custom forms to be used in Flmsg, version 2.0.17 or later must be used. There was a bug in previous versions that didn’t allow the forms to be parsed correctly. In addition, another browser needs to be installed as the default is unable to connect to the webserver created by Flmsg. Thanks to Ken – W0KAH for determining this issue and getting it resolved with the program author.

Linux package installer

The version available from the package manager could be installed but that version is several revisions behind which won’t have the latest enhancements. Some repositories don’t have Flmsg and Flwrap which makes it hard for NBEMS operation.

sudo apt-get -y install fldigi

sudo apt-get -y install flmsg flwrap
If it doesn’t work, you’ll get a message like:

E: Unable to locate package flmsg

Dongle Bits: ADSB Radar and $60 Police Scanner

This article appeared in the The Lake Erie Amateur Radio Association newsletter The Spirit of ’76 and ’88 February 2015 edition and The Wood County Amateur Radio Club newsletter CQ Chatter March 2015 edition.

Read the rest of the series in the Dongle Bits articles category.


The holidays were a busy time at the K8JTK laboratories with a couple RTL-SDR projects. The RTL-SDR is the European TV tuner dongle that was turned into a software defined radio receiver.

Thanksgiving is one of the busiest travel seasons and I wanted to decode ADS-B data to see how many aircraft were flying around. ADS-B stands for Automatic Dependent Surveillance – Broadcast allowing aircraft to be tracked by ground stations and provide situational awareness to nearby aircraft. This is part of the FAA’s NextGen project and mandated by agencies across the globe.

I saw this project in the January 2014 edition of QST written by Robert – W9RAN. He covered building a Collinear Array for the ADS-B frequency of 1090 MHz. I used one of my ham antennas. The RF signal received by the dongle is turned into data packets by a program called ADSB# (included in the SDR# download). VirtualRadar receives those packets, decodes the data, and plots aircraft on Google Maps. This setup can work with a Raspberry Pi and I hope to try this in the future.

adsb-07_browser-06_thanksgiving_travel_and_take_off
Thanksgiving travel in Cleveland, Ohio.

Over the Thanksgiving holiday, I saw 25 aircraft flying around Cleveland on average. I think the most I saw was 48 at once. Not all aircraft have full ADS-B implementations. For example: I would see a call sign but no position data. My receive range (depending on aircraft altitude) was east of Toledo to the PA border and south to Canton. Visit my write-up on this project: ADS-B Decoding with ADSBSharp and VirtualRadar Server.

The second project is a little more complicated but it helped me understand how trunked radio systems work. With the FCC narrowbanding mandate in certain RF spectrum, many public service agencies have decided to “go digital.” In my area the MARCS-IP system and the Greater Cleveland Radio Communications Network are most popular. Both are P25 trunked digital systems. P25 is a specification for voice and data transmission. Trunked radio systems operate by having a radio send data to the control channel requesting communication on a talkgroup. The control channel directs all users of that talkgroup to a specified channel. When the user is done transmitting, all radios switch back to monitoring the control channel for further instructions. This is done seamlessly and allows many users (agencies) to use a small set of radio frequencies. Users only hear the conversations on their assigned talkgroup and not other users on the same system.

dongle-bits-06-p25_trunked_decoding-single_voice_decoder
P25 trunked decoding with a single voice decoder.

Scanners that receive these systems run $500 and go up from there. Using two RTL-SDR dongles and software (mostly free), I’ve been able to receive P25 trunked systems for about $65. One dongle monitors only the control channel and other dongle(s) jump frequencies to receive the digital voice modulation with a program decoding the audio. I can have as many voice receivers as I want whereas a scanner cannot be expanded. Most I’ve heard of is eight. There are some drawbacks like portability. Find out my experiences in my P25 Trunked Tracking post.

Fresh Baked Pi

Raspberry Pi foundation released new models over the last couple months. The biggest news coming at the beginning of February: the Raspberry Pi 2. This model comes with a quad-core CPU and 1GB RAM offering a six times speed improvement, still at $35. Initial reports are it is a lot faster!

Raspberry Pi 2

Along with the new Pi2 came a new version of the Raspbian operating system with optimizations and a new look. In the near future, Microsoft will be releasing a version of Windows 10 Embedded for the Raspberry Pi 2 FREE OF CHARGE! (see the Raspberry Pi 2 link above.)

That’s A Wrap

A goal behind this series has been to expose many hams to newer technologies and younger people to ham radio. These technologies are getting young people interested in experimenting, programming, and even Ham Radio. On podcasts I watch, I’ve heard “I want to get my Ham Radio license” by 20 and 30 year olds like I’ve never heard before. These are young people interested in experimenting, making things, building things, and hacking things — all of which are the foundation of Amateur Radio. Making has evolved into writing software, sending a chip a set of commands and analyzing what is returned, or analyzing packets. Then figuring out “what can I do with this?”

I saw a great technology round-table over the holidays and they talked about getting kids into technology. Many of the methods apply to Ham Radio. As a builder, you build something and presume what will happen. Then something different happens and now you have a mystery to solve. “Why did X happen and not Y?” A new theory develops and sucks you in. This is exactly how the Raspberry Pi, RTL-SDR, and every project surrounding them came to be. It is my opinion that we, as the Amateur Radio community, need to encourage, capitalize, and focus efforts on younger makers and hackers to get them licensed.

As this is my last planned article, I would like to take time and thank the newsletter editors for thinking this series was worth publishing and recreating all the links I included. Thank you to those who told others about this series. I got a ton of feedback and couldn’t be happier that others have found this interesting and sparked them to start experimenting. Most of all, thank you for reading.

P25 Trunked Tracking and Decoding with RTL-SDR, Unitrunker, and DSDPlus

The project that got me really into experimenting with the RTL-SDR dongles is using them to decode P25 digital trunked public service radio systems.  I have been a casual scanner listener for years and like to listen to emergency calls nearby.  In college it was great to listen in on a party weekend hearing fights, disturbances, or why my street suddenly filled with cars at 3 AM.

Narrowbanding

That was when most agencies were analog.  To get more use out of the radio spectrum, the FCC decreed a narrowbanding mandate requiring a “maximum of 12.5 kHz bandwidth across the private land mobile bands between 150-174 and 421-512 MHz.”  This means going digital for much of that radio spectrum because traditional FM transmissions are 15 KHz.  Ironically they will “go digital” but move to 700/800 MHz.

As a casual listener, I wasn’t exactly thrilled with spending at least $500 for a scanner capable of digital (P25 mostly) and trunked system tracking (also Radio Reference wiki).

$40 RTL-SDR trunked scanner

Lurking around the Radio Reference forums, I saw references to being able to use the RTL-SDR dongles for trunked digital decoding.  I had to try it.  I had played around with these dongles and read about the many projects people were doing with them.  In actuality this project cost me $65.

About the project

You will need at least two RTL-SDR dongles ($20/each) and a copy of Virtual Audio Cable ($26).  I already had a premium Radio Reference account.  You can do the project with one dongle but you loose many features in Unitrunker like talkgroup priority.  Theoretically, the single dongle listens to the system control channel and then tunes to voice calls, then back to the control channel.  You will miss calls because that notification comes across the control channel while the dongle was tuned to a voice transmission.  I will cover a two dongle setup and do not plan to cover a single dongle setup.

This project is still very complicated but it is MUCH easier than it used to be.  This manly thanks to Rick, the developer of Unitrunker who implemented support for the RTL-SDR chipset in his program.  Previously, there needed to be a plug-in for both Unitrunker and SDRSharp, there were all kinds of “moving parts.”  In one respect, being able to see the signal waveform on a spectrum analyzer made it much easier to fine tune the PPM correction on-the-fly as opposed to guessing on a modulation scope.  This setup is much cleaner and the Unitrunker developer has implemented advanced features like drift correction.  It will take some time and patience to understand, research, and know the types of systems and system specifics.

There are some advantages like cost and being software based.  Changing modulation types is often as easy as changing programs.  As an example, DSDPlus will decode MotoTrbo as opposed to no standalone scanner being able to do so currently.  However, portability of this setup is limited as you have to have many pieces of equipment with you.  You’ll need an Internet connection to find sites to program and a PC to tweak settings.

Two very specific and key things to note about trunked radio systems in general:

  • You cannot tell the tower your’re listening to which talkgroup you want to monitor.  Doing so would require the ability to transmit and IS ILLEGAL because you are not authorized to do so.  If the talkgroup is not transmitted by the tower, you’re out of luck.  You can’t be in Dayton and tell the system you want to listen to a talkgroup originating from Cleveland.
  • Nothing here (and no program I know of) will defeat encryption, even if you own the keys.  Decoding encrypted transmissions is not implemented in any of these programs.  On the flip side, be aware that using this tutorial and feeding the audio to Radio Reference and Broadcastify may not make agencies happy.  You could get a take-down notice or even worse, it is trivial to turn on encryption at the system level and you just blocked reception for all scanner listeners.

Thanks to those whose tutorials I first used getting this setup working: $20 trunking police scanner and RTL-SDR Tutorial: Following Trunked Radio With Unitrunker.

Program versions

I used a Windows 7 64 bit PC. Applications and versions used in this writeup:

  • SDRSharp: 1.0.0.1330
  • Virtual Audio Cable: 4.14
  • DSDPlus: 1.51
  • UniTrunker: 1.0.30.10

Parts list

Listed below are all the parts needed to get this project working.

  • Computer with some processing and memory horse power.  It is recommended to have a computer with a recent Intel Core i5 processor and 8GB of RAM, or better.
  • Receive antenna that covers 700 & 800 MHz where P25 trunked usually resides. For an external antenna, splitters and coax runs maybe needed.  The stock RTL-SDR dongle antennas worked fine for me.
  • Two RTL-SDR Dongles.  To decode more than one voice transmission, increase the number of dongles needed.
  • Virtual Audio Cable.  Not free but trial version available.
  • Radio Reference account.  Premium account.  If you don’t want to fork over the money, become an audio feed provider.
  • Recommend a USB hub.  Couple years ago I picked up a Rosewill RHUB-300 USB 2.0 Hub 7-Port HUB.  I recommend this hub because when the dongle is plugged in, the antenna connector is pointed up.  This makes it easier to connect an adapter and a Pryme RD-98.  If available, connect the hub to an Intel USB chipset on your motherboard.  I’ve had far less issues using Intel based hardware.

ADS-B Decoding with RTL-SDR, ADSBSharp, and Virtual Radar Server

Update: ADSBSharp (ADSB#) is no longer available and has been deprecated.  Copies can be found by doing some searching.  It is not available from the authors site as described in this post for the RTL-SDR. A program like RTL1090 or Dump1090 (or any of its forks) can be substituted.  The author is focusing on AirSpy devices and ADSBSpy is available from the same site as SDR#.


An interesting project I came across using the RTL-SDR dongle is to decode ADS-B data.  ADS-B stands for Automatic dependent surveillance – broadcast allowing aircraft to be tracked by ground stations and provide situational awareness to nearby aircraft.  It is part of the FAA’s NextGen project and mandated by agencies across the globe.  ADS-B uses a frequency of 1090 MHz.

Thanks goes out to Robert Nickels – W9RAN and his article in the January 2014 edition of QST which covers this project and how to make a Collinear Array for 1090.  HAK5 also did a couple episodes showing how to make an antenna and configure Virtual Radar Server.

adsb-hub-diagram
Block diagram of the ADS-B Hub setup. From: QST, January 2014.

Program versions

I used a Windows 7 64 bit PC.  Applications and versions used in this writeup…

SDRSharp: 1.0.0.1330
ADSBSharp: 1.0.11.1
Zadig: 2.1.0.658
Virtual Radar Server: 2.0.2
SBS Resources: 6.7

Parts list

Listed below are all the parts needed to get this project working.

Antenna with receive coverage of 1090 MHz.
RTL-SDR dongle.

I had a ham radio antenna that I used.  It is the MP Antenna 08-ANT-0860 Ultra Mobile Antenna if you’re interested.  To build an antenna, see the QST article above.  The one that comes with the dongle will work but at short range.

Dongle Bits: Settings, Programs, & Apps for Software Defined Radio

This article appeared in the The Lake Erie Amateur Radio Association newsletter The Spirit of ’76 and ’88 October 2014 edition and The Wood County Amateur Radio Club newsletter CQ Chatter November 2014 edition.

Read the rest of the series in the Dongle Bits articles category.


Last time on Dongle Bits, I talked about the $20 European TV tuner dongle that was hacked allowing direct access to the signal data. The result is a cheap wideband receiver for your computer. We’re going to take a look at key settings you should know about when using these devices. Then look at some software and projects that transform these into systems that would have cost hundreds or thousands of dollars!

PPM and Settings

An important thing to know about these dongles: they are cheaply made and not tested for accuracy. They are designed to receive DVB-T signals at a bandwidth of 6 – 8 MHz where a few KHz error doesn’t matter. This is obviously not true when you’re dealing with FM signals that are 16 KHz wide or digital at 12.5 where a few KHz will put you on a completely different frequency or channel.

PPM stands for parts per million and is the difference in received frequency vs. frequency shown. To visualize this, use SDRSharp to receive a known FM signal. The center frequency shown will be different from the signal on the scope. Typical PPM offset is anywhere from 45 – 65 and will be in the programs settings. The dongle will drift another 2 – 5 PPM over the next 20 – 45 minutes as it warms up. Gain is obviously another setting that will help you receive signals. The RTL AGC setting works but will err on the side of too much gain. Manually, using more than 32.8 dB will overload and produce duplicate signal spikes. The Correct IQ setting will get rid of phantom spikes at lower gain settings.

PPM at 0
Dongle with no frequency correction. The actual 162.550 frequency is just to the left of the displayed frequency. 162.550 is one of the NOAA Weather Radio frequencies.
RTL-SDR Settings (PPM corrected)
Shows the gain and PPM frequency correction of 55 for the dongle I’m using.
PPM Corrected
Shows 162.550 centered with frequency correction applied.

The crystals on the RTL-SDR dongle can be replaced with higher accuracy temperature controlled crystals (TCXO) that have a variance of 1 ppm! These crystals are $10 but you have to wait for them to ship from China. Pre-modified dongles are available but you will pay three times the price for the dongle.

Android

PCs aren’t the only place these SDRs can be used. They can be plugged into an Android device too. You will need a USB OTG cable (on-the-go) and Android 3.1 or later. Search Amazon or EBay for “USB OTG.” OTG is a standard for plugging in USB keyboards, mice, and thumb drives into mobile devices. Running external USB devices off the internal battery will drain it much faster. A powered USB hub would off-load the dongle power consumption. Apps include SDR Touch (wideband receiver program), ADSB Receiver, and SDRWeather for monitoring NOAA weather alerts on your device.

IMG_0003
This is the RTL-SDR running on my Android Nexus 7 tablet with SDR Touch receiving the 146.880 repeater in Lakewood, Ohio. It is connected with a USB OTG cable to the RTL-SDR dongle, then to an MCX to SMA, and then SMA to PL259 adapter.
Screenshot_2014-09-25-21-24-12
This is a screenshot of the above setup with SDR Touch.

What can I do with this thing?

The definitive source on all things RTL-SDR is at the appropriately named www.rtl-sdr.com website. This site has it all. They regularly post software, updates, projects, and new developments. There is something new just about every week.

Some features of RTL-STR.com are The Big List Of RTL-SDR Supported Software. This is the list of software packages that support RTL-SDR on all platforms. Software ranges from wideband receivers to single purpose programs. This will give you some ideas of things to try with RTL-SDR. SDRSharp was written to have plugins extend the functionality of the program. These include plugins that make SDRSharp scan frequencies, add an audio FFT, scope, level meter, or CTCSS (PL) detector.

There is an extensive list of projects and write-ups including an Amateur Radio category. Some interesting ones are receiving live NOAA satellite imagery, analyze cellular phone GSM signals, radio astronomy, signal strength heat mapping (foxhunting?), and how Brazil uses our military satellites to transmit SSTV images.

With the onset of many digital standards and narrowbanding, there are more digital signals out there you may not be able to identify by hearing them or seeing them on the waterfall. This Signal Identification Guide has known types, frequencies they may be heard on, mode, bandwidth, sample audio, and waterfall image. I find myself using the Radio Reference database search utilities to help identify signals and their owners (a premium account maybe needed for some features).

My first SDR project was to use the Raspberry Pi as a SDR remote network server. The Raspberry Pi could be placed in an attic or basement connected to an antenna and controlled by another computer.

Audio can be piped from one program into another using Virtual Audio Cable (VAC). Some time ago, during one of the digital nets on the .76 repeater in Cleveland, I used SDRSharp and VAC to receive the FLDIGI messages being passed on the net. The signal path looked like this: received RF signal (146.760) -> RTL-SDR (signal data) -> SDRSharp (audio out) -> Virtual Audio Cable -> FLDIGI (audio in) -> message decoded on screen. If I had a HackRF, I probably would have been able to transmit messages without using any “ham” gear.

The next and probably final article, I will demonstrate tracking airplanes equipped with ADS-B transmitters and listening to trunked P25 public service radio systems for under $100.

Dongle Bits: Projects

This article appeared in the The Lake Erie Amateur Radio Association newsletter The Spirit of ’76 and ’88 June 2014 edition and The Wood County Amateur Radio Club newsletter CQ Chatter July 2014 edition.

Read the rest of the series in the Dongle Bits articles category.


We’re going to take a look at projects others have done with micro-computers and controllers. Many of these will be Amateur Radio related but I will highlight some getting started projects that show setup or basic programming. Since many Hams are into computers and programming, I will highlight some networking and server related uses. Finally, some of the more some crazy and unique setups I’ve come across.

First thing to note: if you receive this newsletter in printed form, you’ll want to go to the club’s website or get it in electronic form to view these links. Links will be to videos or instructions posted online. Any YouTube videos will start at the beginning of the segment.

Getting started tutorials

Ham Radio

I was informed the University of Akron Amateur Radio Club (W8UPD) was planning on using the Raspberry Pi for their second High Altitude Balloon launch on April 8, 2014. Though no reason was given, it was scrapped for the Beaglebone Black board. They configured it to send back Slow-scan TV images overlaid with telemetry information. Unfortunately, the launch was a failure due to high winds and “poorly placed trees.” Upon launch, the payload got snagged and caught in a tree.

I heard from John – N8MDP who setup his Raspberry Pi as a D-STAR hotspot as well. His setup works with the “X-Reflector” system. There are multiple D-STAR reflector systems that co-exist together on the network. His instructions are detailed and the setup is different than mine because different software is needed to access these alternative reflector systems. John installed a webserver on his Pi to control it from the Internet.

Raspberry Pi

Arduino

Networking and server

One of the first projects I saw was how to use the Raspberry Pi as a Home theater PC. This allows you to watch videos, listen to audio, or display photos accessible via the network on a TV.

A Pi can be turned into a home or portable access device used in conferences, competitions, demonstrations, or school project. Some examples are a router, network attached storage (NAS) device, web server, or secure virtual private network (VPN) server. The VPN server uses OpenVPN, an excellent encryption package that offers trust no one (TNO) encryption since you generate the encryption keys.

A useful project is the Raspberry Pi IP address IDer which speaks the IP address if you are operating headless and need to connect to it.

Cool and unique

Want to relive the 8-bit gaming days of the Commodore 64? There is a project called Commodore Pi to create a native Commodore 64 emulator and operating system for the Raspberry Pi.

Build a coffee table gaming rig.

Turn a Raspberry Pi into an FM transmitter.

If you like cheap phones, for $160 you can create your own Raspberry Pi smartphone.

Want to give your dog a treat via email? The Judd Treat Machine will do just that! Send an email to the dog’s email address, it dispenses the treat, snaps a picture, and replies with the picture attached.

The University of Southampton in England created the Raspberry Pi Supercomputer using 64 Raspberry Pi computers. They use a “message passing” system to distribute processing across all 64 devices. His son also helped out by building the rack to hold them out of… Legos!

Raspberry Pi and Lego Supercomputer

Other places for projects and news

Raspberry Pi forums.
Arduino forums.
Slashdot: (Pi) (Arduino).
Lifehacker: (Pi) (Arduino).
Reddit: (Pi) (Arduino).
Podcasts.
Search the Internet!

Next time, we’re going to move on to another type of dongle: the $20 software-defined radio.