One of the responsibilities of the Technical Coordinator in the Ohio Section is to submit something for the Section Journal. The Section Journal covers Amateur Radio related things happening in and around the ARRL Ohio Section. It is published by the Section Manager Tom – WB8LCD and articles are submitted by cabinet members.
Once my article is published in the Journal, I will also make it available on my site with a link to the published edition.
You can receive the Journal and other Ohio Section news by joining the mailing list Tom has setup. You do not need to be a member of the ARRL, Ohio Section, or even a ham to join the mailing list. Please sign up!
If you are an ARRL member and reside in the Ohio Section, update your mailing preferences to receive Ohio Section news in your inbox. Those residing outside the section will need to use the mailing list link above.
Updating your ARRL profile will deliver news from the section where you reside (if the leadership chooses to use this method).
Go to www.arrl.org and logon.
Click Edit your Profile.
You will be taken to the Edit Your Profile page. On the first tab Edit Info, verify your Email address is correct.
Click the Edit Email Subscriptions tab.
Check the News and information from your Division Director and Section Manager box.
Click Save.
Now without further ado…
Read the full edition at:
THE TECHNICAL COORDINATOR
Jeff Kopcak – TC
k8jtk@arrl.net
 Hey gang,
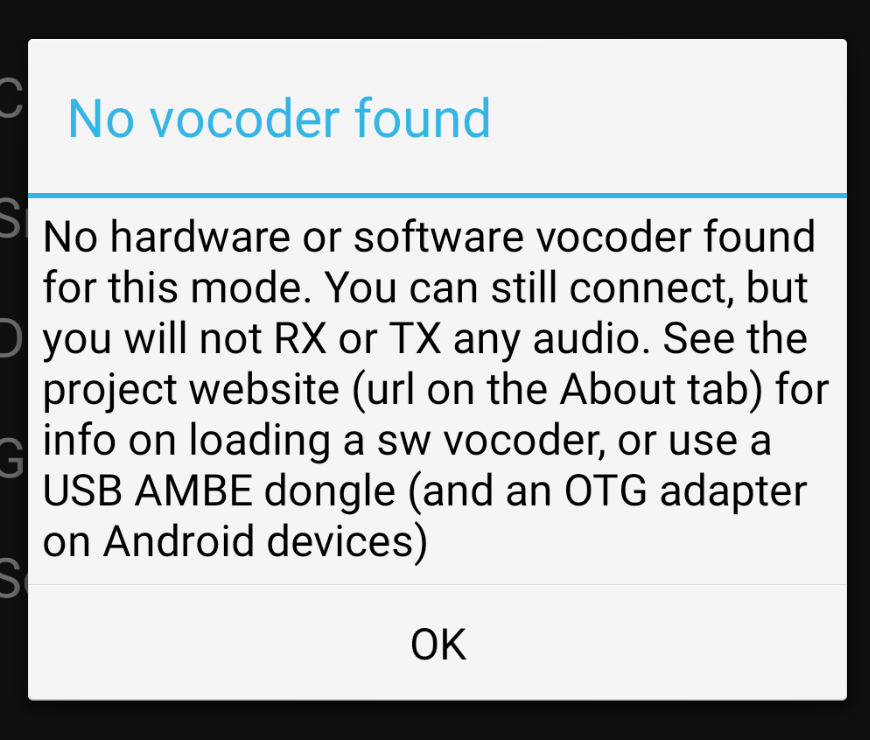
Users of the DROID-Star application ran into a problem with an update earlier this month. After upgrading, then trying to connect to a DMR, D-STAR, NXDN, or System Fusion network, users were greeted with a “no vocoder found” message.
DROID-Star is known to users of digital modes. Namely used by Android or iOS users, it connects the user to ham radio digital networks. Later AllStar support was added through IAX, not using the AllStar Link network rather through the Inter-Asterisk eXchange protocol. AllStar is built on Asterisk and IAX requires separate accounts for access. DROID-Star supports MMDVM in hotspot or standalone transceiver configurations. MMDVM is written by G4KLX and the standard for ham radio digital linking via hotspots, interface boards, and applications.
Modes that can no longer be used out-of-the-box, after the November update, are all of the AMBE modes. AMBE is the voice encoder used in DMR, D-STAR, NXDN, and YSF. The no vocoder found message is seen when connecting to any of these modes. Unaffected modes are IAX, M17, and P25. IAX uses codes available to Asterisk. M17 uses the free and open source Codec 2. P25 (phase I, as used in ham radio) uses the IMBE codec. All three of those modes can be used without additional configuration.
First thought, there was a licensing issue or dispute. I found a forum post where the Pi-Star author recommended keeping packages separate in DROID-Star making them easier to maintain and packages can be built without including unnecessary extras. I believe this to be the reason the packaged codec in DROID-Star was removed.
As the message indicates, the user can connect to a reflector or talkgroup, but no audio will be heard. That’s about as useless as a glass hammer. I guess you can connect to make your presence known, but transmissions and reception is done through ESP? First thing I did was to visit the project URL to obtain information about finding a vocoder as suggested.
I have no information regarding aquiring a software vocoder.
There are no software vocoder plugins available in this repository, and I have no information on obtaining one. DONT ASK!
Super helpful. It does say there is an option of using a DV3000 and OTG cable. If you haven’t seen a DV3000, it’s about the size of a USB thumb drive. Do DROID-Star users need to have a hardware dongle hanging off their phones to make digital connections? Maybe. I was planning to test this method but realized I switched to a phone with USB-C connector and the OTG cables I had for previous devices were Micro USB. Make sure to obtain the correct cable for your phone or tablet.
USB OTG stands for On-The-Go. By default, phones/tables act as a peripheral. For example, plugging into a PC allows access to the phone’s storage. In order to set the phone in host mode, allowing it to accept input from other devices, a special cable containing an extra pin is required. This cable with an extra pin informs the device to enter host mode. OTG cables are readily available from a favorite online store or local computer shop. Search for ‘Micro USB OTG cable’ or ‘USB-C OTG cable’ depending on the device’s connector type. Description should make reference to being an ‘adapter for smartphone.’
Not seeing any other solutions early on, I rolled back the application to an earlier version. This is not for the faint of heart nor for someone worried about installing unofficial versions of applications, called “sideloading.” Not responsible for any damage or legal issues. This is for informational purposes only. Updates to the operating system may keep this app from working properly in the future. Any app updates/enhancements/features/bug fixes to DROID-Star will not be available without using a later version and running a vocoder. Downgrading is not possible through the Play Store. I downloaded DroidStar 1.0 (58) from the APKPure website. Hashes and additional info available on this page. I had to remove the newer DROID-Star version (which removes settings) from my phone and install the downloaded version manually. There is a “How to install APK / XAPK file” on the download link. It will explain sideloading an app and required settings to change.
After doing more digging, I was able to find a more appropriate and supported solution. The instructions to load the plugin on the project page are wrong. Saving to the Download directory did not work. To install the vocoder on an Android device:
1. Install the latest version of DROID-Star (Play Store, 3rd party store, official APK).
2. In the browser of the mobile device, visit this website: http://pizzanbeer.net/plugins/
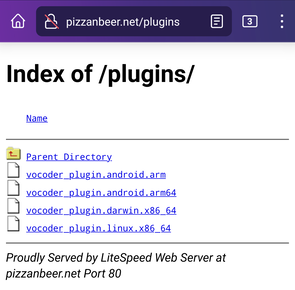 3. Press and hold the filename for your device (arm, arm64). If you’re not sure which one to use, in DROID-Star hit About and look for Architecture.
 4. Tap Copy link from the popup
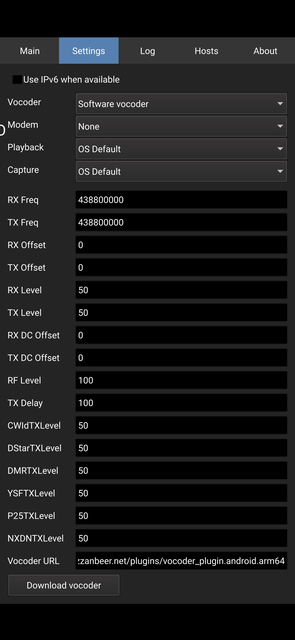 5. In DroidStar, go to Settings
6. Scroll to the bottom (now located just above the MMDVM and level settings in later versions) and paste the URL in the Vocoder URL field (tap the Vocoder URL box. When the cursor is displayed, press and hold the same field. Click Paste).
7. Tap Download vocoder
 8. A message saying “Updating, Check log tab for details” is displayed. Tap OK.
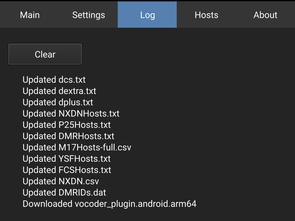 9. The Log tab should display “Downloaded vocoder_plugin.android.arch.”
You’re ready to go! If this is not seen, there was an error or the download couldn’t complete. Though these instructions are for Android, they are nearly the same for iPhones and iOS devices, except choose the “darwin” platform file instead of arm/64.
These steps might have to be repeated often. The release I used as of this writing (Nov 24) DROID-Star did not retain the vocoder settings. Now, I could have corrupted a database or borked permissions during testing and re-installing previous versions on my phone. Apparently other users are experiencing the same issue. Doug – AD8DP, the author of DROID-Star, seemingly doesn’t want to be bothered with issues. His repositories state the applications are offered “as is.” There is no E-mail on his QRZ and the GitHub repository has the “Issues” tab disabled. Normally, the issues option is used to report bugs with GitHub projects for developers or other community members address.
Other links about AMBE and contributing to the projects:
- For a breakdown of AMBE and where I was able to find a link to the vocoders: https://www.qsl.net/kb9mwr/projects/dv/codec/ambe.html
- Additional vocoder download location with instructions: http://dudestar.gw8szl.com/
- GitHub to the first link (pizzanbeer) for vocoder source code, to manually compile, or contribute: https://github.com/pizzabeerllc
- There are two groups.io groups for DROID-Star. Neither of which seem to be official but rather run by enthusiasts: https://groups.io/search?q=DroidStar -> Droid Star and DROID-Star
- I originally posted this information to the AmateurLogic groups.io and you can follow late-breaking developments.
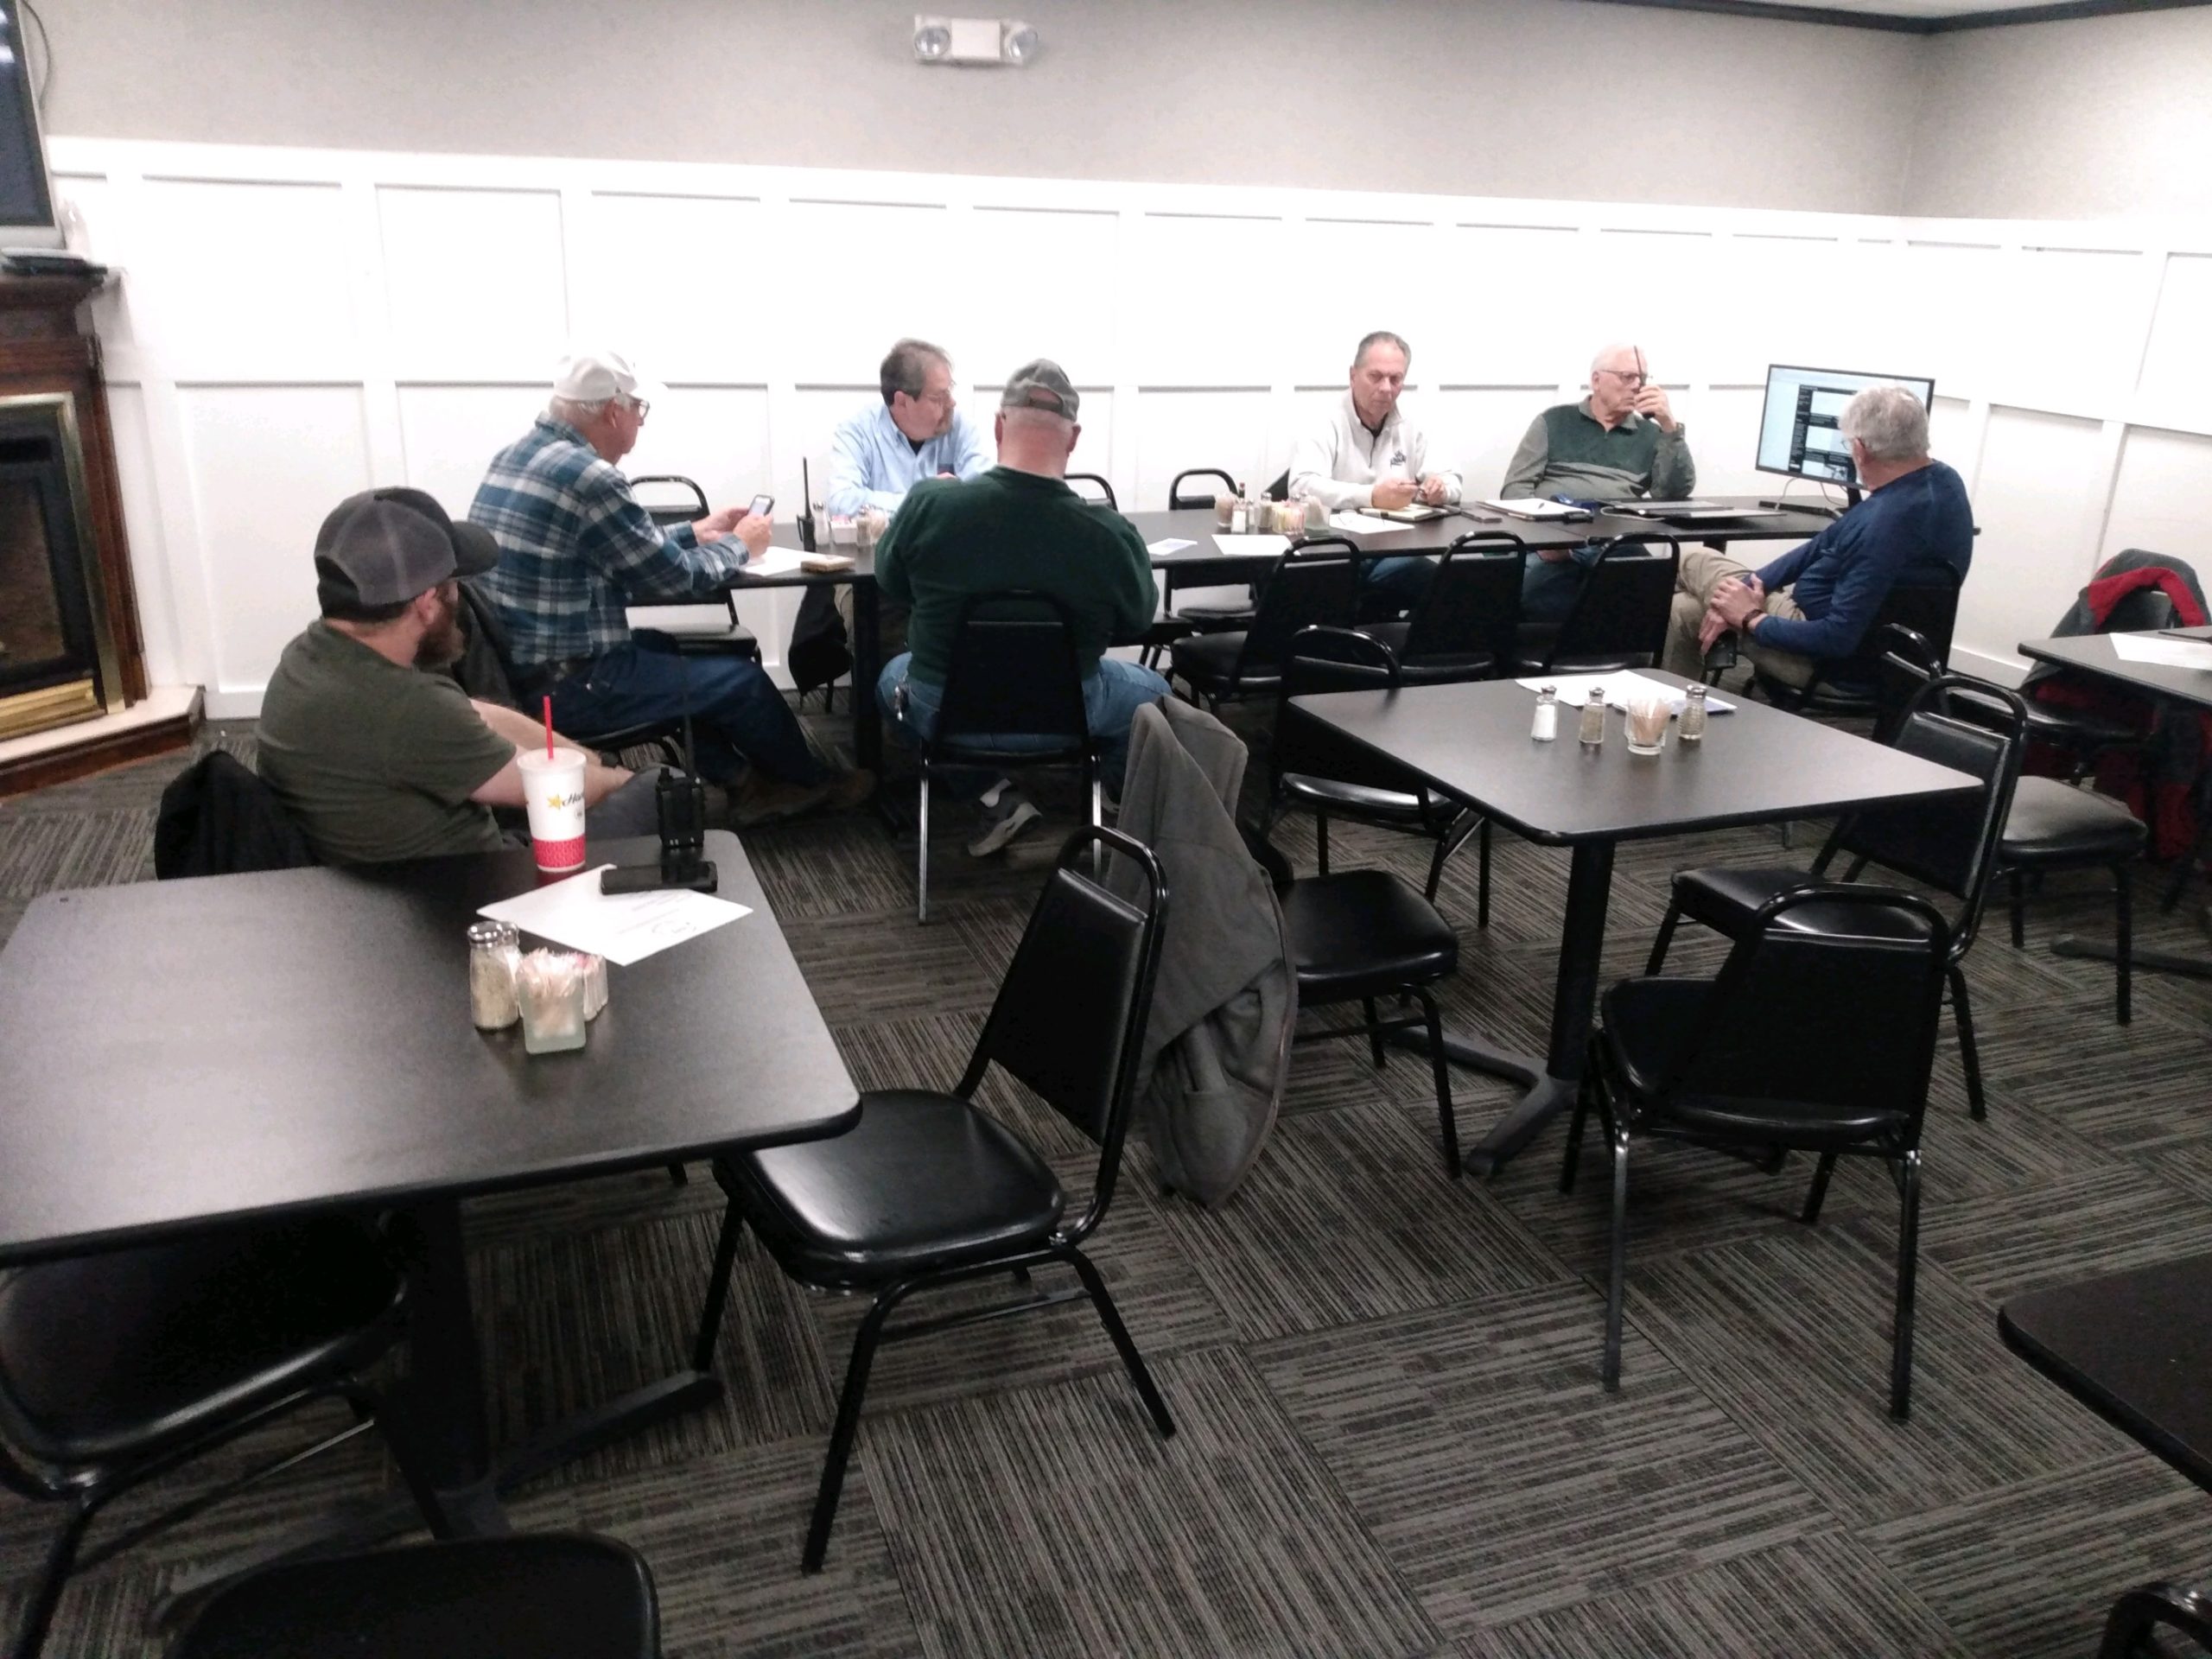
Although not in our section, I do know they read our OSJ, quick shout out to the Henry County Amateur Radio Club in New Castle, IN – W9OB. I gave a presentation on AllStar Link and linking with digital modes. Been awhile since I’ve done a meeting over the air. Presentation was done using their local repeater via my local AllStar node. If your club would like a presentation on digital and VoIP modes or how my DVMIS works, get in contact with me.
 Time off of work or wanting a break from the madness is a great time to get on the air and work special event stations. Some nets will even get children, grandchildren, and neighborhood kiddos in touch with Santa! The Santa Net is held every evening between Thanksgiving and Christmas on 3.916 MHz at 8:15PM eastern time. If HF is not available, the DoDropIn Echolink conference is hosting the Santa Watch Net on Christmas Eve! It begins at 6:00PM eastern on the 24th and runs about 4 hours. Third party traffic is always on the nice list.
On the ARRL Special Event Station calendar, W9WWI is hosting Christmas in Bethlehem on Dec 4. KC5OUR is hosting Bethlehem on the Air, Dec 18-24. N0T, N0R, N0A, N0I, and N0N make up the Christmas Train crew to Celebrate Christmas Time and Holiday Cheer through Ham Radio, Dec 23-26.
Let us not forget, the attacks on Perl Harbor that happened Dec 7, 1941. A number of stations including W2W, W9CAP, NE1PL, N7C, N7D, and N7N will be on the air to commemorate 80 years and the men and women who served.
Thanks for reading. Happy holidays, Merry Christmas, and Happy New Year! 73… de Jeff – K8JTK