This article appeared in the The Lake Erie Amateur Radio Association newsletter The Spirit of ’76 and ’88 June 2014 edition and The Wood County Amateur Radio Club newsletter CQ Chatter July 2014 edition.
Read the rest of the series in the Dongle Bits articles category.
We’re going to take a look at projects others have done with micro-computers and controllers. Many of these will be Amateur Radio related but I will highlight some getting started projects that show setup or basic programming. Since many Hams are into computers and programming, I will highlight some networking and server related uses. Finally, some of the more some crazy and unique setups I’ve come across.
First thing to note: if you receive this newsletter in printed form, you’ll want to go to the club’s website or get it in electronic form to view these links. Links will be to videos or instructions posted online. Any YouTube videos will start at the beginning of the segment.
Getting started tutorials
Ham Radio
I was informed the University of Akron Amateur Radio Club (W8UPD) was planning on using the Raspberry Pi for their second High Altitude Balloon launch on April 8, 2014. Though no reason was given, it was scrapped for the Beaglebone Black board. They configured it to send back Slow-scan TV images overlaid with telemetry information. Unfortunately, the launch was a failure due to high winds and “poorly placed trees.” Upon launch, the payload got snagged and caught in a tree.
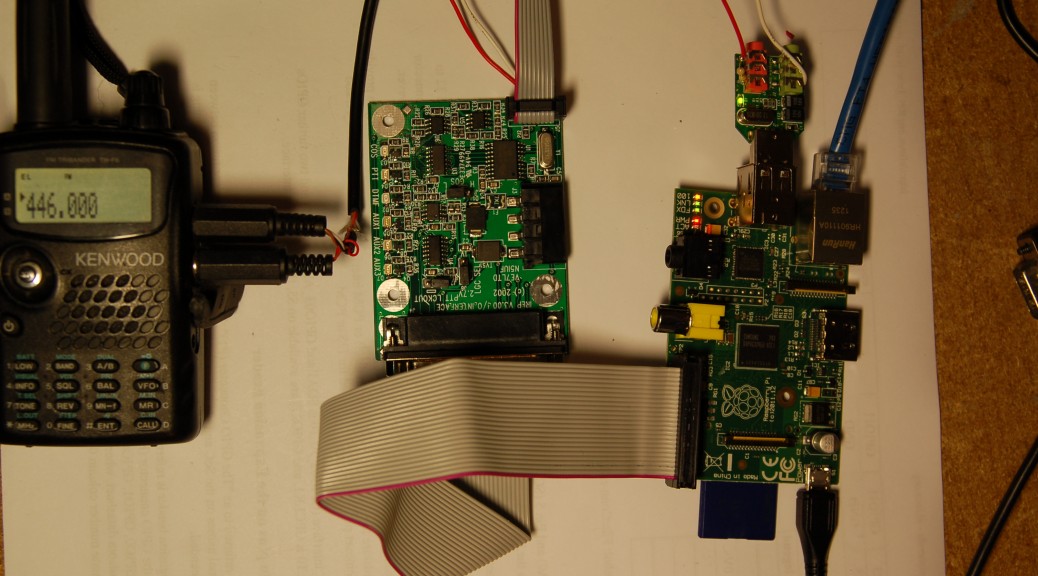
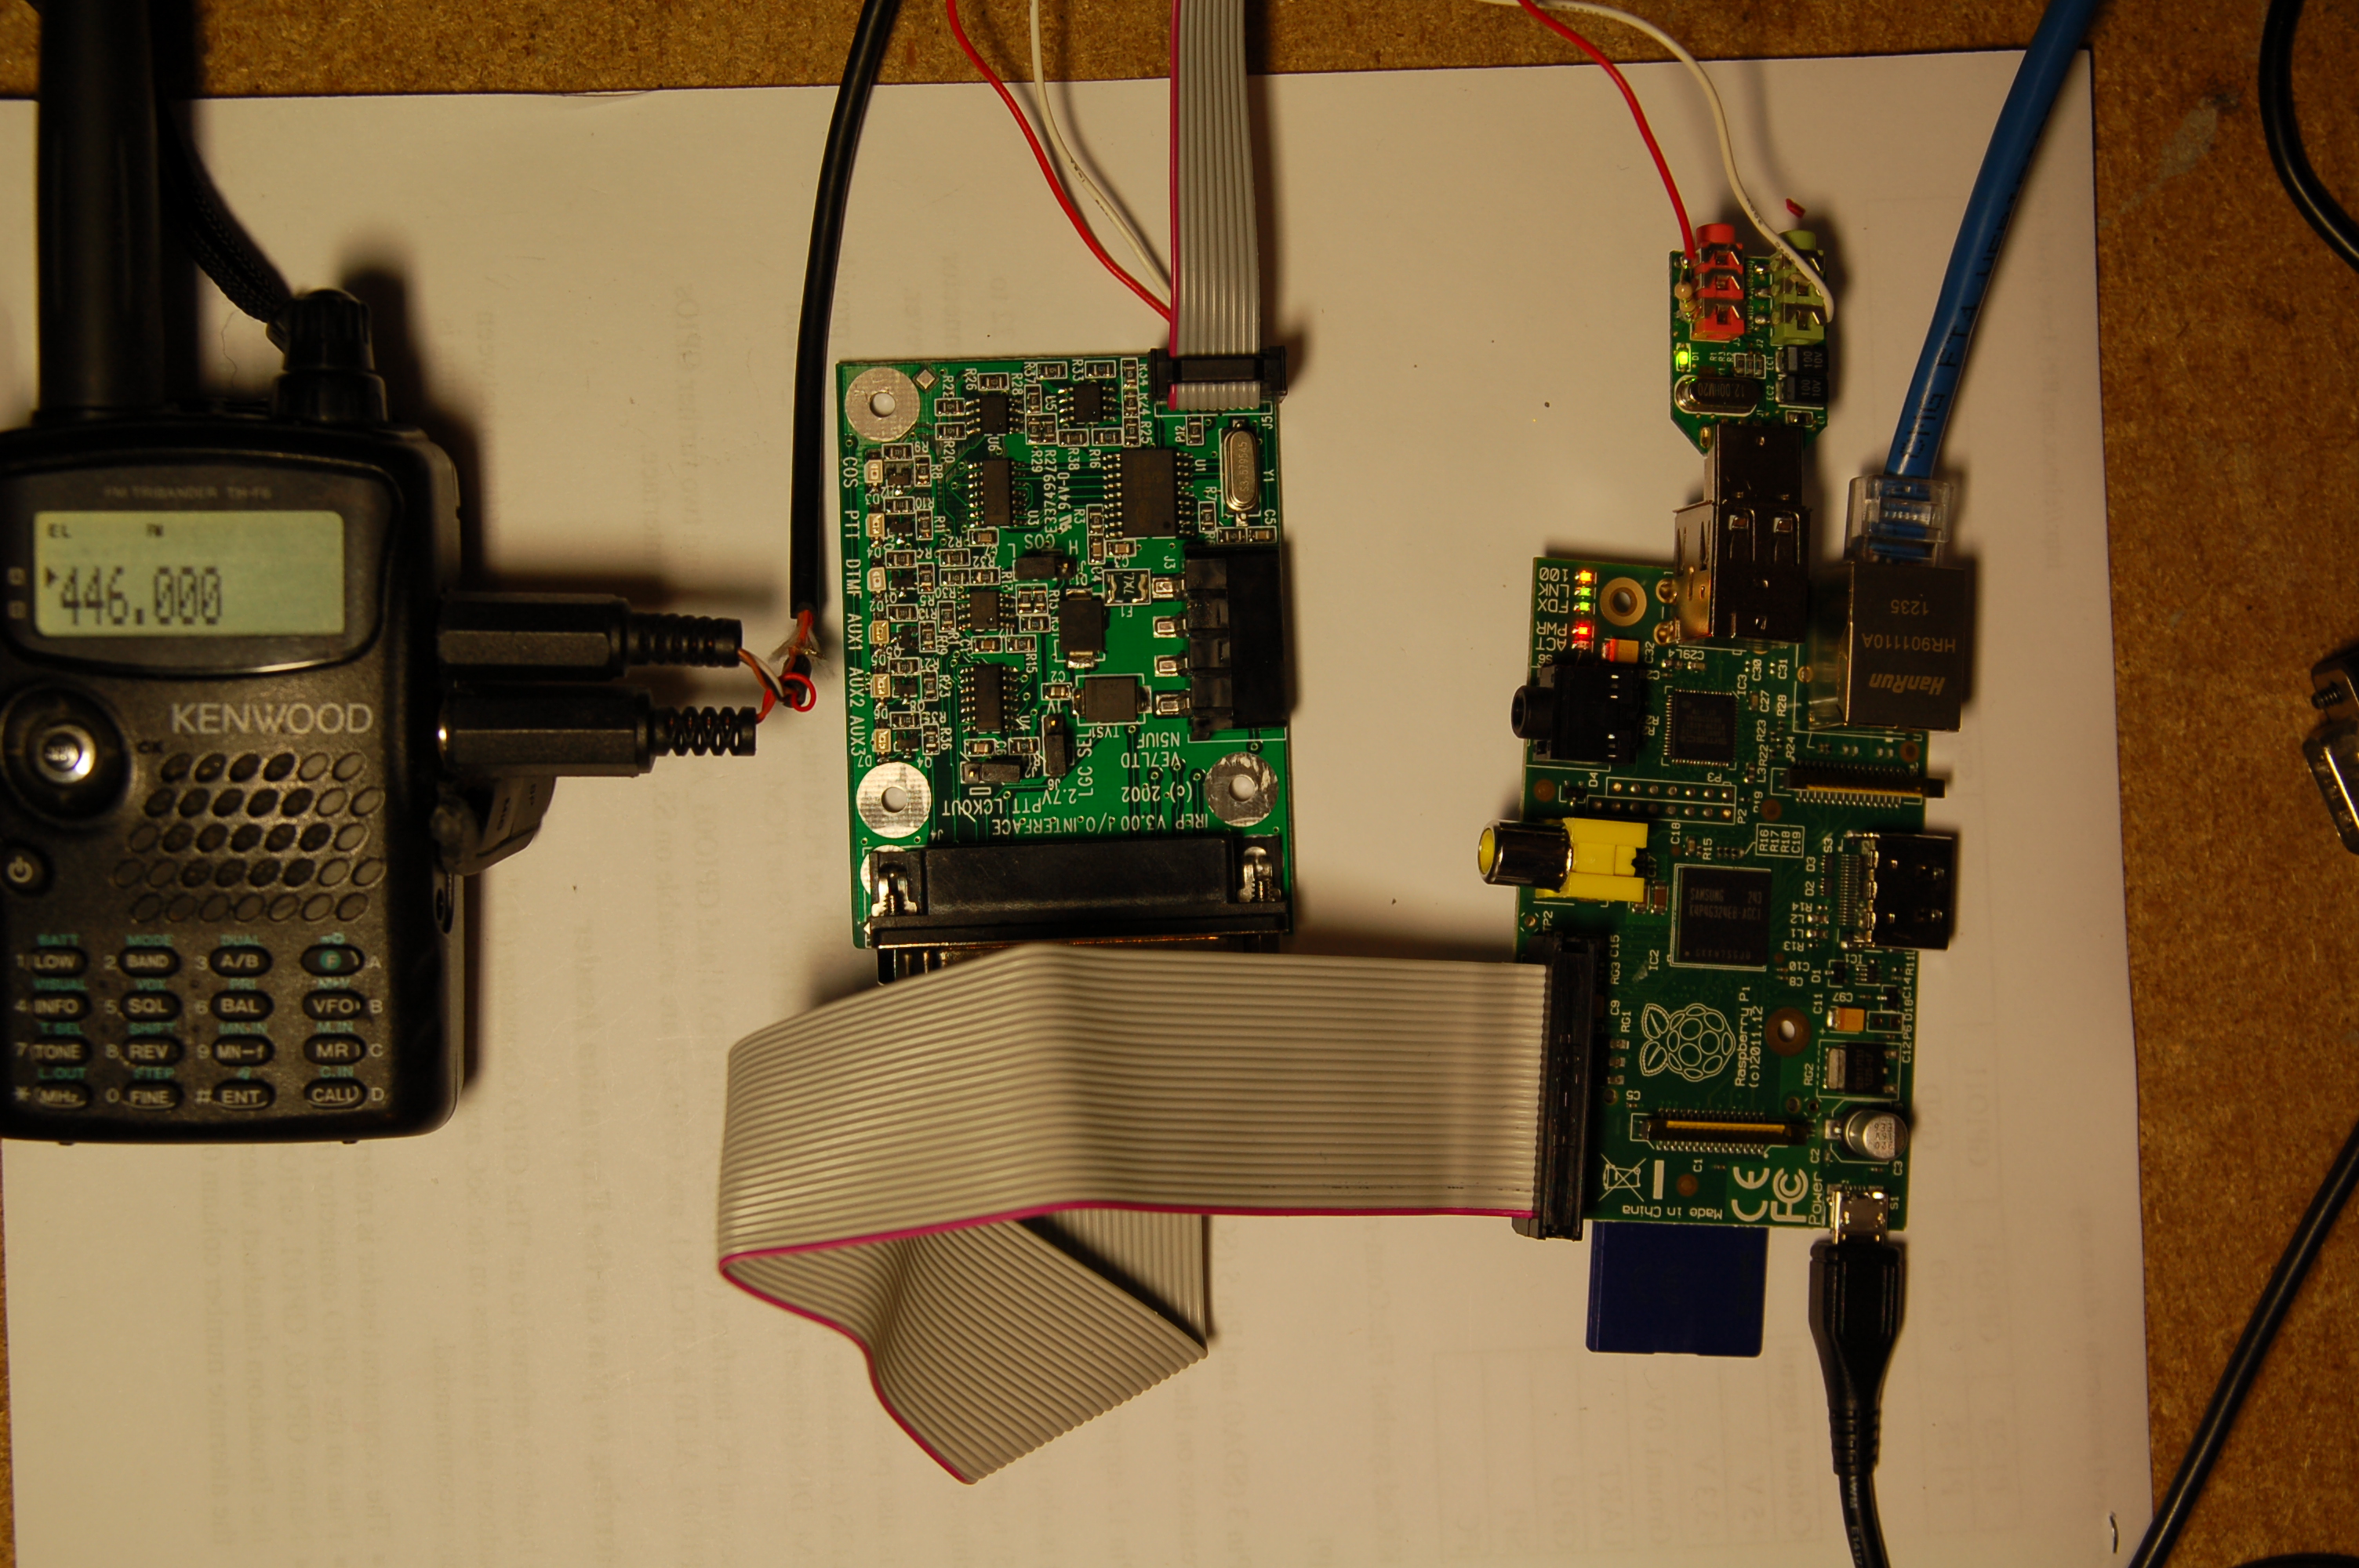
I heard from John – N8MDP who setup his Raspberry Pi as a D-STAR hotspot as well. His setup works with the “X-Reflector” system. There are multiple D-STAR reflector systems that co-exist together on the network. His instructions are detailed and the setup is different than mine because different software is needed to access these alternative reflector systems. John installed a webserver on his Pi to control it from the Internet.
Raspberry Pi
- PiIRLP. IRLP on the Pi.
PiIRLP setup with radio - EchoLink (part 1) (part 2). Later they stated there are still issues. Stay tuned.
- TNC-Pi (part 1) (part 2) which comes as a kit to build. APRS was used in the demonstration.
- Mobile Xastir based APRS station.
- PSK31.
- Repeater controller with web interface. This is still in development.
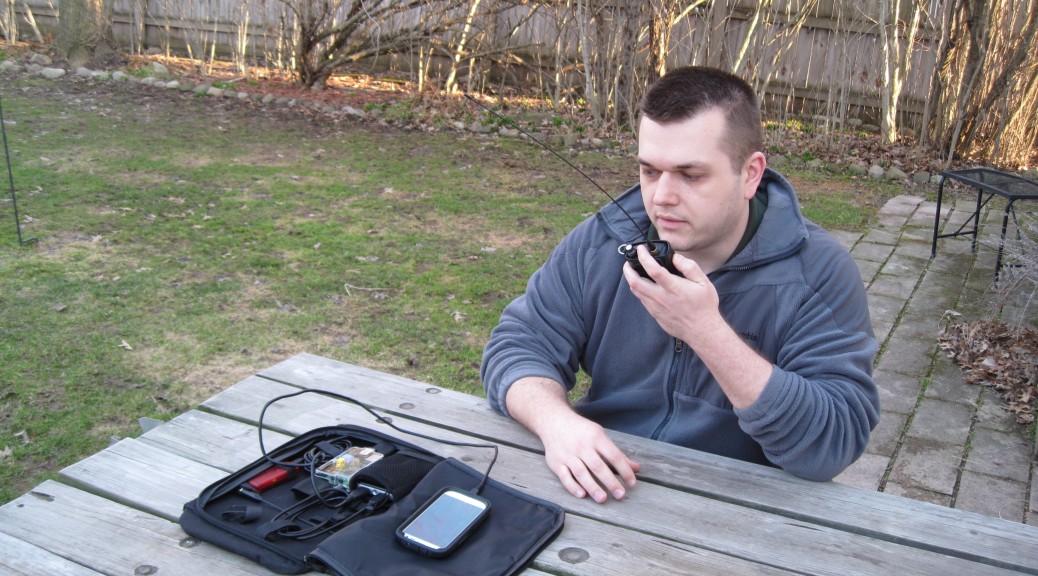
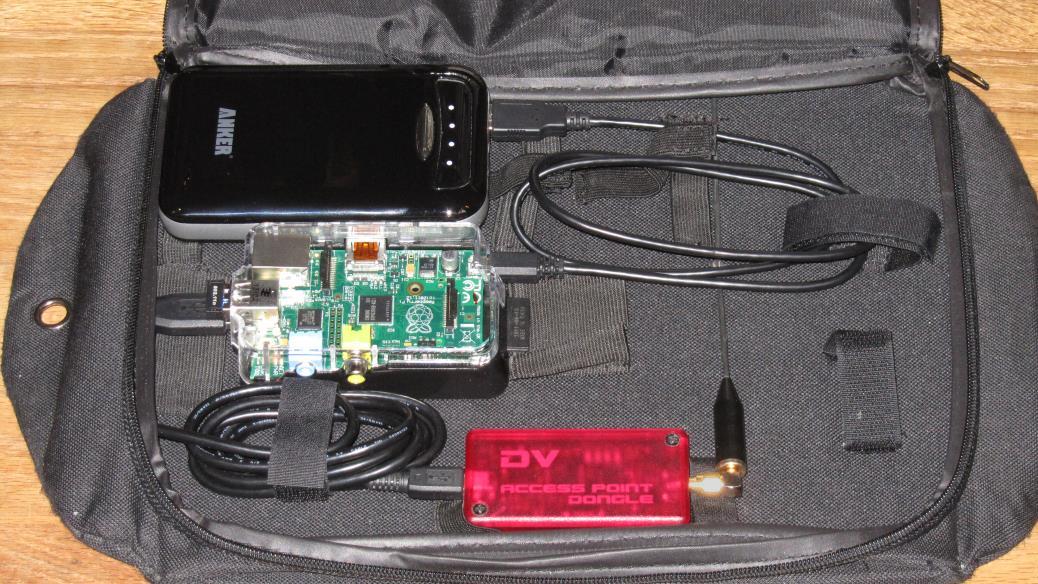
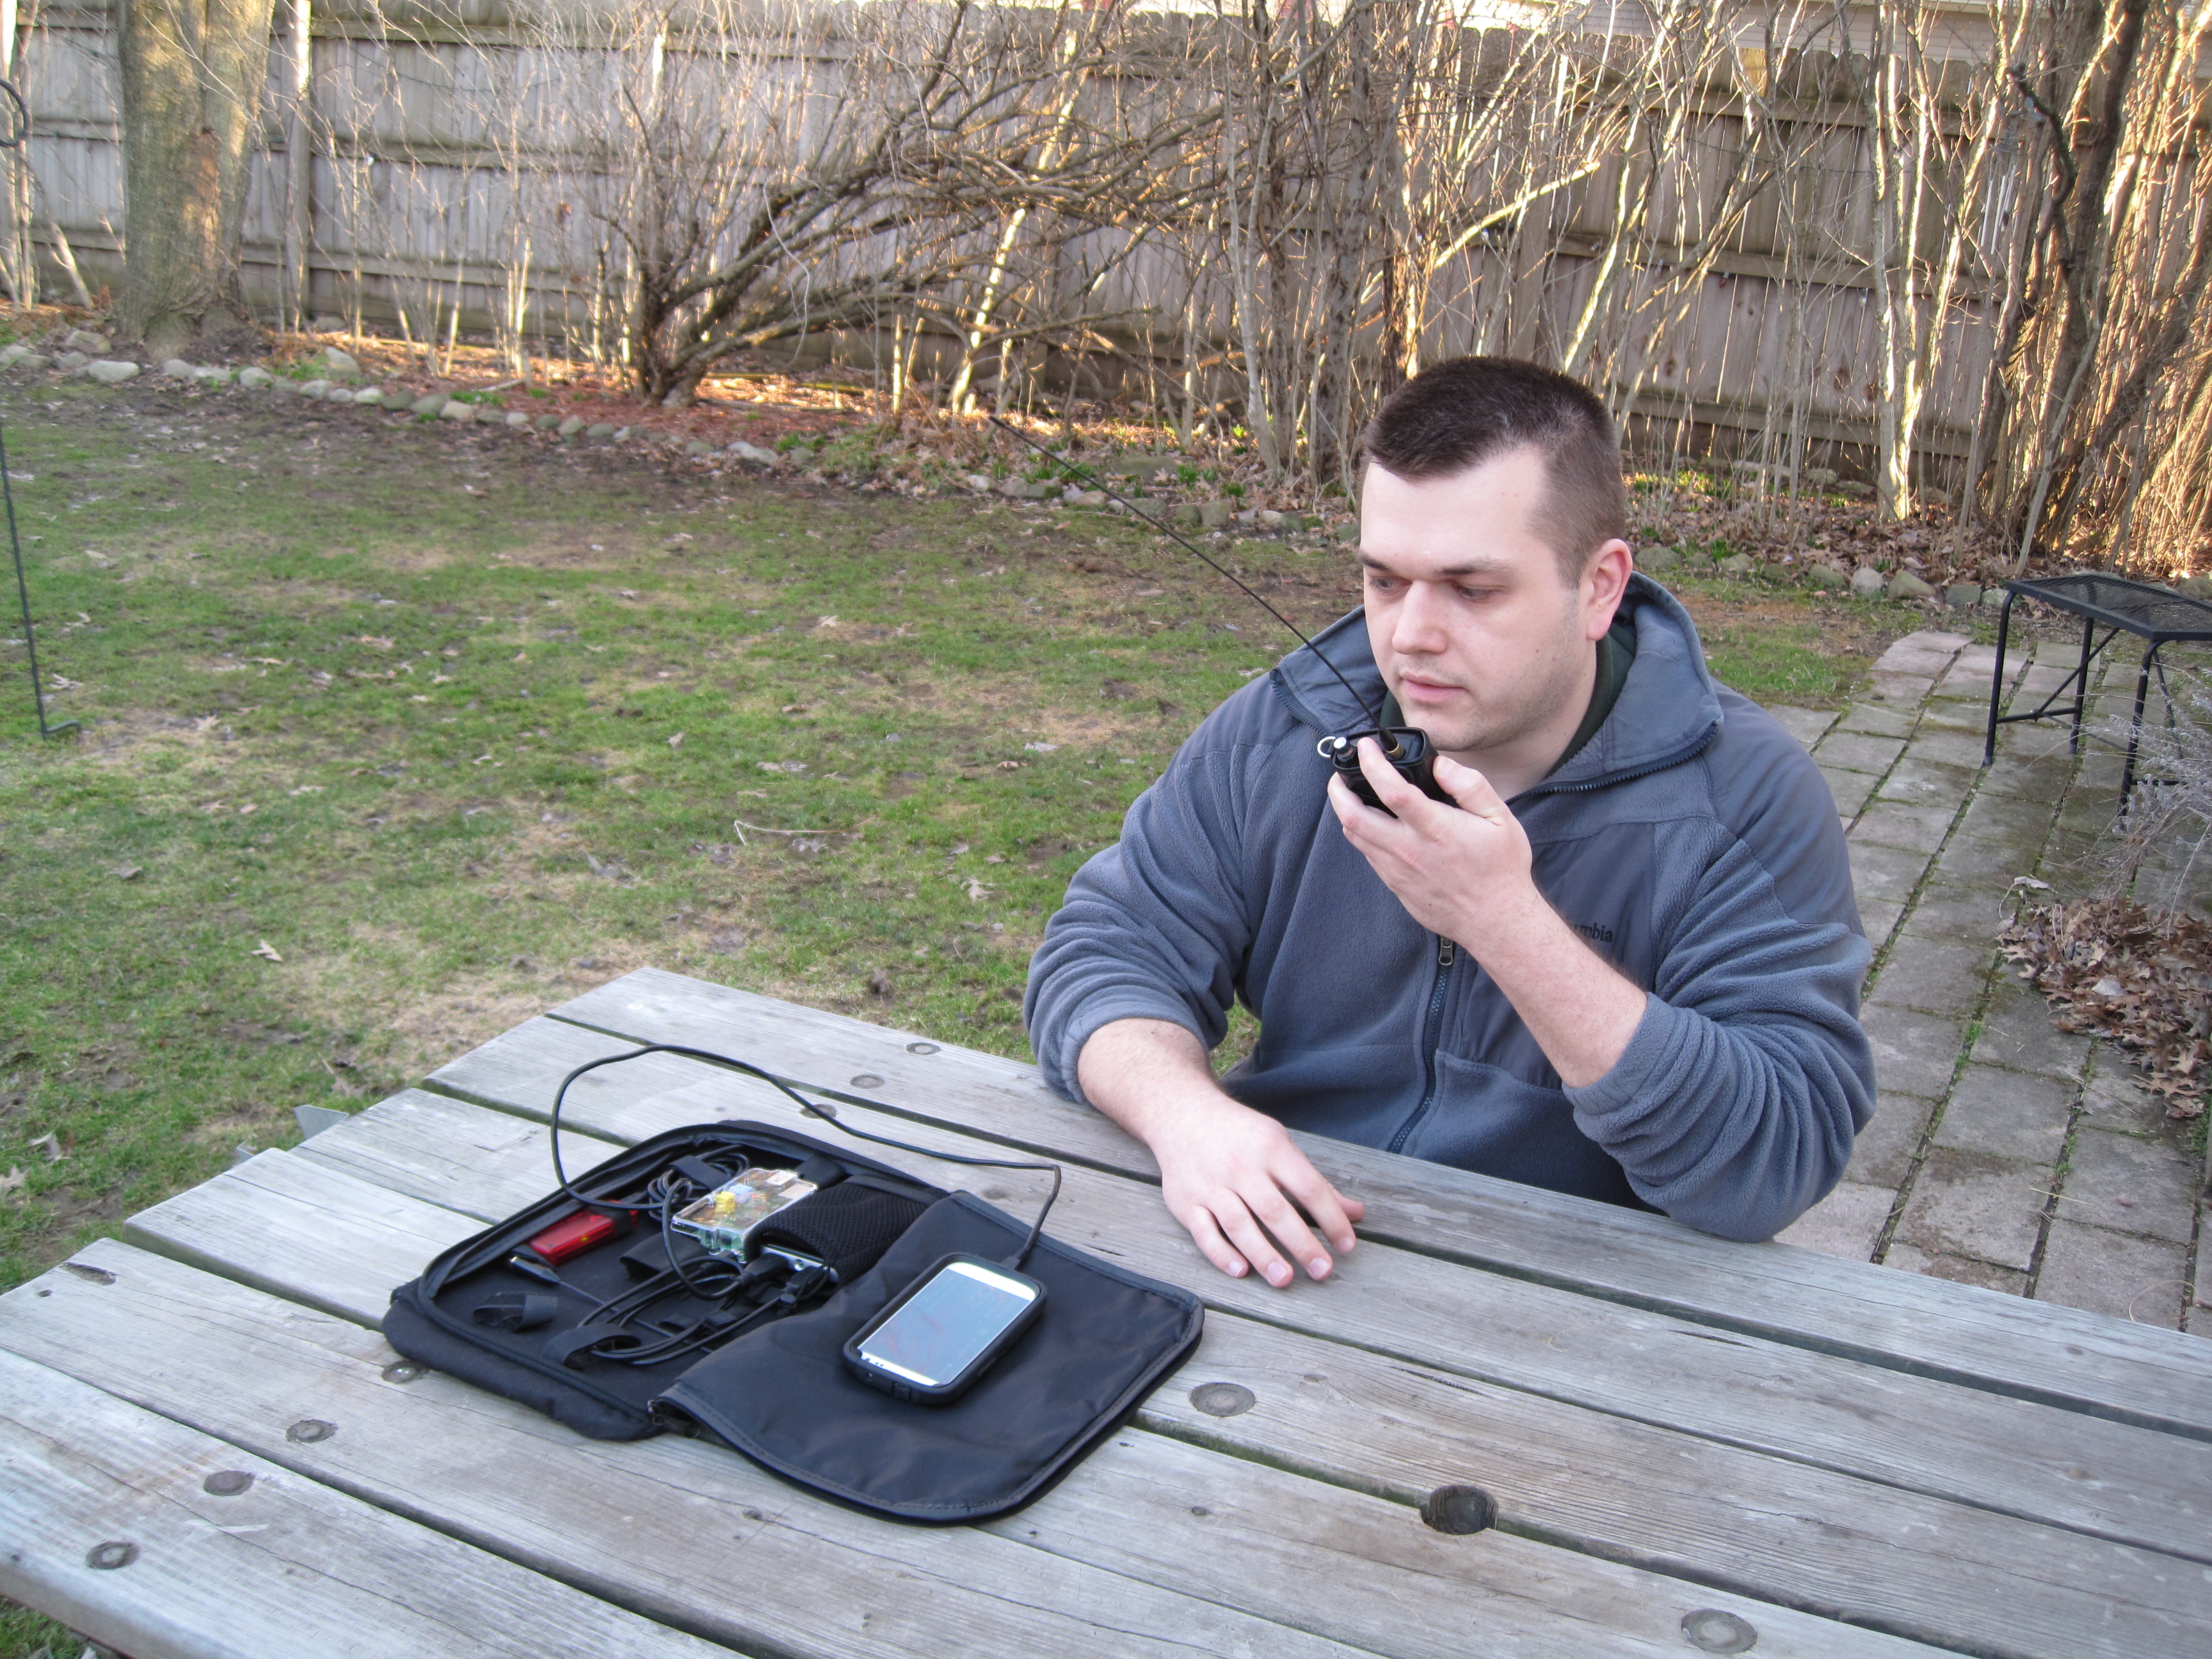
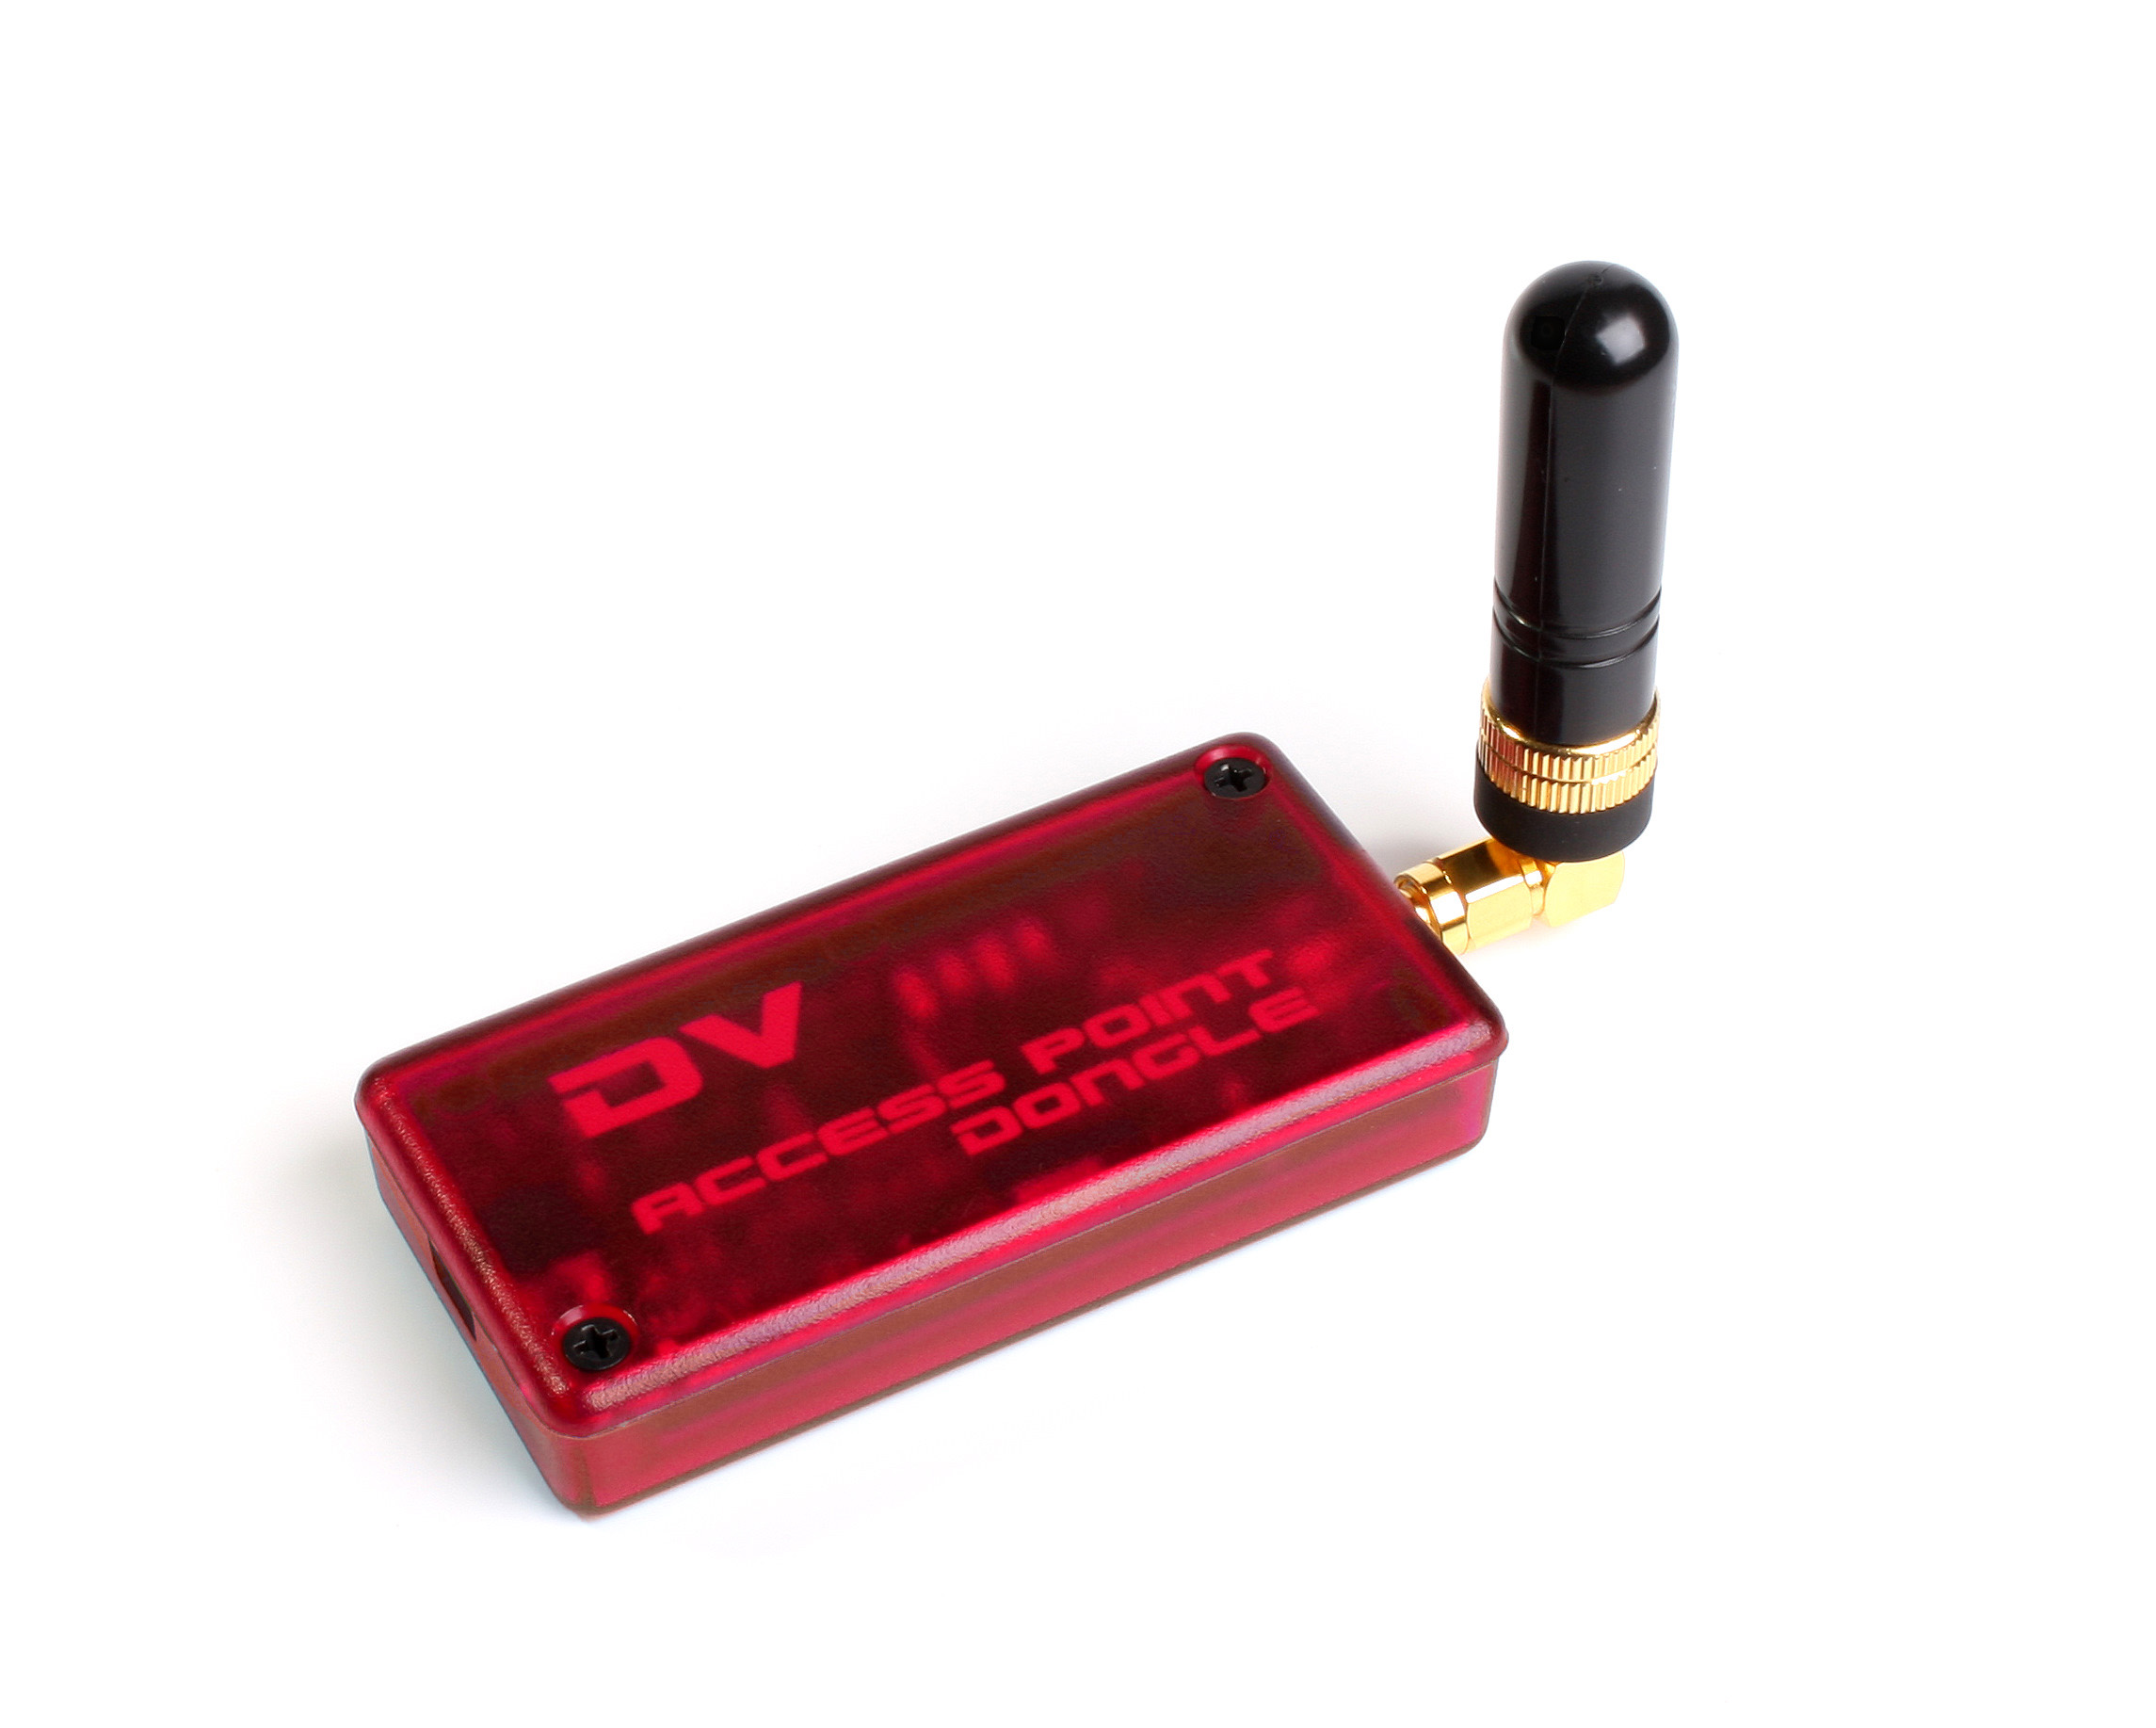
- DVAP Pi which I’ve mentioned previously. There is a DHAP (Digital HAM Access Point) which is a DVAP Pi in a hardened case.
Arduino
- ID timer (part 1) (part 2) that will remind you to ID with your call sign every 10 minutes.
- Foxhunt transmitter.
- Heads-up display in a mobile setup for radios that use CAT commands.
Networking and server
One of the first projects I saw was how to use the Raspberry Pi as a Home theater PC. This allows you to watch videos, listen to audio, or display photos accessible via the network on a TV.
A Pi can be turned into a home or portable access device used in conferences, competitions, demonstrations, or school project. Some examples are a router, network attached storage (NAS) device, web server, or secure virtual private network (VPN) server. The VPN server uses OpenVPN, an excellent encryption package that offers trust no one (TNO) encryption since you generate the encryption keys.
A useful project is the Raspberry Pi IP address IDer which speaks the IP address if you are operating headless and need to connect to it.
Cool and unique
Want to relive the 8-bit gaming days of the Commodore 64? There is a project called Commodore Pi to create a native Commodore 64 emulator and operating system for the Raspberry Pi.
Build a coffee table gaming rig.
Turn a Raspberry Pi into an FM transmitter.
If you like cheap phones, for $160 you can create your own Raspberry Pi smartphone.
Want to give your dog a treat via email? The Judd Treat Machine will do just that! Send an email to the dog’s email address, it dispenses the treat, snaps a picture, and replies with the picture attached.
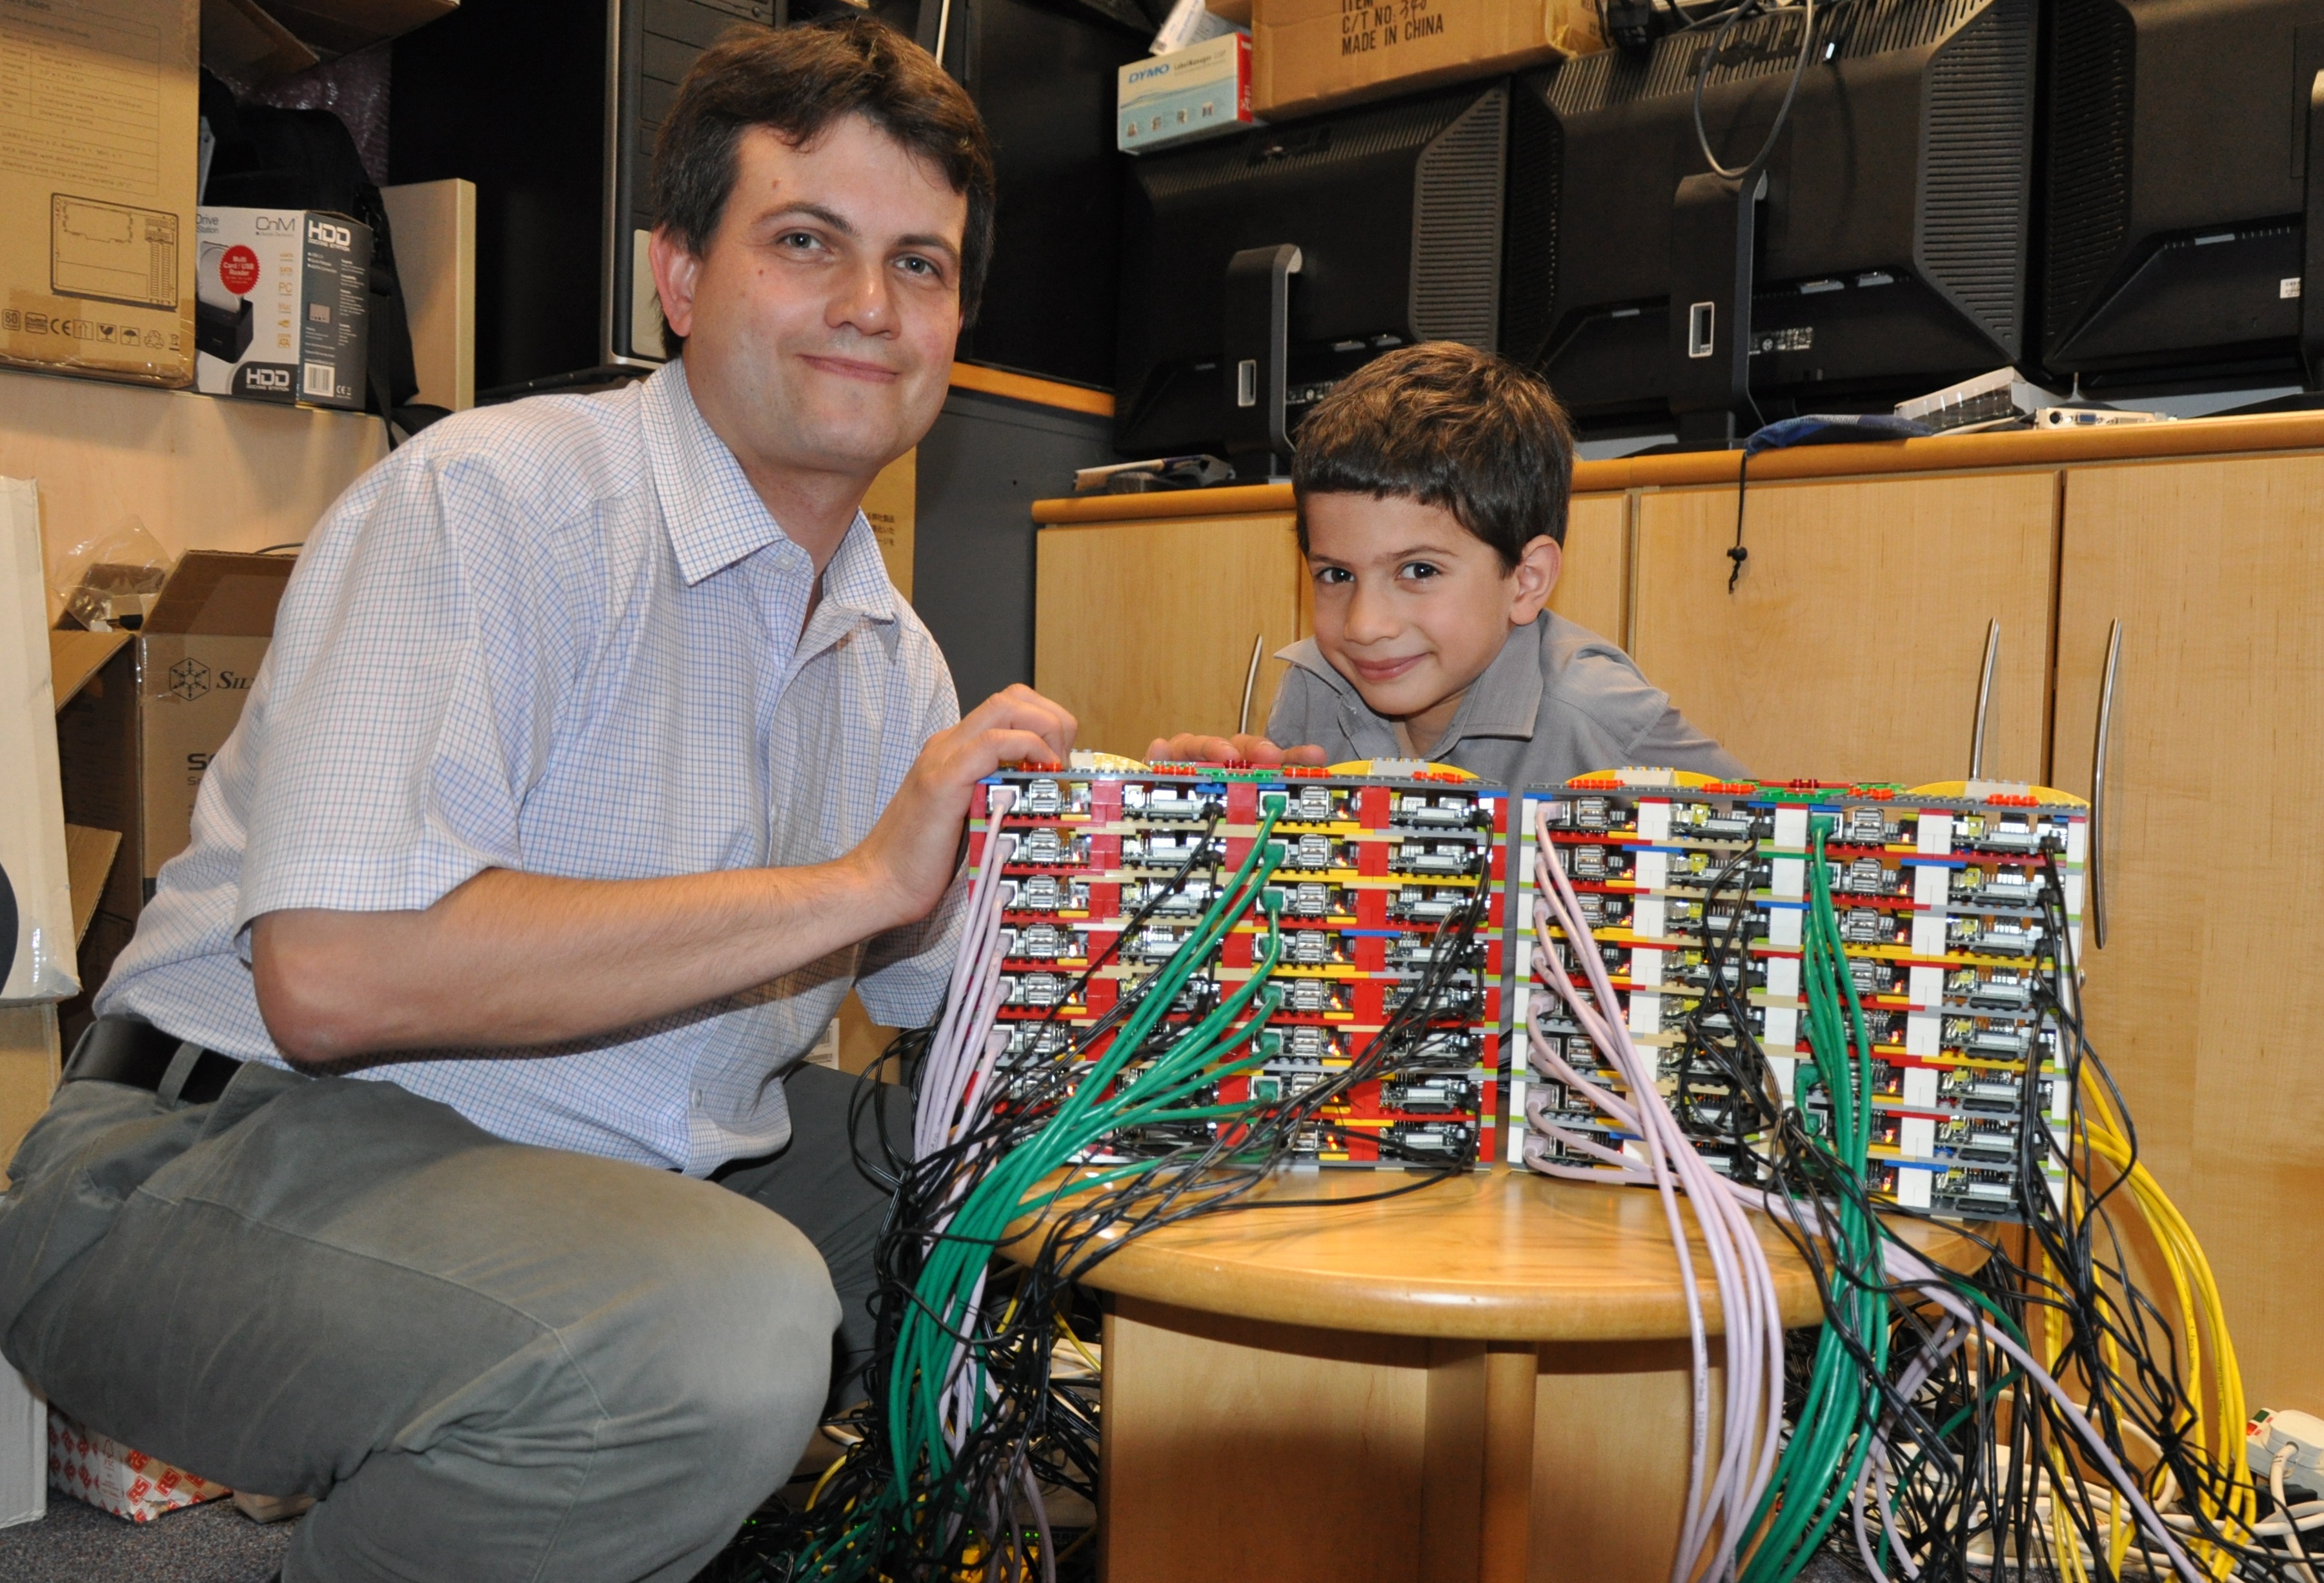
The University of Southampton in England created the Raspberry Pi Supercomputer using 64 Raspberry Pi computers. They use a “message passing” system to distribute processing across all 64 devices. His son also helped out by building the rack to hold them out of… Legos!
Other places for projects and news
Raspberry Pi forums.
Arduino forums.
Slashdot: (Pi) (Arduino).
Lifehacker: (Pi) (Arduino).
Reddit: (Pi) (Arduino).
Podcasts.
Search the Internet!
Next time, we’re going to move on to another type of dongle: the $20 software-defined radio.