Testing and configuration
This section will determine the RTL-SDR’s frequency correction (PPM setting), check APRS data is being decoded, and finally configure the IGate.
RTL-SDR dongle
An important thing to know about these dongles: they are cheaply made and not tested for accuracy. They are designed to receive DVB-T signals at a bandwidth of 6 – 8 MHz where a few KHz error doesn’t matter. This is obviously not true when you’re dealing with FM signals that are 15 KHz wide or digital at 12.5 where a few KHz will put you on a completely different frequency or channel.
PPM stands for parts per million and is the difference in received frequency vs. frequency shown. To visualize this, use SDRSharp to receive a known FM signal. The center frequency shown will be different from the signal on the scope. Typical PPM offset is anywhere from 45 – 65 and will be in the programs settings. The dongle will drift another 2 – 5 PPM over the next 20 – 45 minutes as it warms up. PPM number will change with ambient temperature extremes. Gain is obviously another setting that will help you receive signals. The RTL AGC setting works but will err on the side of too much gain. Gain is manually set and too much gain does seem to effect reception. The Correct IQ setting will get rid of phantom spikes at lower gain settings.
The Pi and computer will need to be connected via Ethernet or very close to the WiFi access point due to the amount of data transferred while using rtl_tcp. The connection MUST sustain a constant 40 Mpbs (5 MB/s).
SDRSharp is an application that interacts with Software Defined Radio hardware. It’s regarded as the easiest to use and most popular.
Plugin the RTL-SDR dongle into a USB port on the Pi.

Connect via SSH to the Pi.
Test the operating system has the correct drivers loaded and we can read signal data from the RTL-SDR dongle by entering
rtl_test
It should find the device and last line should show it reading samples. If it does not or there are errors: check the device is plugged in (No supported devices found), repeat the installation of the RTL-SDR drivers and programs shown earlier, make sure ldconfig was run, reboot again.
Exit rtl_test by pressing and holding [CTRL] + [C].
Now that the Pi is communicating with the RTL-SDR dongle, the frequency correction (PPM setting) needs to be determined. While this may have been determined using a similar method on a PC, I still calibrate it using the same drivers pymultimonaprs will use to access the dongle. Enter
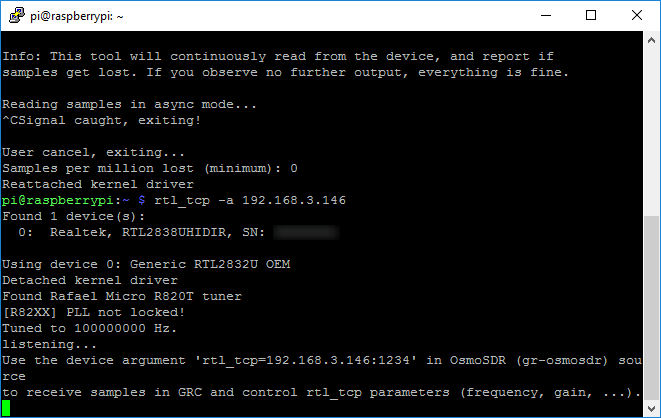
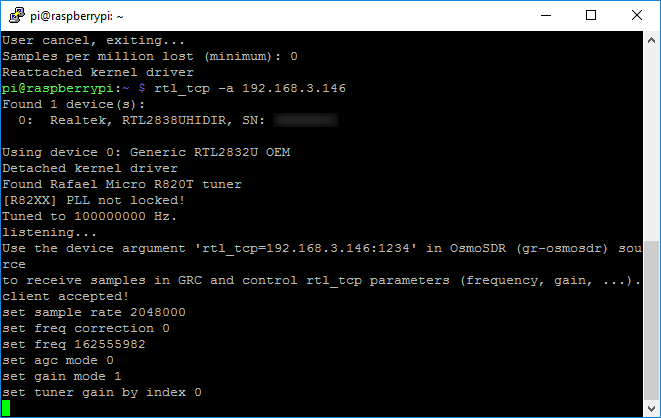
rtl_tcp -a PI_IP_ADDRESS
rtl_tcp: listens for remote connections and transfers signal data over IP.
-a PI_IP_ADDRESS: this tells rtl_tcp which IP interface to listen for connections. If this is omitted, it will listen for connections locally (127.0.0.1) which is no good since it won’t answer remote connections. Replace PI_IP_ADDRESS with the address of the Raspberry Pi. It is the same one used to connect via SSH. In this case the command will look like: rtl_tcp -a 192.168.3.146
Again, it should find the RTL-SDR dongle and in the last few lines should say “listening.” If there are errors, check the IP address.
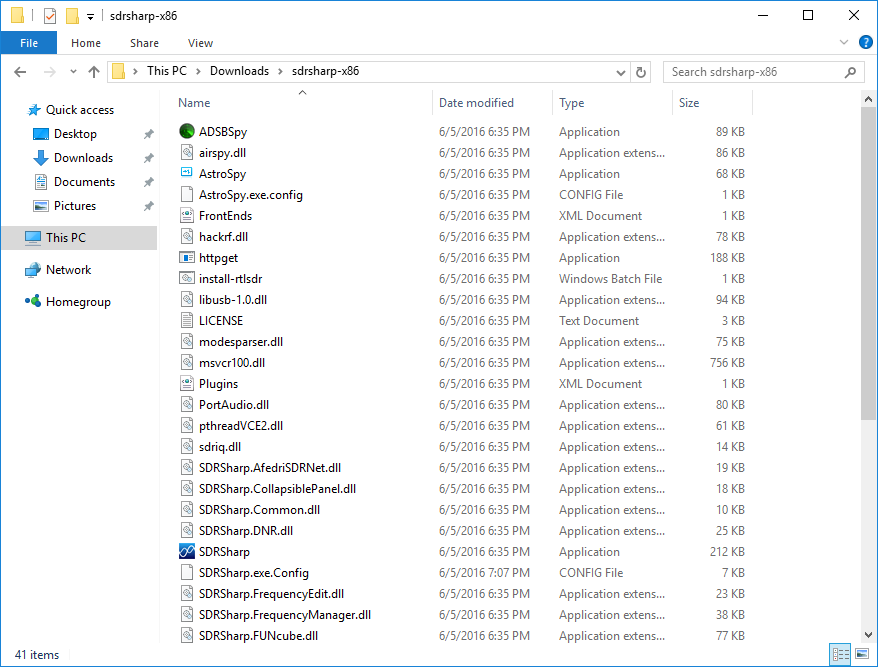
On the PC, return to the sdrsharp folder extracted earlier.
If the default download location is used, it will be something like: C:\Users\username\Downloads\sdrsharp-x86\
Run the SDRSharp application.

For Source select RTL-SDR (TCP).
Leave Radio in WFM.
For Bandwidth, enter 15000 (kHz).
Check Correct IQ.
Enter the frequency of a known active transmission. I always use NOAA Weather Radio.
Click the Configuration Source icon (gear).
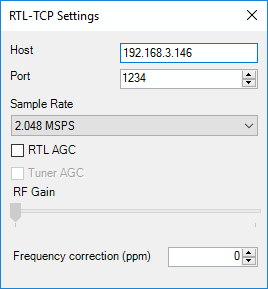
For Host enter the IP of the Raspberry PI. In this case, 192.168.3.146.
Turn down speakers as the white noise will likely be very loud. With RTL-TCP Settings still open, click Start (Play icon).
If you receive ‘a connection attempt failed’ message after 45 seconds, the Pi is not running rtl_tcp, the wrong IP address was used for the -a parameter, the PI is on a different (unreachable) network and/or being blocked by a firewall.
On the Pi, a line saying “client accepted” should be displayed. As settings are changed in SDRSharp there will be corresponding debug lines displayed for informational purposes.
Signal data is received by the RTL-SDR dongle, turned into a data stream, and sent across the network to the PC running SDRSharp. Pretty cool!

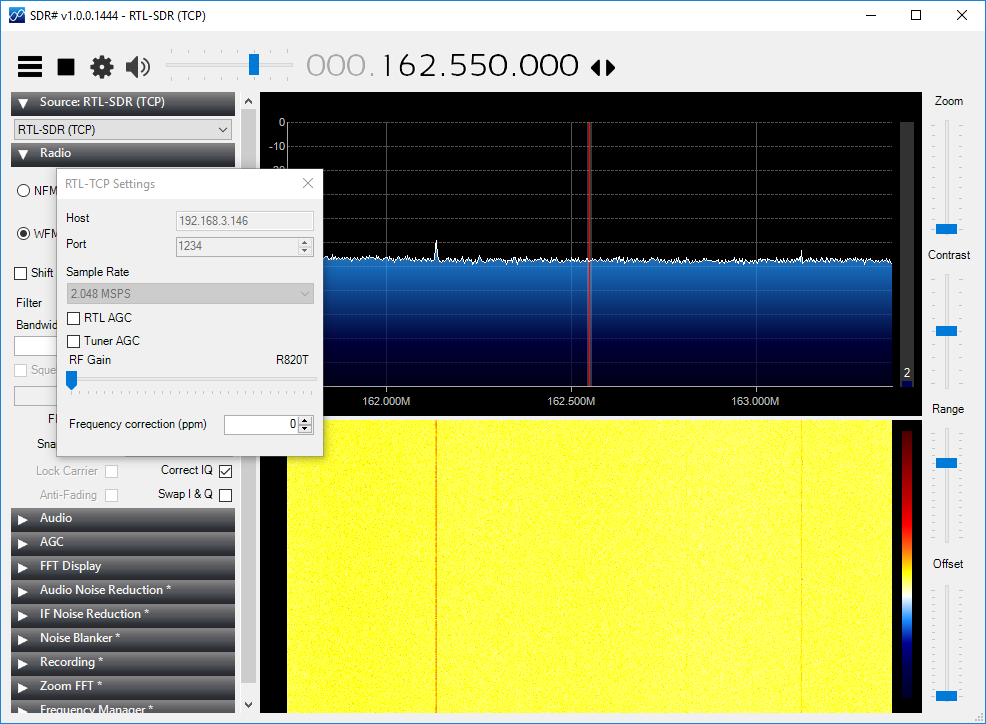
Move the RF Gain slider all the way to the right.
Move the Zoom slider up to the 4th notch.
Above is the dongle with no frequency correction. The actual 162.550 frequency is just to the left of the displayed frequency. 162.550 is one of the NOAA Weather Radio frequencies.
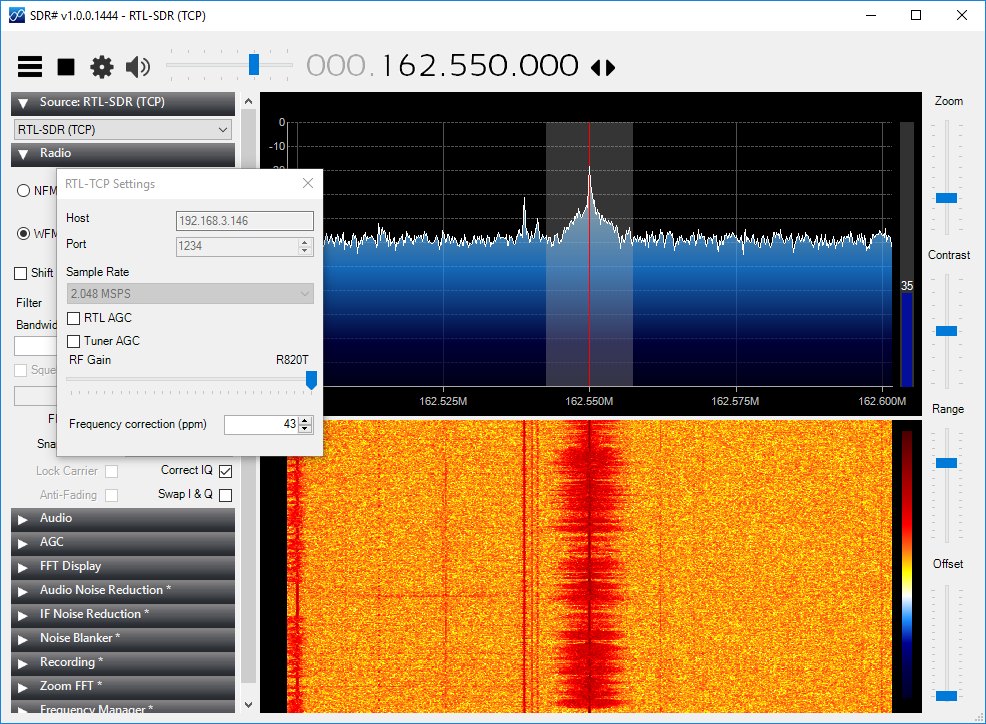
Shows 162.550 centered with frequency correction applied.
Run the calibration for 15 minutes to obtain an accurate result. Speculation suggests this may take as long as 45 minutes. Increase the PPM setting until the carrier is centered as close to the red line as possible. In this case a PPM frequency correction of 43 is required for the dongle I’m using.
Note the Frequency correction (ppm).
Click Stop.
Close SDR#,
On the Pi, exit rtl_tcp by pressing and holding [CTRL] + [C].
Test APRS reception by entering
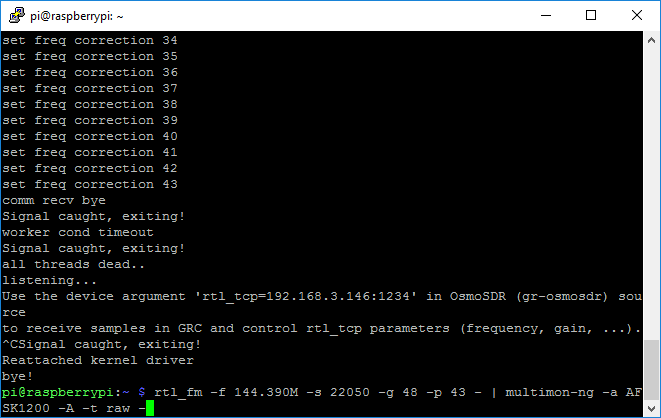
rtl_fm -f 144.390M -s 22050 -g 48 -p PPM - | multimon-ng -a AFSK1200 -A -t raw -
Replace PPM with the PPM noted above. In this case rtl_fm -f 144.390M -s 22050 -g 48 -p 43 – | multimon-ng -a AFSK1200 -A -t raw –
This command is similar to the program chain used by pymultimonaprs.
rtl_fm: FM demodulator for the RTL-SDR dongle.
-f: sets the frequency to 144.390 MHz for APRS in the North America. Check the APRS Wiki for other frequencies.
-s: sets the sample rate (22.050 kHz).
-g: sets gain value in db. 48 is near maximum and works well.
-p: PPM frequency correction value determined above. In this case, 43.
–: redirects output to standard output.
|: sends the standard output from the first command (left) to the second command as standard input.
multimon-ng: decodes digital transmissions,
-a: adds a decoder. This can be a chain (multiple) of decoders. For APRS we only need AFSK at 1200 baud.
-A: enables APRS mode.
-t raw: specifies the input stream type (from rtl_fm) of raw signal data.
–: redirects output to standard output. Which will be the screen or terminal in this case.

Enabled demodulator is AFSK1200. rtl_fm it should find the RTL-SDR dongle, gain, error, and sample rate should display as entered in the command string.
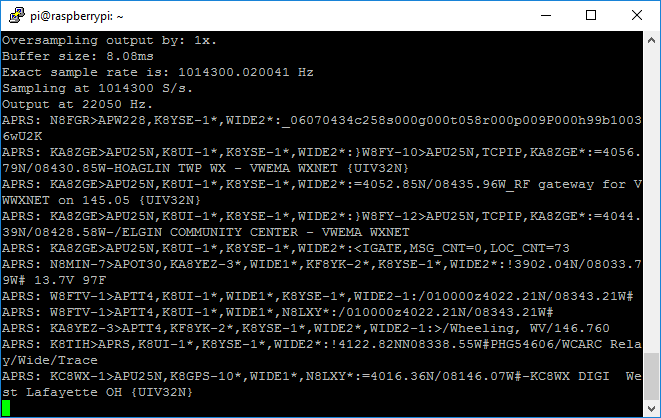
After some length of time, lines that begin with “APRS:” should display in the terminal. This means packets are being successfully decoded from RF!
The length of time depends on APRS activity in the area. Mostly digipeaters repeated packets will be heard initially. Tune another radio or scanner to the same frequency with a similar antenna. Most of the strong stations should decode on screen. Some of the weaker ones probably wont because, as mentioned before, the RTL-SDR does not have a sensitive receiver.
If nothing at all is seen on screen, after 15 minutes, exit and check the command string. If after an hour no packets are seen, verify the PPM frequency correction with the process above.
Exit rtl_fm and multimon-ng by pressing and holding [CTRL] + [C].
Other bits
The crystals on the RTL-SDR dongle can be replaced with higher accuracy temperature controlled crystals (TCXO) that have a variance of 1 ppm! These crystals are $10 but you have to wait for them to ship from China. Pre-modified dongles are available but you will pay three times the price for the dongle.