
Recording with Audacity
Some week you can’t make the net, but you still want to receive the messages passed on the net or there is an event taking place and you want to record the transmissions. There are a couple options.
Leave the digital application running on your computer in receive mode. Transmissions made will be picked up and decoded by the program for later review. Disadvantages: if the net decides to change programs and/or modes, particularly ones that don’t transmit an ID and require manual intervention won’t be recorded. Leaving more than one monitoring program running doesn’t always work because one application can take “exclusive” control over the recording device, bumping out the other program. Conversations taking place on the net explaining modes or information about the content would not be recorded.
A second option is to record the net using a sound recording program and play it back into the appropriate digital program at a later time. This is also known as Time shifting. This method works great for monitoring the net.
Do not start the digital program in addition to the recording program. Disable “Auto Power Off” features in the radio and sleep/power saving features of the computer. Re-enable when done.
Download Audacity (free, all platforms): http://audacity.sourceforge.net/download/
You will need the administrator password to install if you are running as a standard user.
Install with the default options.
Start Audacity.
Click OK.
Check Don’t show this again at start up.
Click OK.
Recording settings
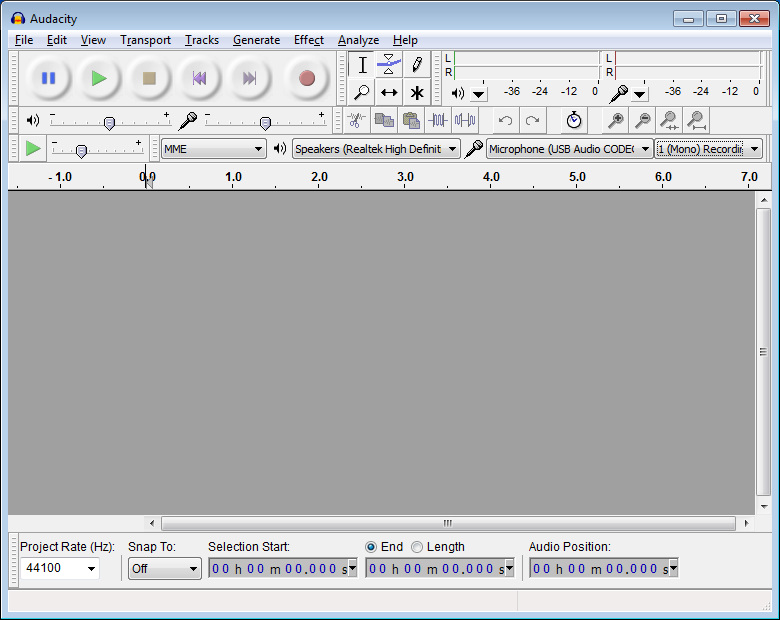
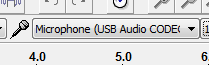
For Recording Device, select the radio interface device.
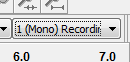
For Recording Channels, select 1 (Mono) Recording.
For Recording Volume, select 0.50. A tooltip will appear while clicking and dragging indicating volume level.
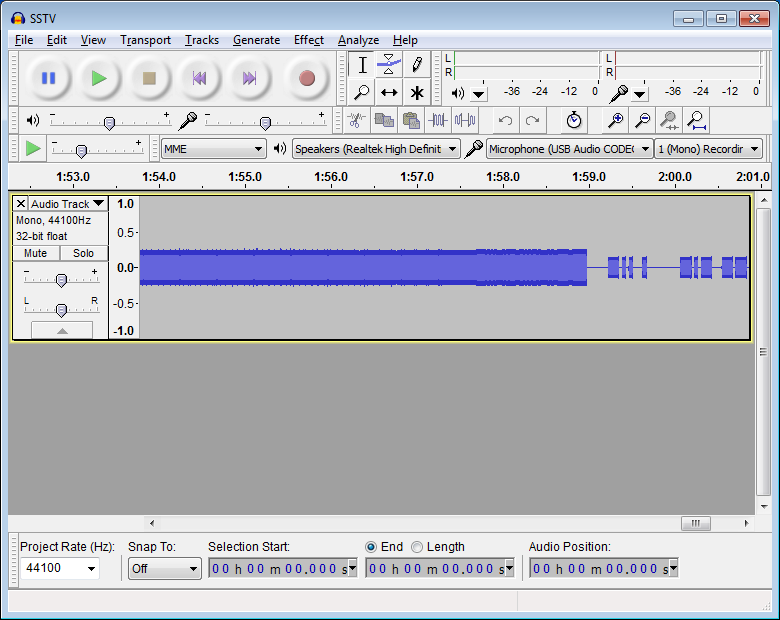
Click Record.
When completed, click Stop.
Notes:
- These files can be very large at approximately 610MB/hr even in temporary storage.
Record all received and transmitted audio
To record the received audio in addition to your transmitted audio, a separate audio cable will need to be used. Install the cable into the “speaker out” on the radio into the “line in” on the computer. The radio will need to have a “monitor” feature which mixes received audio with your transmissions. Set “line in” of the main sound card as the Recording Device in Audacity.
Timer recording
Begin a recording at a specified time.
Setup Audacity as instructed in the “Recording settings” section.
Click Transport.
Click Timer Record.
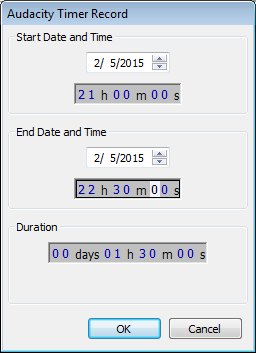
Set the Start Date and Time.
Set the End Date and Time or the end time will be calculated based on Duration.
Click OK.
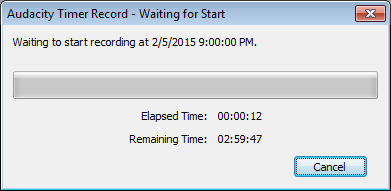
The timer will start counting down.
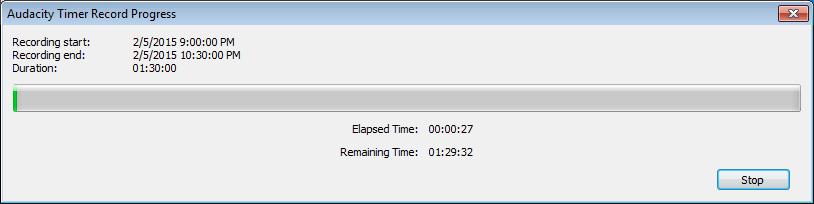
Audacity will begin recording at the specified time.
Saving
When the recording is complete, it can be played immediately or saved by clicking File.
Click Save Project.
Click OK on the warning message.
Give the project a name.
Click Save.
Notes:
- Recording files can be very large at approximately 610MB/hr.
Playback
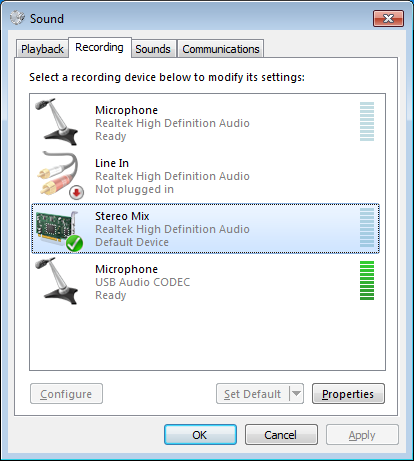
Go into the Recording Sound Control Panel.
There should be a Stereo Mix, Mono Mix, or Wave option from your main sound card. This depends on the sound driver. If nothing similar is seen, right-click in the recording box and click Show Disabled Devices. Then right-click the appropriate device and click Enable.
In the digital application, select the mix device for the input. Remember to change it back to the radio interface device when done.
Notes:
- The mix device is not required to be the default device.

In Audacity, open the project if it is not already.
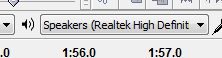
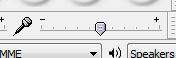
For Playback Device, select the speakers of the main sound card.

For Playback Volume, select 0.50. A tooltip will appear while clicking and dragging indicating volume level.
Click Play.
Notes:
- Selecting Speakers will allow the recording to be outputted to the speakers. In addition, this feeds audio back into the “mix” recording device where it is picked up and decoded by the digital program as it is being played back.
- Decoding issues: disable all audio processing including Enhancements in the Sound Control Panel. Default Format on the Advanced tab should be 48000 Hz (1 channel for the radio interface, the rest don’t matter). Verify these for all sound devices used in this setup.
- Usually the volume of your playback (speaker) device affects the input level of the mix device. Adjusting the level on the recording tab for the mix device may help if the speaker output level needs to be low.