Dongle Bits: DVAP Pi Hotspot

This article appeared in the The Lake Erie Amateur Radio Association newsletter The Spirit of ’76 and ’88 April 2014 edition and The Wood County Amateur Radio Club newsletter CQ Chatter May 2014 edition.

Read the rest of the series in the Dongle Bits articles category.


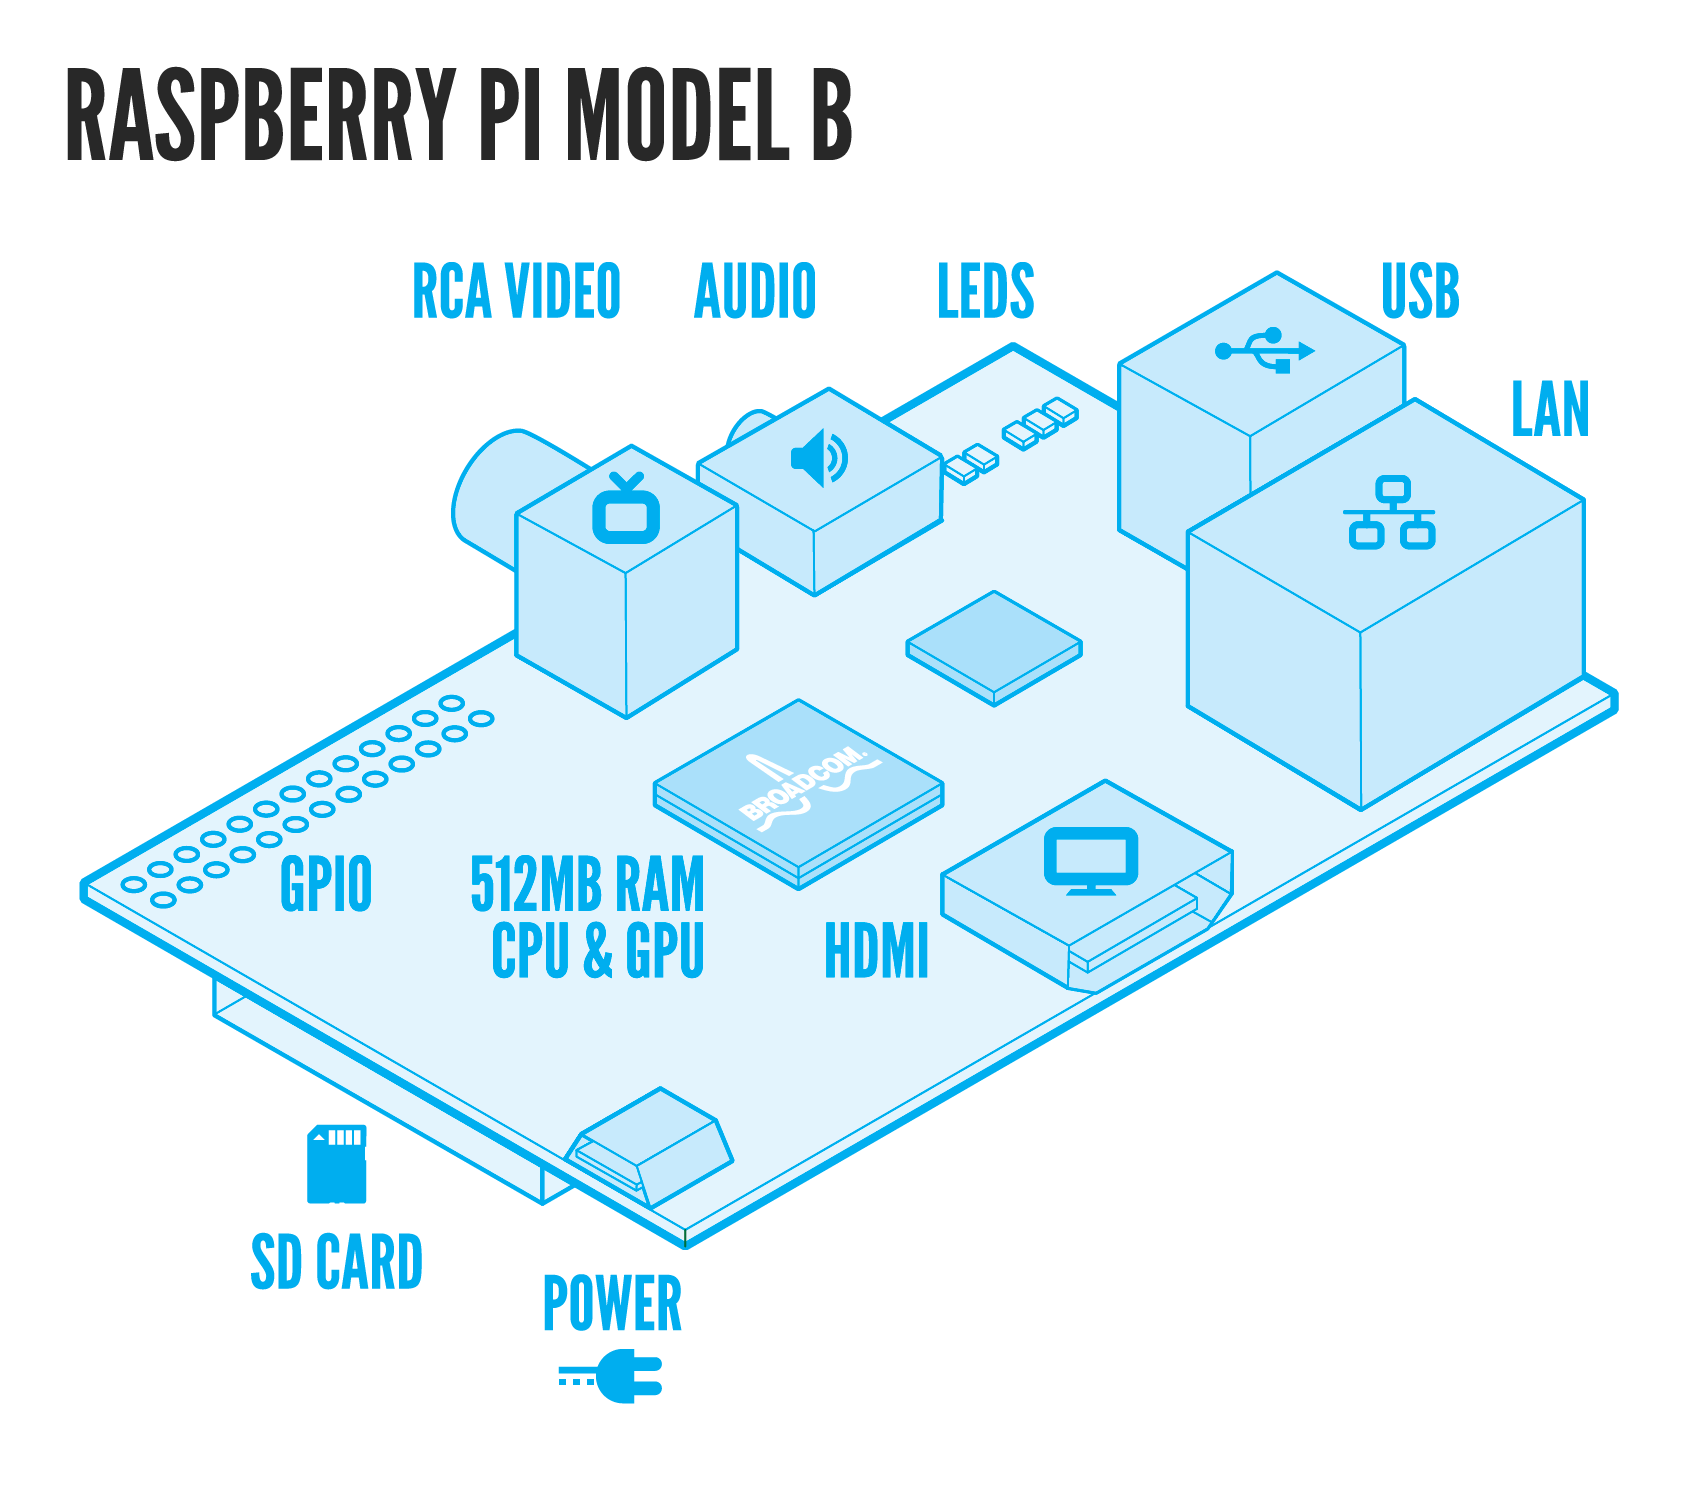
One of the questions I was asked about the Raspberry PI was “why would I want to get one of these?” I can say with absolute certainty: the answer isn’t going to be the same for everyone.  My recommendation is to find a project that really gets you excited!  Go out and do it.  Then do it better.  Make it a learning tool as it was intended.  The hardware, operating system, and many projects are published under the Open Source model.  The concept of Open Source is something that can be freely used, changed, and shared.  This means YOU can download a project and “hack” it yourself.  From there, explore other projects or prototype one of your own!

In my previous article, I mentioned two ways to find projects.  For an initial project, I suggest finding something that has a good amount of detail in the instructions.  This way you won’t be frustrated if they are vague or unclear.  Projects with videos and screen-shots are always helpful for me to visualize what is taking place and I’m able to check my settings with theirs.  On the other hand, if the project doesn’t work, it’s a great opportunity to sharpen troubleshooting skills.

After finding out about the Raspberry Pi and seeing projects appearing in blogs and podcasts, the project that got me excited was the “DVAP Pi Hotspot.”  If you’re on D-STAR, you probably know about a couple dongles that make D-STAR available to you if there is not a repeater nearby.  These dongles traditionally need a PC computer, USB connection, and Internet connection to access the D-STAR network.

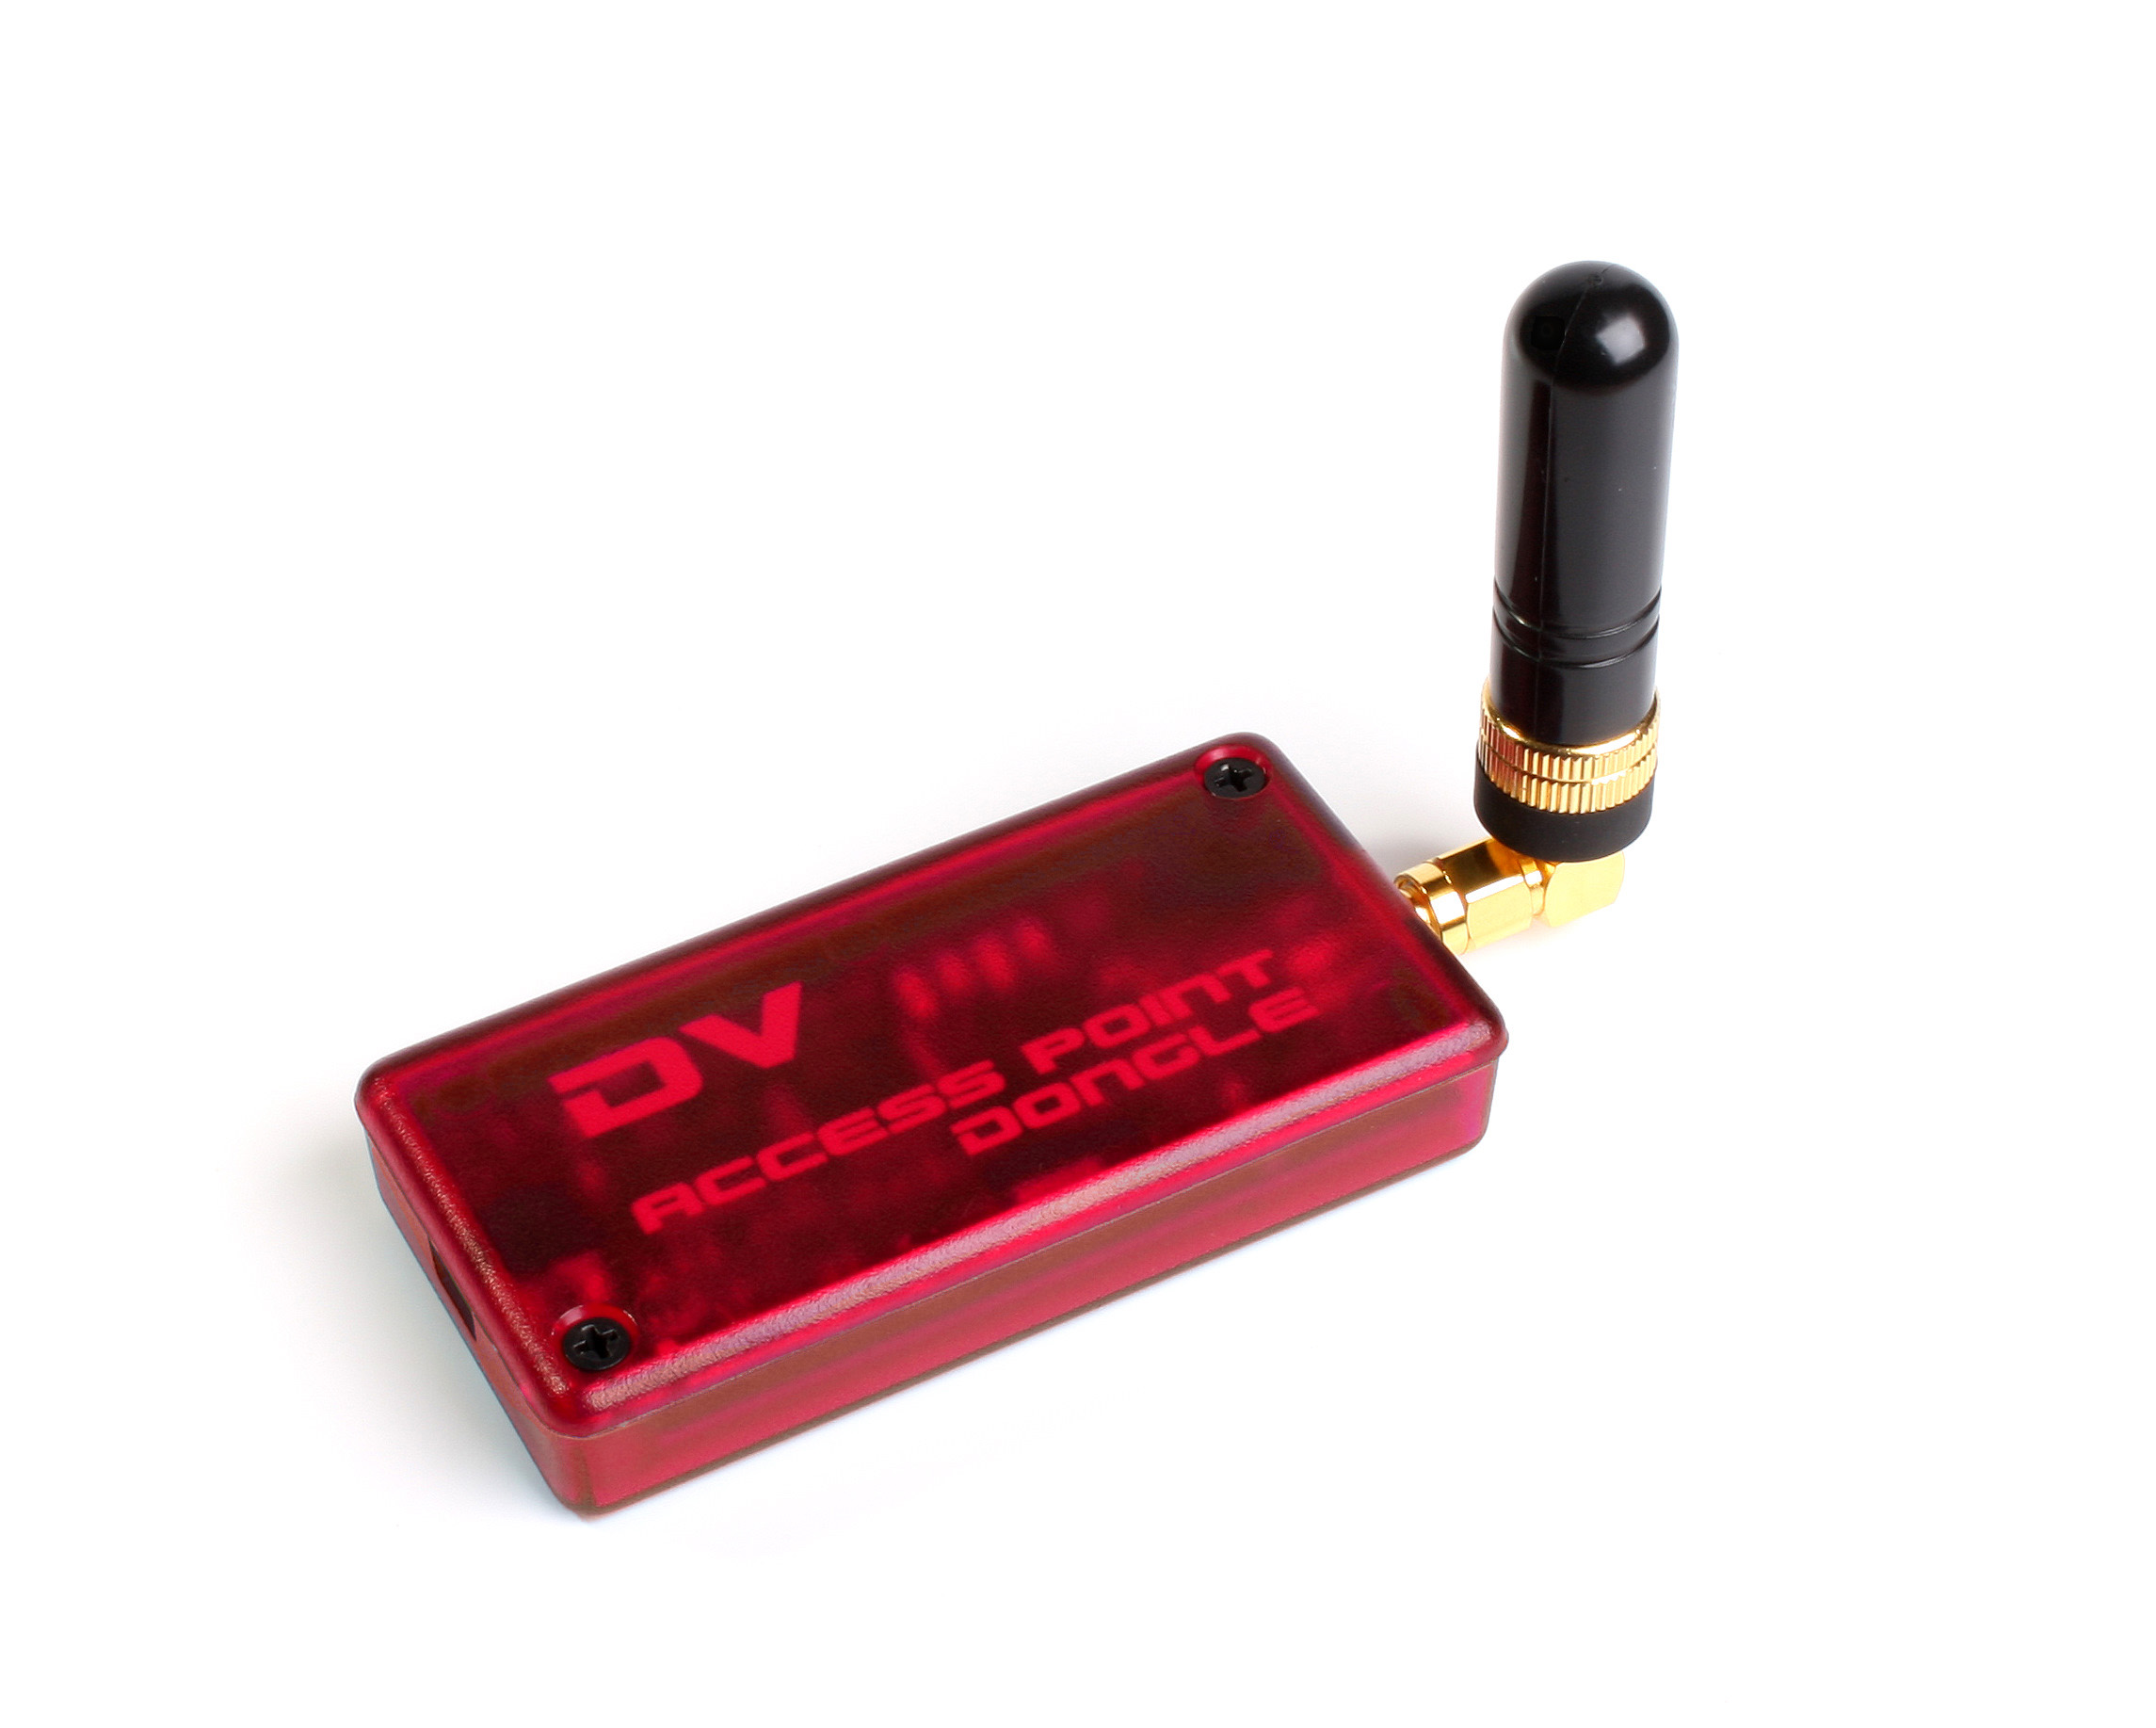
The blue box is called the “DV Dongle.”  It is D-STAR in a box.  It uses your computer speakers and microphone for sending and receiving Digital Voice (DV).  This dongle does the encoding and decoding internally.  I don’t know of any Raspberry Pi projects using the DV Dongle yet.  The second is the red box called the “DV Access Point Dongle” or DVAP.  This device has a low power, 10 mW 2m or 440 transceiver that works with a D-STAR radio.  It passes the bits from the Internet & D-STAR network over the air to your D-STAR radio and vice versa.  The radio does the encoding and decoding.  These devices are great for traveling as they can be hooked to a laptop and used in a hotel room to link back to your home repeater or favorite reflector.

I had been hearing about this DVAP Pi Hotspot on D-STAR nets.  Two advantages were the unit was self-contained, making it no longer necessary to keep a desktop computer running with the DVAP connected.  Since the Raspberry Pi draws far less power than a desktop, some were leaving their DVAP Pi running all the time.  The second advantage was it could be easily converted into a mobile setup.

I follow the guys over at AmateurLogic.TV.  They’re the longest running podcast dedicated to Amateur Radio and technology.  In episode 57, Tommy, N5ZNO, did a segment on how he setup his DVAP Pi.  The project seemed easy enough and the setup was just like how I wanted mine to operate: “headless” where the app starts automatically so a video monitor is not required, has SSH (Linux Secure SHell) enabled, and connects to a mobile hotspot.  Soon after seeing the segment, I ordered my Raspberry Pi.

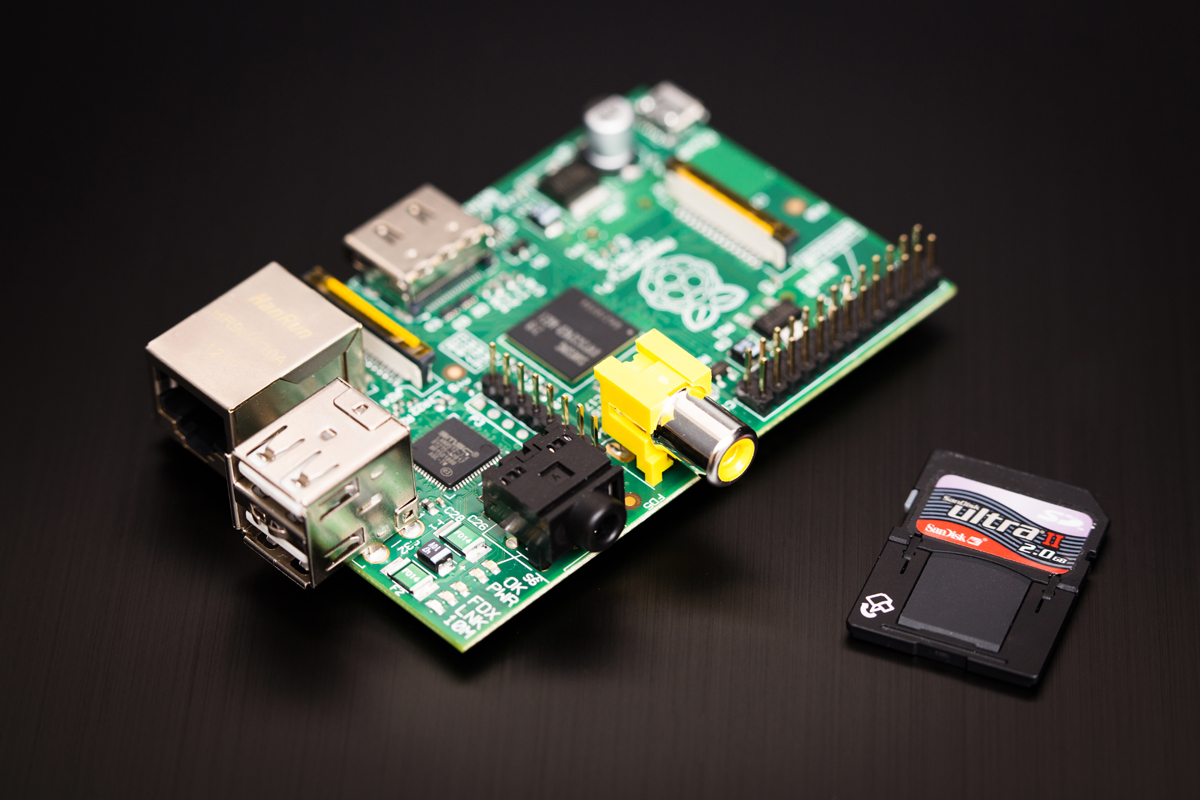
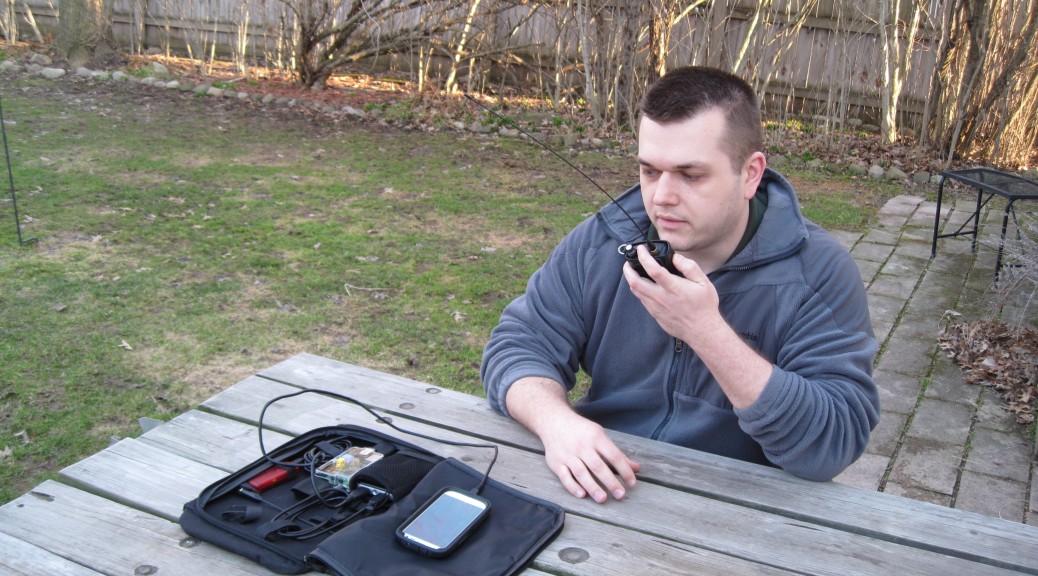
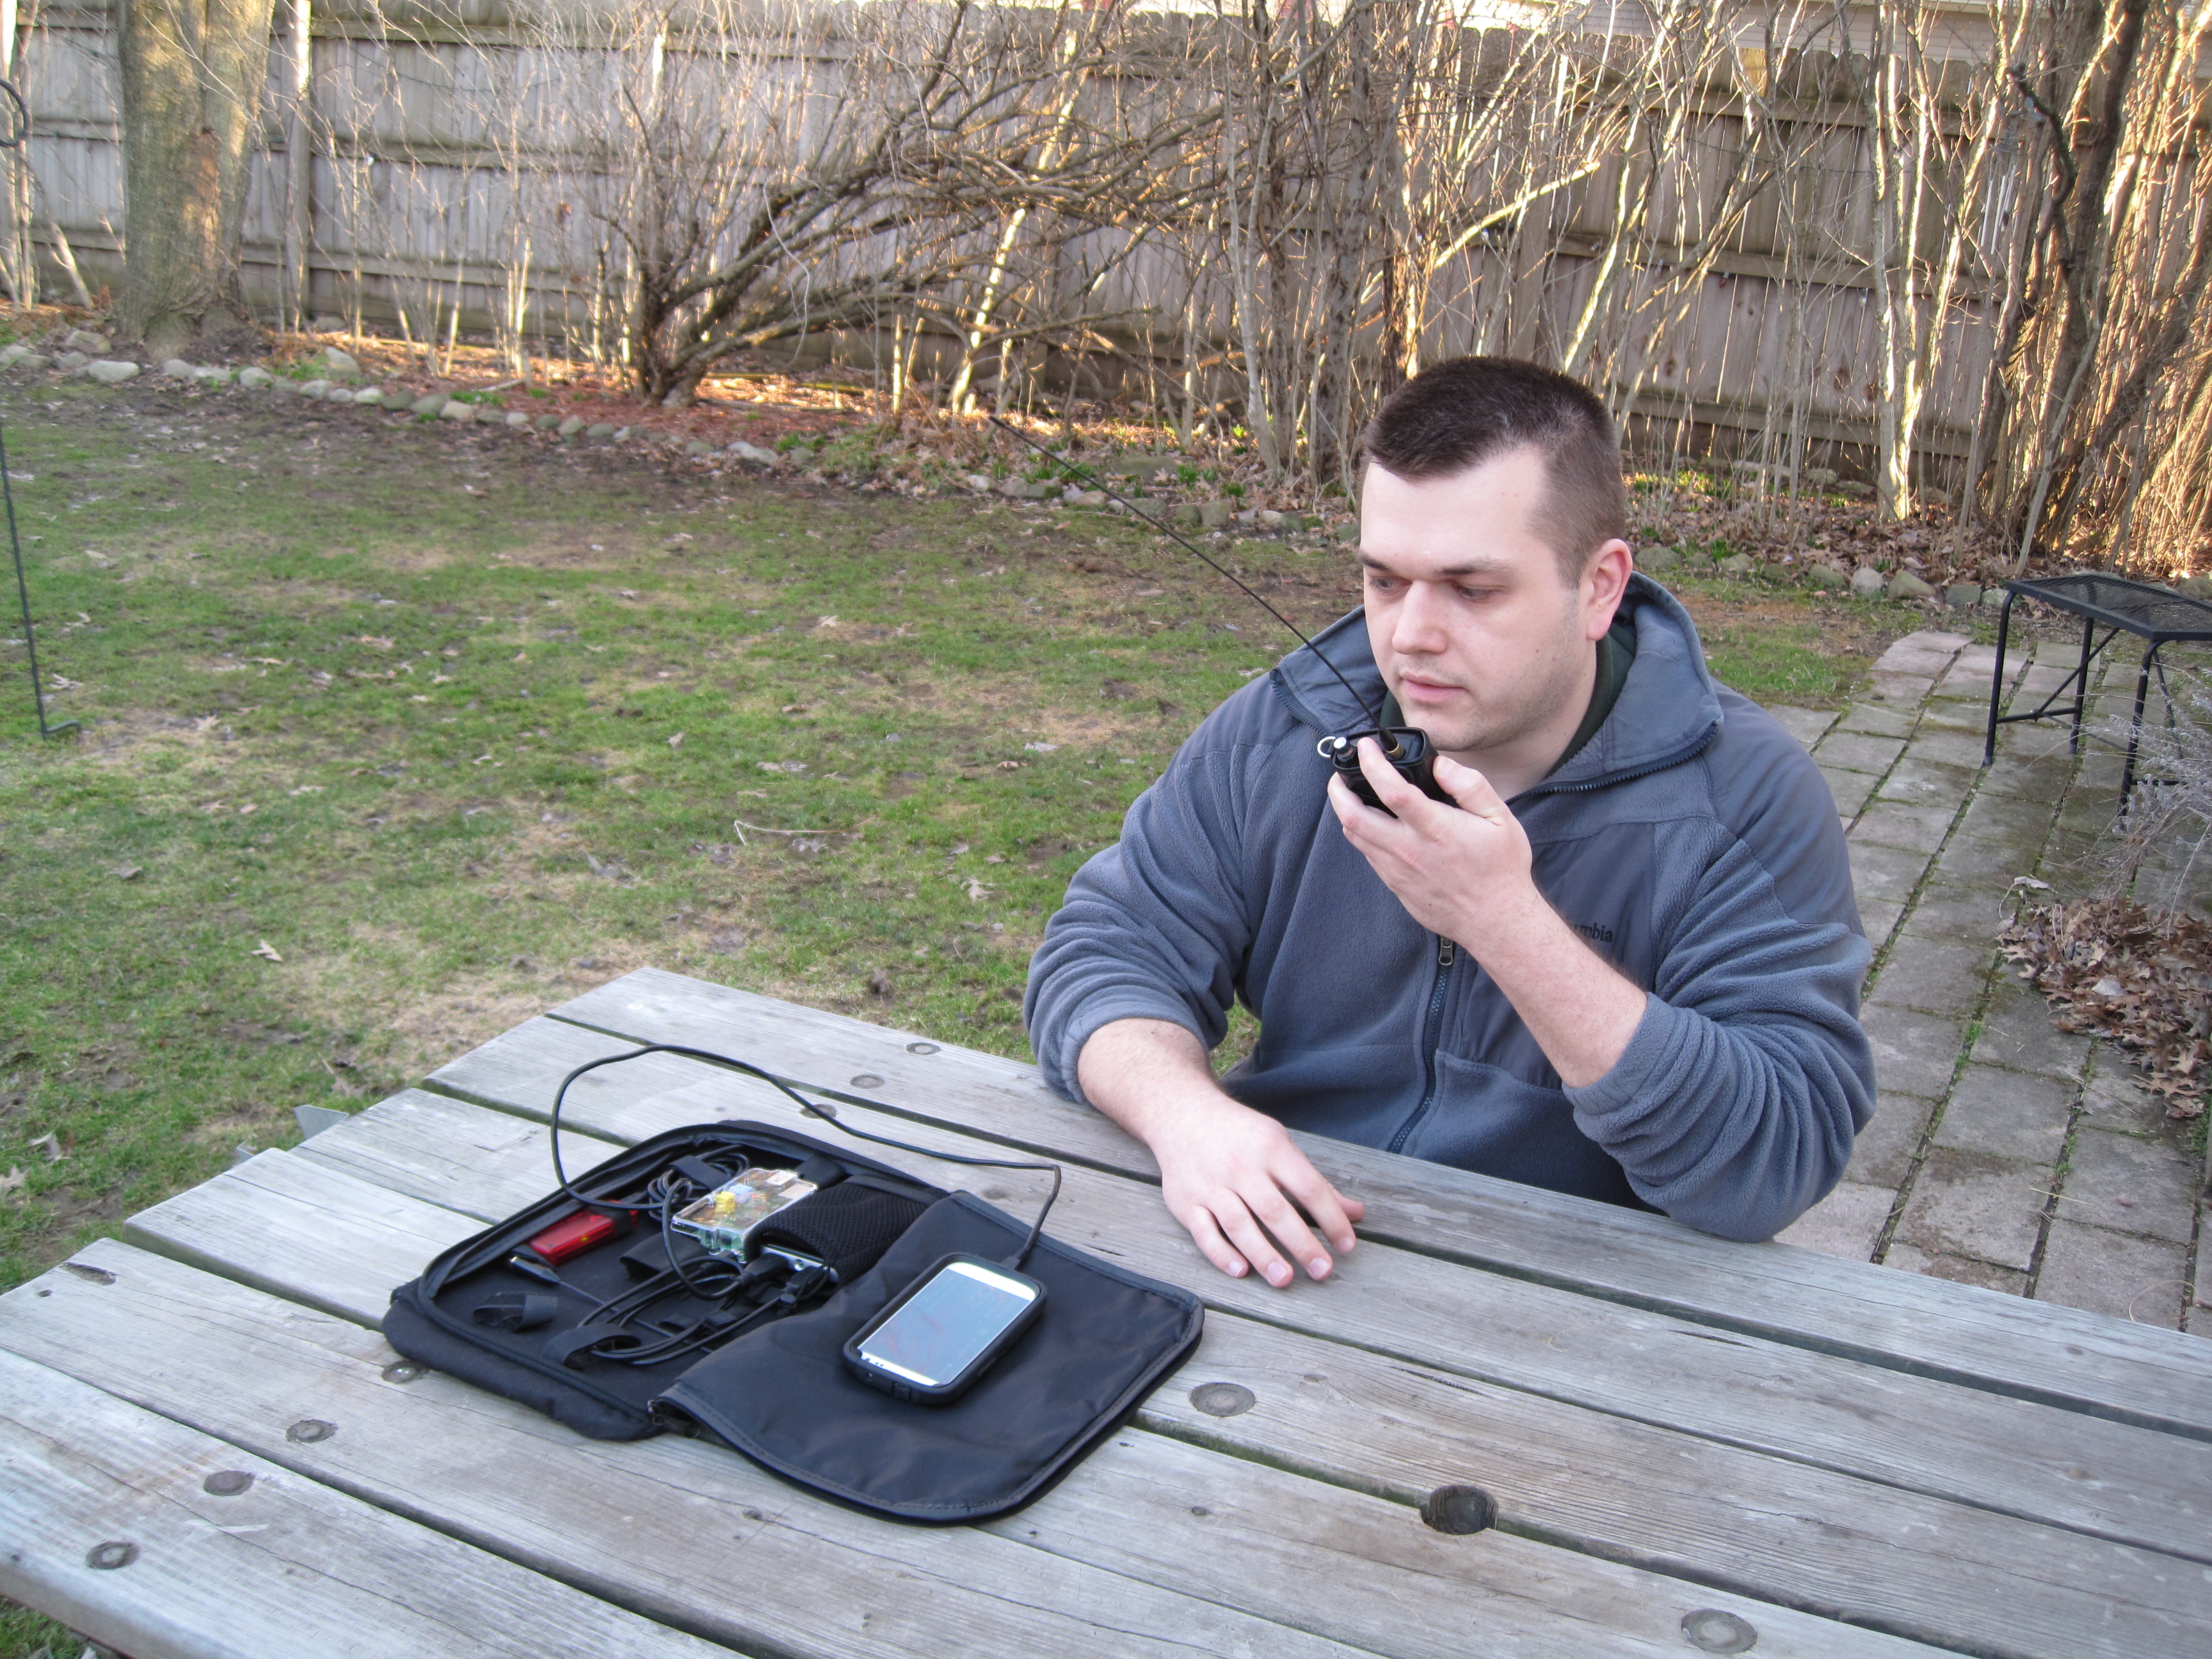
I completed the project and got it up and running in short order.  IMG_0003 
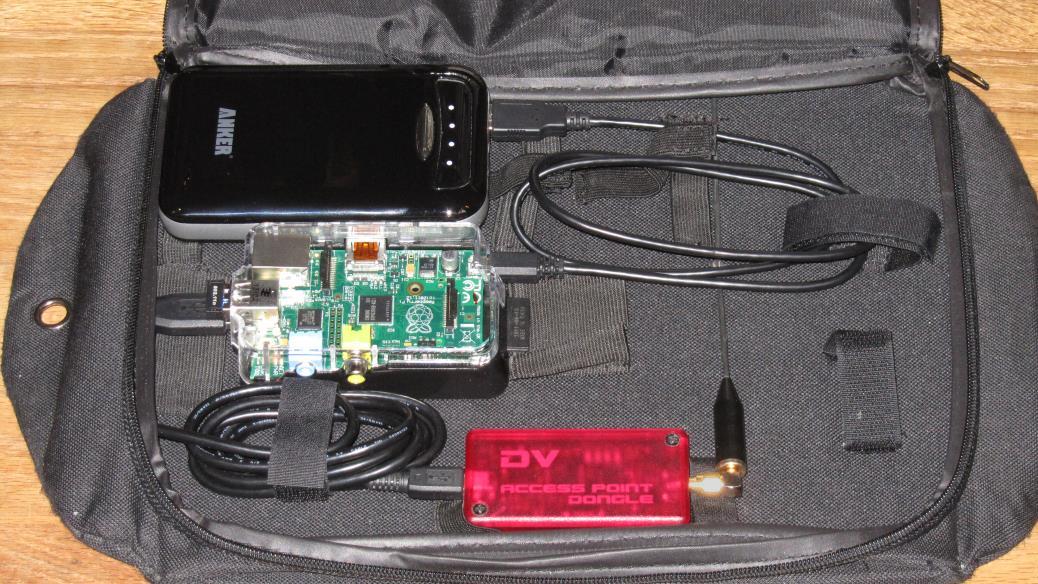
Wow!  I was so amazed I got to experiment with this small, but powerful computer and have a portable D-STAR hotspot I can take with me anywhere.  Using a cell phone for the Internet connection, I am limited to the coverage area of my cell phone provider, big red.  Their coverage is very good and I don’t have many disconnects.  I use a portable charging station (fancy word for “battery pack”) as the power source.  The pack has 2 USB ports so I can run the Raspberry Pi and charge my cell phone at the same time.  I’ve also used my 1A micro-USB car charger to power the Raspberry Pi.  If the setup is on a home network, there is no need to worry about cell coverage or a portable power source.

I’ll leave the video tutorial to Tommy.  I did a detailed post on my site that shows, step-by-step, how I set mine up.  It’s a little more advanced than Tommy’s setup but it fixed an issue I was having.

When I booted the Raspberry Pi and tried to link the DVAP to a gateway, I frequently got a “gateway unknown” error message.  This error means the remote D-STAR system doesn’t exist or is offline.  However, neither was the case.  The problem was the DVAP software was not able to authenticate my callsign with the D-STAR authentication servers.  This happened because the WiFi interface wasn’t fully operational before the DVAP software tried to log me in.  I was running into this error enough for it to be frustrating.  Usually a reboot would work, however a few times I had to reboot 3 or 4 times.  I fixed the issue with a Linux shell script (like a DOS batch file) to make sure the Internet was accessible before the DVAP software is started.  Volá, fixed my problem! 🙂

Additionally, I added to the setup by installing VNC.  VNC (Virtual Network Computing) is a way to view and control the graphical desktop of the Raspberry Pi (or any computer) over a network connection.  Since there are SSH and VNC applications for smartphones, I am able to fully control the Raspberry Pi from my phone with it connected to the WiFi hotspot application.

IMG_7746That’s the first project I did with my Raspberry Pi.  I’ve done a couple other projects and see some other ones I would like to try out.  Right now, I mostly use my Raspberry Pi as a DVAP hotspot.

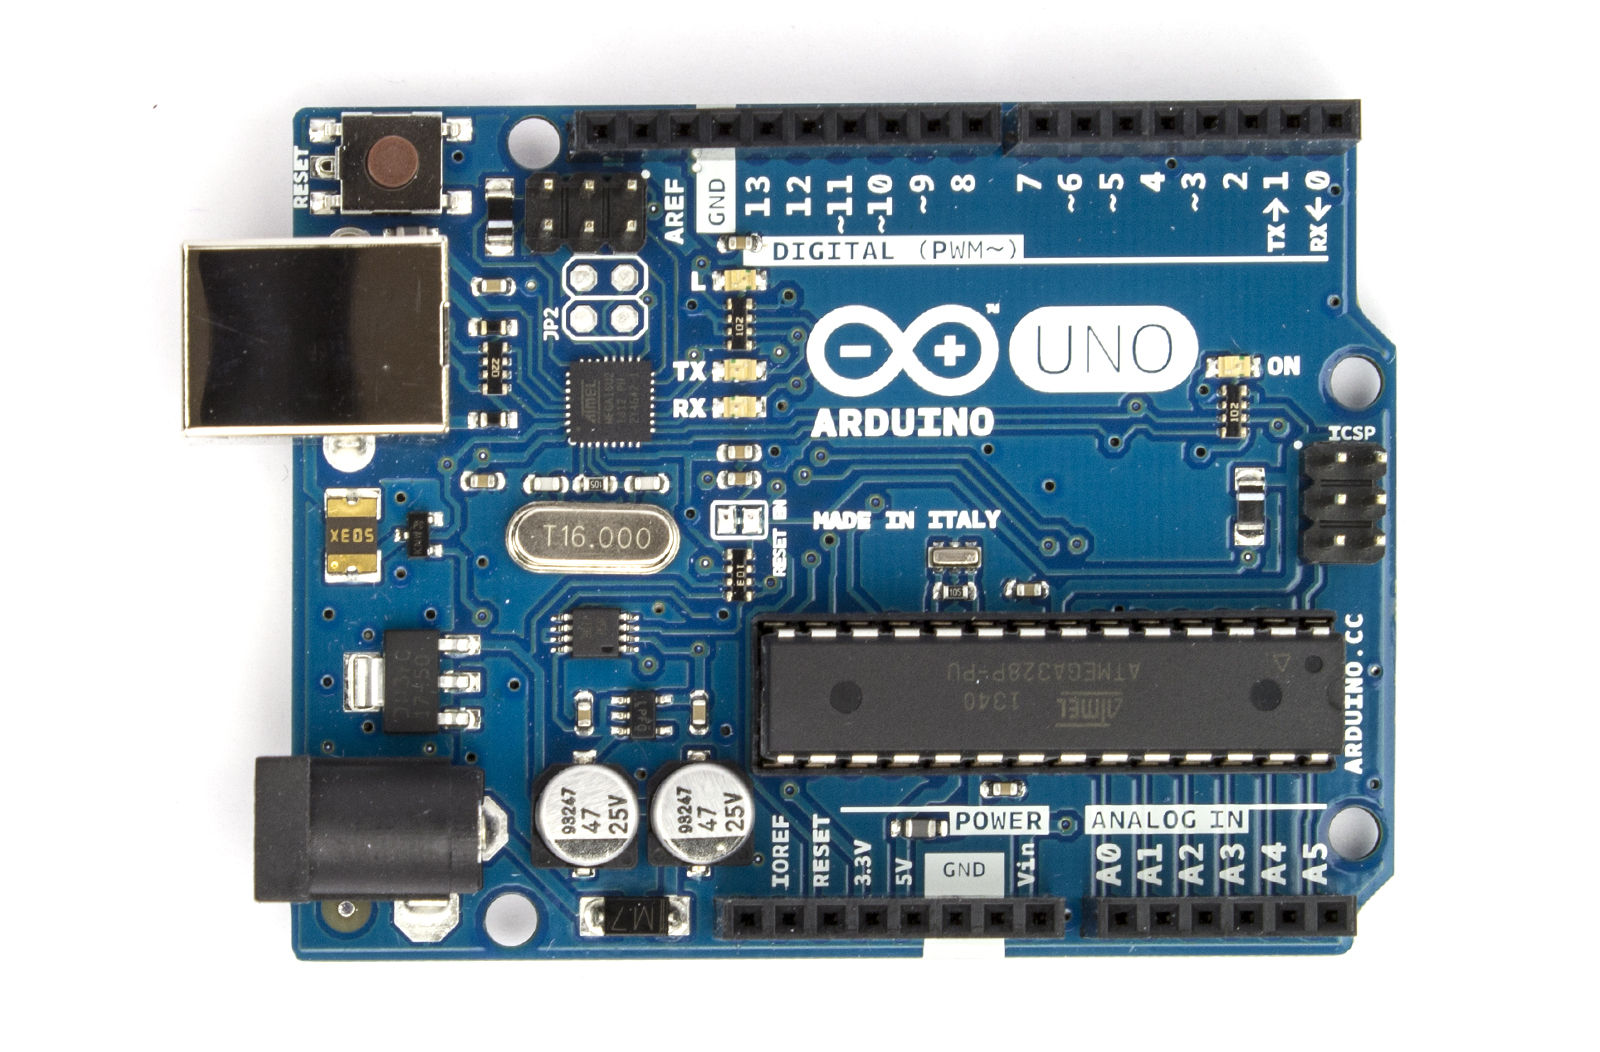
Next time, we’ll take a look at how other hams are using microcomputers in their projects.  If you have any projects using the Raspberry Pi, Arduino, Galileo, BeagleBoard/Bone, or any others, let me know.

DVAP Pi Hotspot

DVAPDongleOne of my interests is digital modes, so I’m a D-STAR fan.  My first project with the Raspberry Pi would be the DVAP Pi Hotspot.  The DVAP normally connects to a computer and has a low power, 10 mW 2m or 440 transceiver that works with a D-STAR radio.  It passes the bits from the Internet & D-STAR network over the air to your D-STAR radio and vice versa.  The radio does the encoding and decoding.

Thanks goes out to the guys over at AmateurLogic.TV.  Tommy, N5ZNO, did a DVAP Pi segment in episode 57 that I used to build mine.

Requirements

Much like Tommy, my DVAP Pi had to be portable (battery operated), headless (no monitor, autostart), use a cellphone WiFi hotspot, and administered through SSH and VNC if needed.  On Windows, I use PuTTY and TightVNC.  On Android, I use JuiceSSH and PocketCloud.

Assumptions

With this tutorial, I’m assuming anyone setting this up is already familiar with D-STAR, registered on the D-STAR network, and familiar with using the DVAP on a PC.

This guide is step-by-step in nature, meant for beginners, with brief explanations of the steps.  It will help to have an understanding of Linux commands and scripting.  Capitalization is important in Linux!

DPRS problem

I was hoping to use the DVAP Pi as a portable DPRS (D-STAR APRS) iGate to report location data to the APRS network.  It currently does not.  It only reports D-PRS data to the gateway system you’re connected to.  No further.  It will show up on the gateway’s DPlus Dashboard but the DVAP Tool nor the gateway/reflector/repeater will not pass location data to the APRS network.

If you come over the RF side of a repeater with a GPS enabled radio, it will pass the location data to the APRS network.  The repeater will not pass location data to the APRS network when transmitting through a DVAP linked to the system.

This is true when the DVAP is connected to a PC or the Pi.

Program versions

I used a Windows 7 64 bit PC. Applications and versions used in this writeup:

  • Wheezy Raspbian 2014-01-07
  • Win32 Disk Imager 0.9
  • PuTTY  0.63
  • TightVNC 2.7.10 64 bit
  • DVAPTool 1.04
  • Mobile Hotspot ? (added after publishing)
  • JuiceSSH ? (added after publishing)
  • PocketCloud ? (added after publishing)

Parts list

Listed below are all the parts needed to get this project working.  It is noted when items can be left out or substituted.

That’s all the parts needed for this project.  Check out the AdaFruit Raspberry Pi page for other hardware that might be useful, like the USB to PS/2 adapter for example.  Many of these parts are included in the Raspberry Pi Starter Pack.

Downloads

01_raspberry_pi_downloads

Go to http://www.raspberrypi.org/downloads and find the “Raw Images” section.

Download the Win32DiskImager and Raspbian image (800 MB).  Save them in your Downloads folder.

Dongle Bits: Raspberry Pi and Arduino

I’m writing a series for The Lake Erie Amateur Radio Association newsletter The Spirit of ’76 and ’88 about microcomputers.  Here is the first article that appeared in the February 2014 edition.  The series also  appears in The Wood County Amateur Radio Club newsletter CQ Chatter April 2014 edition. The series is titled “Dongle Bits.”

Read the rest of the series in the Dongle Bits articles category.


Raspi_Colour_RI first heard about the Raspberry Pi about a year and a half ago on a podcast I watch called Hak5 in episode 1117. The founder created these small, cheap computers to promote computer science skills in schools. I liked the idea because students would be using technology standards like the ARM processor, HDMI, and Linux. ARM processors are used in many embedded systems because of its system-on-a-chip architecture. It may include the CPU, video, audio, memory, and input/output interfaces on a single chip. ARM processors are used in just about every smartphone and tablet.

Two current popular micro boards are the Arduino Uno and Raspberry Pi. Galileo is a recent Arduino clone from Intel using their architecture. Devices like these are innovations coming out of a prolific DIY, maker/hacker, and education communities. Just to point out, “hacker” in the sense that hams were considered the first hackers: modifiers and builders. Not the people that steal your credit card data.

This overview will focus on the Raspberry Pi. I see more projects using it and I chose it because of my familiarity with Linux. The Raspberry Pi Foundation describes the device as “…a credit-card sized computer that plugs into your TV and a keyboard. It is a capable little computer which can be used in electronics projects, and for many of the things that your desktop PC does, like spreadsheets, word-processing and games. It also plays high-definition video. We want to see it being used by kids all over the world to learn programming.
(http://www.raspberrypi.org/faqs#introWhatIs).

7513051848_9a6ef2feb8_o

The “Pi” comes in 2 versions, revision A & B. Rev. A sold for about $25 and had fewer components. Rev. B is about $35 and comes fully assembled. For simplicity, I will talk about rev. B as it is the current standard. It’s a great choice for all kinds of projects due to the price point. If you’re doing a project and blow up your Pi, it’s not going to break the bank replacing it compared a desktop. The specs are:

RaspiModelB
Raspberry Pi Model B Components

• Weight of 1.6oz.
• 512 MB shared RAM.
• Video input connector for the optional Raspberry Pi camera.
• Video output over RCA or HDMI.
• Audio out over HDMI or 3.5mm headphone jack.
• SD card storage.
• 2 USB ports.
• 1 microUSB for power.
• 10/100 Ethernet.
• GPIO header (General purpose in/out).
(http://en.wikipedia.org/wiki/Raspberry_Pi)

On the software side, the Raspberry PI can run various distributions of Linux. A distribution is the kernel operating system distributed with different tools and programs. Weezy Raspbian is the standard distribution. Project authors may further customize a distribution or make one of their own. As an example, the Occidentalis distribution has modules for Pulse Width Modulation (PWM) and servos already loaded.

Arduino Uno R3
Arduino Uno R3

Though the Arduino and Raspberry Pi are similar devices, they are very different. The Arduino boots its firmware which allows access to all features over the USB port. An application can be loaded or have it run an instruction set when it boots. It is very simplistic in that it can read sensor data, process data, and produce output. All of this functionality must be programmed into this micro-controller.

The Raspberry Pi can run a full operating system with internet browsing, word processing, games; making it a micro-computer. The Pi does not have a Real Time Clock (RTC). The time is expected to be set via the Internet. Development and hacking of the Pi is typically software based, but it can do functions via the GPIO pins. It is a better choice for embedded systems and projects that require interactivity or greater processing power. A new project or other operating system can be loaded by changing SD cards.
(http://codeduino.com/information-and-news/hardware/arduino-vs-raspberry-pi/
http://www.makeuseof.com/tag/arduino-vs-raspberry-pi-which-is-the-mini-computer-for-you/)

A common issue with the Pi is that it can be “touchy.” Problems are usually related to peripheral incompatibilities and lack of current. The Pi should have at least a 1A power supply. If more than two USB ports are needed, use a powered USB hub. When purchasing the Pi and associated hardware, my strong recommendation is to check reviews, the verified components list, or use AdaFruit. Everything on that page will work with the Pi. There are great DIY projects and tutorials on AdaFruit.

I have been telling people Google (or Bing, you know, whichever) “Raspberry Pi [your hobby]” or poke around project sites for ideas. You’re bound to find something interesting!

The coming articles in this series will touch on some Raspberry Pi projects and cover other computer related projects.

First post: going to start using this space to geek out

I’ve had this website online for a few years now with some static pages about my interests and hobbies.  Recently did a fresh install of WordPress on this, my personal site.  The new twenty fourteen theme really grew on me and decided to go with it.  I did some reworking of the pages to use featured images and will include more images in pages.  Shutterstock helped me find some amazing, high-quality images to use as featured images.  I really like how it’s turning out.

While I was planning on doing the clean install of WP, I thought I should start to take advantage of the posts feature.  I have been doing some projects others have either asked me to write about or provide details.  Figured this would be a great place to do it and get more use out of WP and the servers.

I don’t have any real plan on how much or what I’ll post.  Most likely things I’m working on.  I like to do step-by-step images and as clean of a setup as possible.  I get frustrated with instructions that are incomplete or have too many assumptions.  These could get lengthy.  My place to geek out.

Ham radio and tech.