More bits
Settings
From this point on, each instance has unique settings. Should a universal change need to be made, it must be done independently on each separate instance.
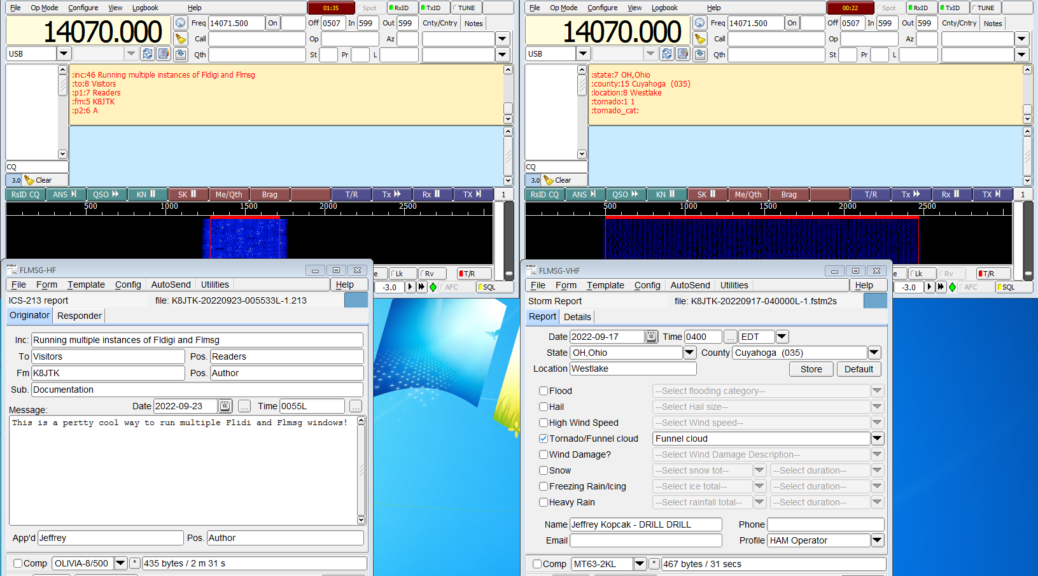
Send Flmsg messages to another instance
Say, for example, a message is received in Flmsg on the VHF instance. How can that message be sent out over Flmsg HF? Once the form is received and opened by Flmsg, the form is located in the ICS\messages directory of each instance.
To send the message from VHF -> HF:
Open flmsg-HF. Flmsg-HF should be open as well.
In Flmsg, click File.
Click Open.
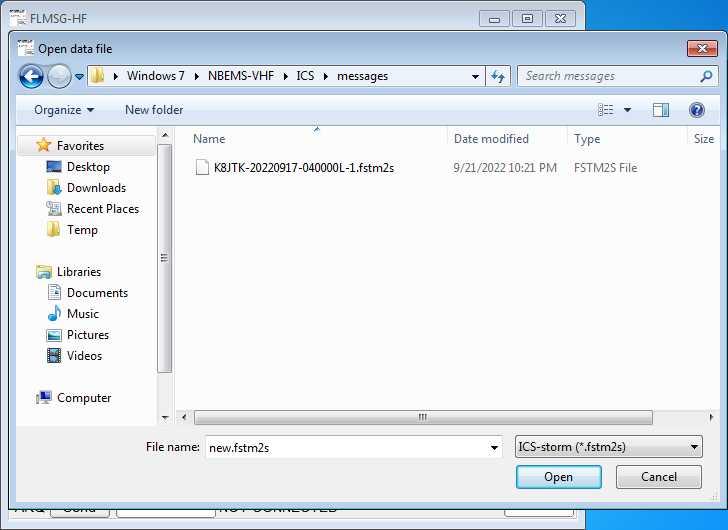 Navigate to the NBEMS folder of the other instance. In this case:
 C:\Users\<Username>\NBEMS-VHF\ICS\messages.
Locate the form by name or sort by date/time.
Click Open.
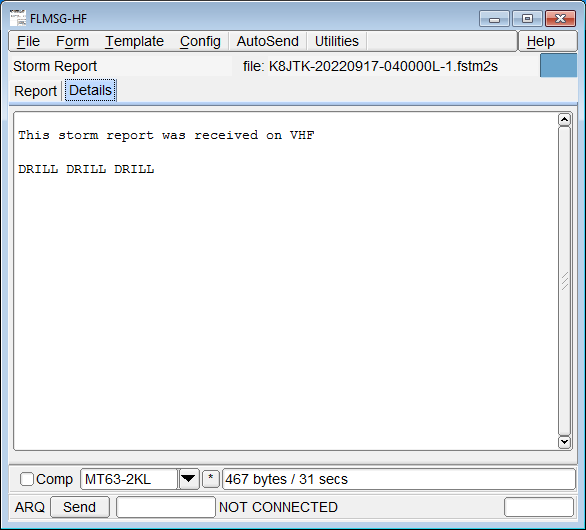 Click AutoSend. The message will transmit through Fldigi-HF.
To send the message from HF -> VHF, use the fldigi/flmsg-VHF instances and C:\Users\<Username>\NBEMS-HF\ICS\messages directory.
Where did the form come from?
It wasn’t always clear from which instance a received message originated by looking at the Flmsg title bar. The received Flmsg window would have the title “FLMSG: x.y.zz.” When I tried appending the “-ti” parameter in Fldigi under NBEMS interface settings, the title was replaced by the date and time the form was received.
Ways to tell which instance received the message:
- In Flmsg, click File then Open. Look at the path in the Open data file dialog.
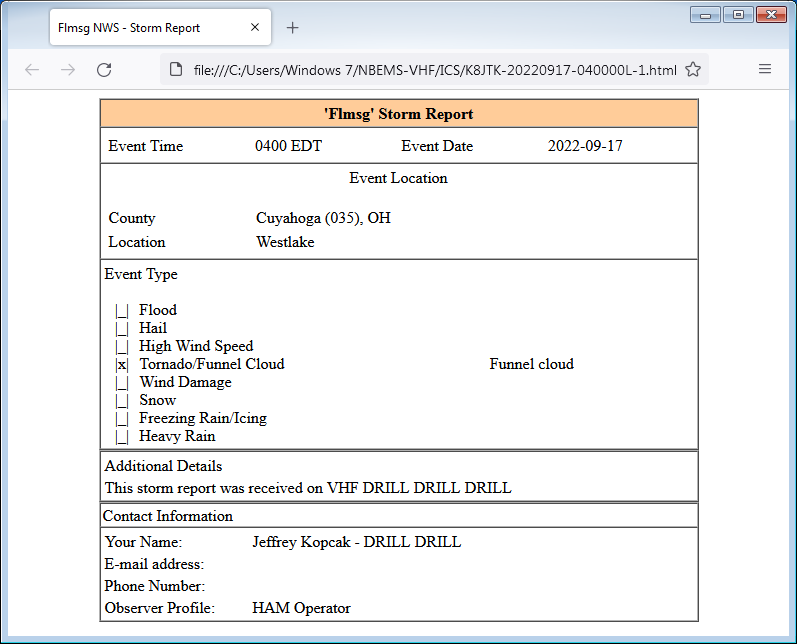
- In the browser window that opens, look at the path in the URL
- Scroll back in the Fldigi receive window
Additional command line options
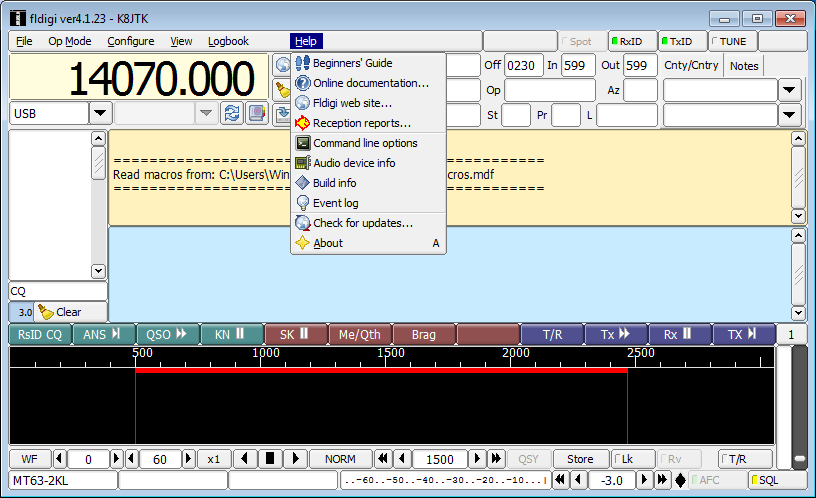
Fldigi suite documentation linked to earlier explains other command line options that maybe useful for other tasks. In addition, there is a reference in Fldigi accessible by clicking Help, then Command line options.
Start menu shortcuts
Changes made to the desktop shortcuts can be made to the start menu shortcuts in addition to or instead of the desktop shortcuts.
The Start Menu shortcuts are often found in:
- C:\Users\<Username>\AppData\Roaming\Microsoft\Windows\Start Menu\Programs
- C:\Users\All Users\Microsoft\Windows\Start Menu\Programs
- C:\Users\<Administrative Username>\AppData\Roaming\Microsoft\Windows\Start Menu\Programs
Where<Administrative Username>is the administrative user of the PC
Updated/new version problem
One of the manageability issues of running multiple instances and then installing a new version of Fldigi/Flmsg, all the shortcuts need to be updated, manually, to the new version.
Example: Fldigi-4.1.20 to Fldigi-4.1.23
Instance names and targets need to be updated from:
Fldigi-4.1.20-HF
"C:\Program Files\Fldigi-4.1.20\fldigi.exe" --config-dir "C:\Users\<Username>\fldigi-HF" --flmsg-dir "C:\Users\<Username>\NBEMS-HF" -ti "fldigi-HF" --xmlrpc-server-port 7372
flmsg-4.0.19-HF
"C:\Program Files (x86)\flmsg-4.0.19\flmsg.exe" --flmsg-dir "C:\Users\<Username>\NBEMS-HF" -ti "FLMSG-HF"
To:
Fldigi-4.1.23-HF
"C:\Program Files\Fldigi-4.1.23\fldigi.exe" --config-dir "C:\Users\<Username>\fldigi-HF" --flmsg-dir "C:\Users\<Username>\NBEMS-HF" -ti "fldigi-HF" --xmlrpc-server-port 7372
flmsg-4.0.20-HF
"C:\Program Files (x86)\flmsg-4.0.20\flmsg.exe" --flmsg-dir "C:\Users\<Username>\NBEMS-HF" -ti "FLMSG-HF"
A workable solution would be to install the program in a “common” directory or other standard naming. This would eliminate the need to update shortcut names and target lines with each new version.
- C:\Program Files\Fldigi-common\
- C:\Program Files (x86)\flmsg-common\
When installing, uncheck the component boxes that create Start Menu Shortcuts and uncheck Desktop Shortcuts. Shortcuts with the same name are created and will overwrite any previous shortcuts.
Use the “common” named directories when naming and updating the shortcut target field.
Fldigi-common-HF or Fldigi-HF
"C:\Program Files\Fldigi-common\fldigi.exe" --config-dir "C:\Users\<Username>\fldigi-HF" --flmsg-dir "C:\Users\<Username>\NBEMS-HF" -ti "fldigi-HF" --xmlrpc-server-port 7372
flmsg-common-HF or flmsg-HF
"C:\Program Files (x86)\flmsg-common\flmsg.exe" --flmsg-dir "C:\Users\<Username>\NBEMS-HF" -ti "FLMSG-HF"
Then install the program again to the its default directories. These will use default configuration directories. This could be used for testing or updating a template.
- C:\Program Files\Fldigi-4.1.23\
- C:\Program Files (x86)\flmsg-4.0.20\