Desktop shortcuts
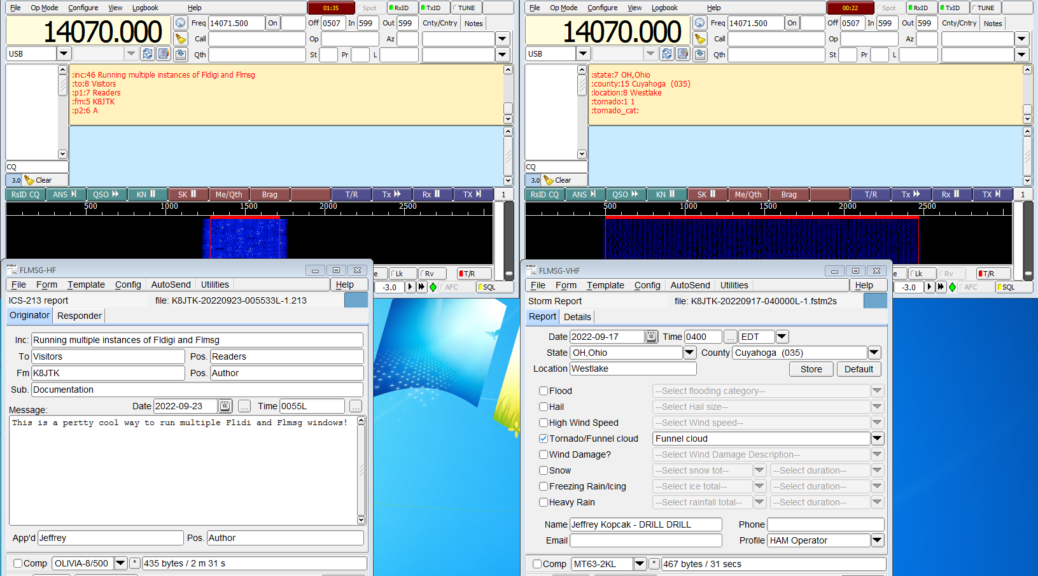
This will create shortcuts for each unique, self contained, instances of Fldigi and Flmsg.
Fldigi
 Right-click the “Fldigi x.y.zz” shortcut. x, y, and zz are specific to the version installed.
Copy the shortcut by right-clicking and selecting Copy or [CTRL]-[C].
Paste the shortcut by right-clicking and selecting Paste or [CTRL]-[V].
Rename the shortcut by right-clicking the shortcut and selecting Rename to Fldigi x.y.zz-HF
Repeat these steps again, renaming the shortcut to Fldigi x.y.zz-VHF
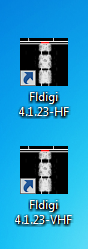 Fldigi shortcuts created.
Flmsg
 Right-click the “flmsg x.y.zz” shortcut. x, y, and zz are specific to the version installed.
Copy the shortcut by right-clicking and selecting Copy or [CTRL]-[C].
Paste the shortcut by right-clicking and selecting Paste or [CTRL]-[V].
Rename the shortcut by right-clicking the shortcut and selecting Rename to flmsg x.y.zz-HF
Repeat these steps again, renaming the shortcut to flmsg x.y.zz-VHF
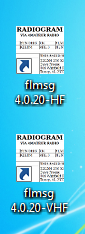 Flmsg shortcuts created.
Fldigi/Flmsg HF instance
 Right-click the Fldigi x.y.zz-HF shortcut.
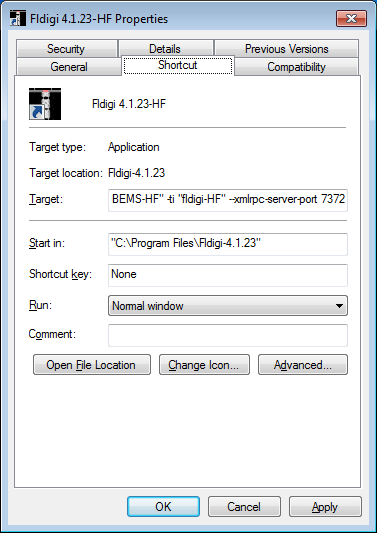
Click Properties. It should default to the Shortcut tab.
Change the Target line to something like:
"C:\Program Files\Fldigi-x.y.zz\fldigi.exe" --config-dir "C:\Users\<Username>\fldigi-HF" --flmsg-dir "C:\Users\<Username>\NBEMS-HF" -ti "fldigi-HF" --xmlrpc-server-port <IP port number>
Example:
"C:\Program Files\Fldigi-4.1.23\fldigi.exe" --config-dir "C:\Users\Windows 7\fldigi-HF" --flmsg-dir "C:\Users\Windows 7\NBEMS-HF" -ti "fldigi-HF" --xmlrpc-server-port 7372
“C:\Program Files\Fldigi-4.1.23\fldigi.exe”: default install location for Fldigi version 4.1.23. Typically, this should not be modified.
–config-dir “C:\Users\<Username>\fldigi-HF”: Fldigi configuration directory location. This directory was created in the Data directories section.
–flmsg-dir “C:\Users\<Username>\NBEMS-HF”: Location for Flmsg files. This directory was created in the Data directories section. This must match the parameters setup in the Flmsg-HF shortcut! If operation of Fldigi with Flmsg is not desired, completely remove this setting.
-ti “fldigi-HF”: sets a window title and labels each instance. This is visual only.
–xmlrpc-server-port <IP port number>: XML RPC port. Used for sending messages from Flmsg to Fldigi. This must be an unused port on the system. I added 10 to the default port of 7362 to get 7372, which I did not see was in use by other Fldigi programs. Each set of Flmsg and Fldigi must have a unique IP port configured and the same port must be configured in both programs. Otherwise an Flmsg transmission might be sent to the wrong Fldigi instance. This must match the Flmsg ARQ xmlrpc Port! If operation of Fldigi with Flmsg is not desired, completely remove this setting.
NOTE: all strings with spaces must be double-quoted otherwise a Fatal error message will be seen when launching a shortcut.
Click OK on Properties.
Start Fldigi x.y.zz-HF by double-clicking the desktop icon.
Make any changes unique to this instance. Most often, these would be: sound card device settings, rig control, transmit mode.
Save settings and close Fldigi-HF.
 Right-click the flmsg x.y.zz-HF shortcut.
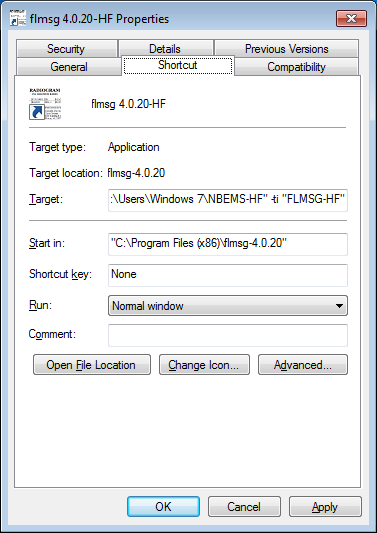
Click Properties. It should default to the Shortcut tab.
Change the Target line to something like:
"C:\Program Files (x86)\flmsg-x.y.zz\flmsg.exe" --flmsg-dir "C:\Users\<Username>\NBEMS-HF" -ti "FLMSG-HF"
Example:
"C:\Program Files (x86)\flmsg-4.0.20\flmsg.exe" --flmsg-dir "C:\Users\Windows 7\NBEMS-HF" -ti "FLMSG-HF"
“C:\Program Files (x86)\flmsg-4.0.20\flmsg.exe”: default install location for Flmsg version 4.0.20. Typically, this should not be modified.
–flmsg-dir “C:\Users\<Username>\NBEMS-HF”: Location for Flmsg files. This directory was created in the Data directories section. This must match the parameters setup in the Fldigi-HF shortcut!
-ti “FLMSG-HF”: sets a window title for labeling each instance. This is visual only.
NOTE: all strings with spaces must be double-quoted otherwise a Fatal error message will be seen when launching a shortcut.
Click OK on Properties.
 Start flmsg x.y.zz-HF by double-clicking the desktop icon.
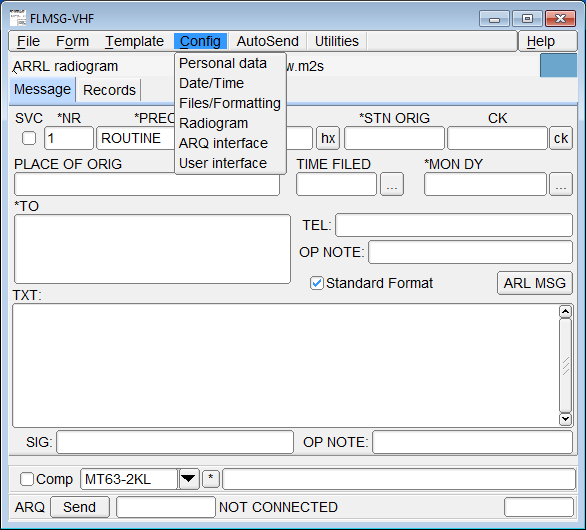
Click Config.
Click ARQ interface.
 Change Fldigi xmlrpc Port to the value of xmlrpc-server-port in the Fldigi-HF shortcut. Example:
 7372. This must match the Fldigi-HF shortcut!
Make any other changes unique to this instance. Most often, this would be: transmit mode.
Save settings and close flmsg-HF. Closing Flmsg and restarting is mandatory for the port change to take effect!
The Fldigi/Flmsg-HF instance is configured!
Fldigi/flmsg VHF instance
 Right-click the Fldigi x.y.zz-VHF shortcut.
Click Properties. It should default to the Shortcut tab.
Change the Target line to something like:
"C:\Program Files\Fldigi-x.y.zz\fldigi.exe" --config-dir "C:\Users\<Username>\fldigi-VHF" --flmsg-dir "C:\Users\<Username>\NBEMS-VHF" -ti "fldigi-VHF" --xmlrpc-server-port <IP port number>
Example:
"C:\Program Files\Fldigi-4.1.23\fldigi.exe" --config-dir "C:\Users\Windows 7\fldigi-VHF" --flmsg-dir "C:\Users\Windows 7\NBEMS-VHF" -ti "fldigi-VHF" --xmlrpc-server-port 7373
See above for parameter descriptions.
NOTE: all strings with spaces must be double-quoted otherwise a Fatal error message will be seen when launching a shortcut.
Click OK on Properties.
Start Fldigi x.y.zz-VHF by double-clicking the desktop icon.
Make any changes unique to this instance. Most often, these would be: sound card device settings, rig control, transmit mode.
Save settings and close Fldigi-VHF.
 Right-click the flmsg x.y.zz-VHF shortcut.
Click Properties. It should default to the Shortcut tab.
Change the Target line to something like:
"C:\Program Files (x86)\flmsg-x.y.zz\flmsg.exe" --flmsg-dir "C:\Users\<Username>\NBEMS-VHF" -ti "FLMSG-VHF"
Example:
"C:\Program Files (x86)\flmsg-4.0.20\flmsg.exe" --flmsg-dir "C:\Users\Windows 7\NBEMS-VHF" -ti "FLMSG-VHF"
See above for parameter descriptions.
NOTE: all strings with spaces must be double-quoted otherwise a Fatal error message will be seen when launching a shortcut.
Click OK on Properties.
 Start flmsg x.y.zz-VHF by double-clicking the desktop icon.
Click Config.
Click ARQ interface.
 Change Fldigi xmlrpc Port to the value of xmlrpc-server-port in the Fldigi-HF shortcut. Example:
 7373. This must match the Fldigi-HF shortcut!
Make any other changes unique to this instance. Most often, this would be: transmit mode.
Save settings and close flmsg-VHF. Closing Flmsg and restarting is mandatory for the port change to take effect!
The Fldigi/Flmsg-VHF instance is configured!