
Remote site configuration
This will configure the server sitting at the remote site to remain persistently connected to the OpenVPN Access Server. You’ll have to be at the site or on the same network as the remote server for this configuration.
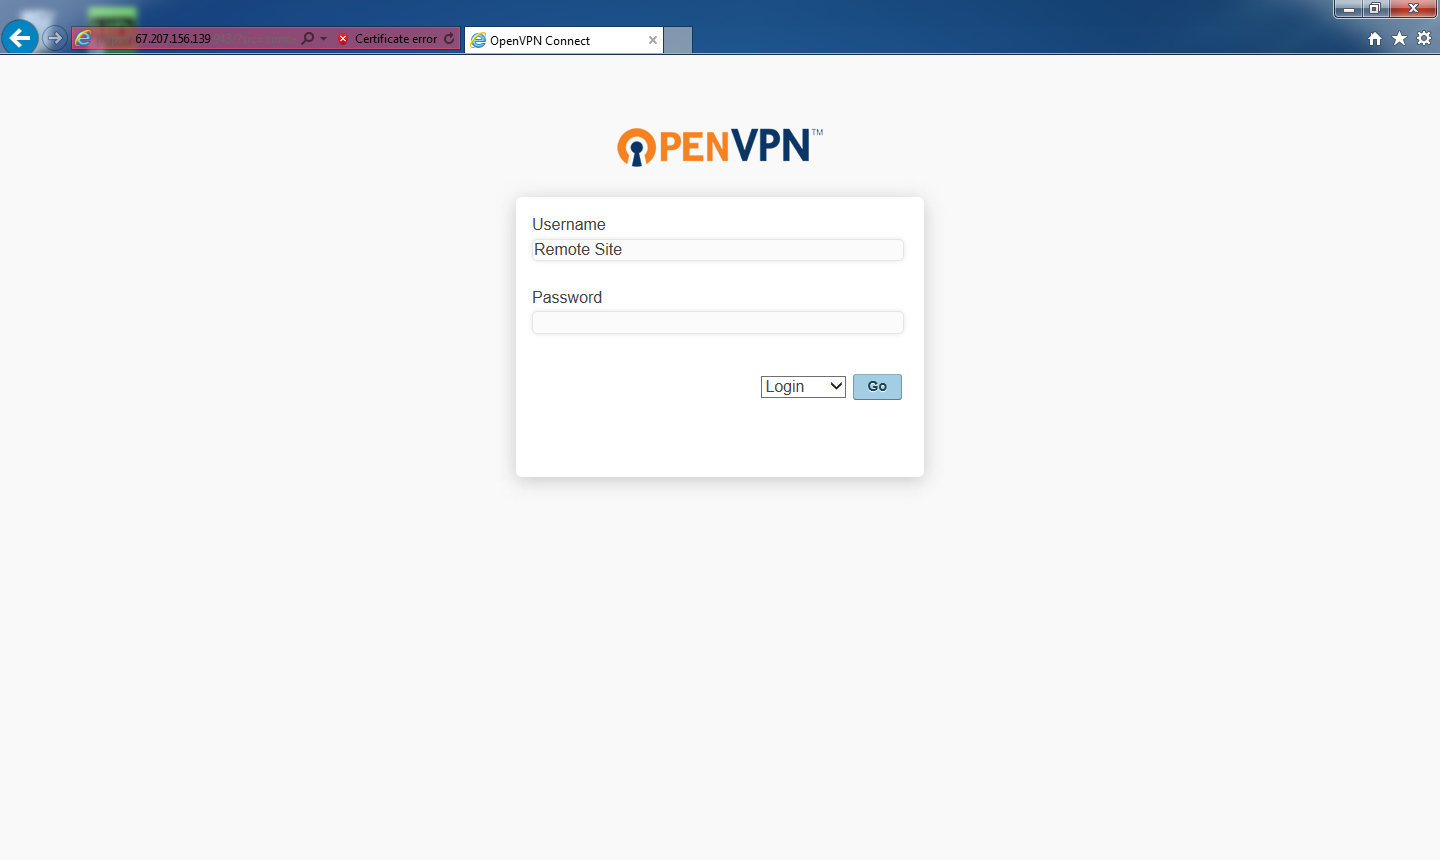 Go back to the web browser and enter the URL for “Client UI.” This would be
https://67.207.156.139:943/
This URL was given at the end of the OpenVPN Access Server configuration.
The certificate error should have been bypassed earlier and not needed again.
For Username, enter
Remote Site
For Password, enter the password that was entered in “More Settings” for the “Remote Site” user.
Select Login.
Click Go.
 Click the Yourself (autologin profile) link under Connection profiles.
 When prompted, Save the file. Save it in your Downloads folder.
 Enter the file name
remote_site
the “.ovpn” extension should be added.
Click Save.
 Download is complete.
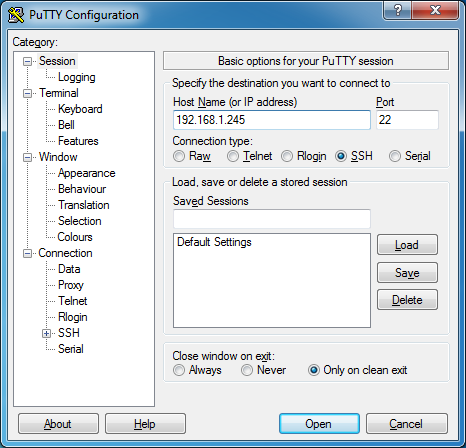 Start Putty.
For Host Name (or IP address), enter the IP address to SSH into the server. In this case: 192.168.1.245.
Click Open.
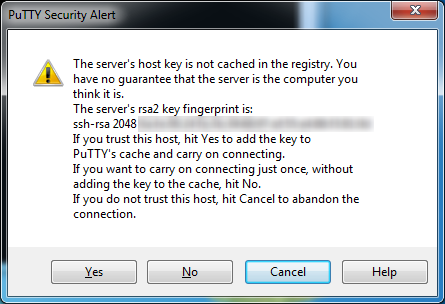 This is not a problem if you’re sure you’re connecting to the correct address.
Click Yes.
 Logon to the server. This information is setup at installation time or provided by your provider.
Though not required for this setup, always keep your server updated. Update the repository archives by entering
sudo apt-get -y update
For a description of this command see the Bridge Server – Download and install OpenVPN Access Server section.
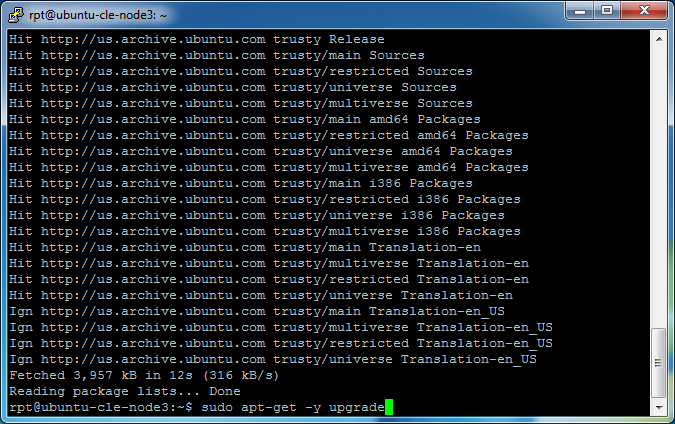 Once complete, update the installed packages by entering
sudo apt-get -y upgrade
For a description of this command see the Bridge Server – Download and install OpenVPN Access Server section.
This may take some time depending on the updates that need to be applied.
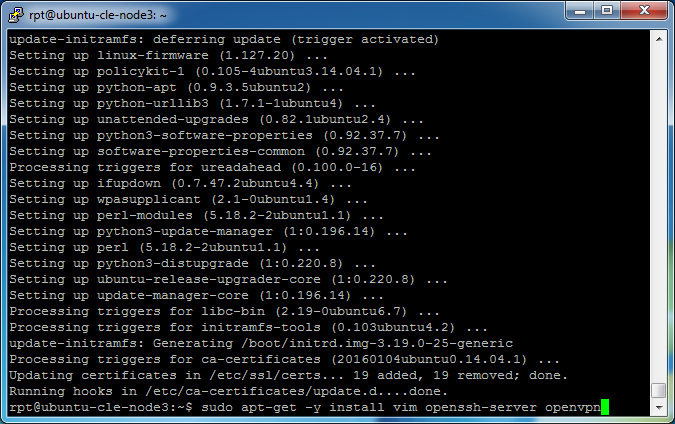 Install a text editor: vim (not required), SSH server (possibly already installed), and openvpn.
sudo apt-get -y install vim openssh-server openvpn
sudo: runs the package manager as the superuser to avoid any permission issues.
apt-get: is the name of the Debian package manager executable.
-y: with this option, apt-get automatically assumes the default answer to any apt-get prompts.
install: download and install the specified package(s).
vim, openssh-server and openvpn: the name of the package(s) to be installed.
 Start Filezilla.
Connect to the server. In this case Host: sftp://192.168.1.245, enter username and password.
Click Quickconnect.
Locate the local directory where the remote_site.ovpn file was downloaded. In this case the Downloads directory.
Drag-and-drop the remote_site.ovpn file from the Local Site file listing to the Remote Site file listing. The directory will be something like /home/username on the Linux machine. This will upload the file to the Linux machine.
Close Filezilla.
Note: the OpenVPN profile file can be downloaded directly to the gateway server if a GUI is available instead of transferring it from another computer.
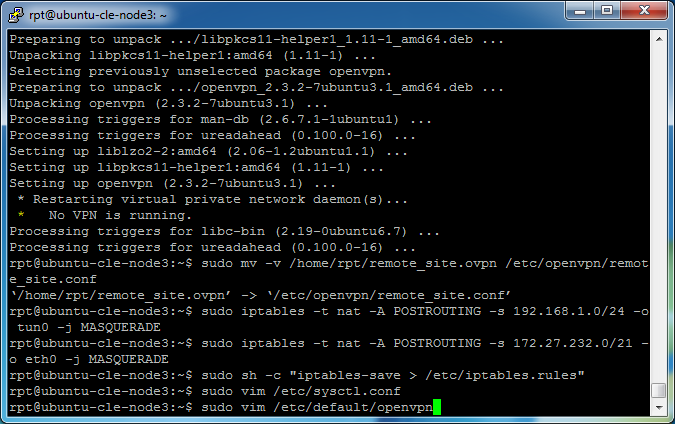
 The remote_site.ovpn file will be moved from the /home/username directory to the /etc/openvpn/ settings directory. Enter
sudo mv -v /home/rpt/remote_site.ovpn /etc/openvpn/remote_site.conf
These commands need to be run as root to avoid system permission issues. Notice the extension changes from .ovpn to .conf. The OpenVPN service automatically starts connections but requires the .conf extension.
Set Linux Firewall rules by entering
sudo iptables -t nat -A POSTROUTING -s 192.168.1.0/24 -o tun0 -j MASQUERADE
sudo iptables -t nat -A POSTROUTING -s 172.27.232.0/21 -o eth0 -j MASQUERADE
sudo: runs the packet filtering administration tool as the superuser to avoid any permission issues.
iptables: packet filtering administration tool.
-t: specifies the packet matching table for the rule.
nat: the modified table is the Network Address Translation (NAT) table when a new connection is encountered.
-A: append the rule to the specified chain.
POSTROUTING: chain that modifies packets as its about to be send out.
-s: specify source ip address/mask.
192.168.1.0/24: network prefix and subnet mask of the remote site network. Check the links in the Remote Site User Configuration section if unfamiliar with this.
172.27.232.0/21: network prefix and subnet mask of the VPN tunnel network.
-o: output interface to send the packet originating from -s.
tun0/eth0: network interface. tun0 is the VPN, eth0 is the wired Ethernet interface.
-j: action to take when the packet matches.
MASQUERADE: replaces the sending IP with the router IP in the packet.
These Firewall rules are only active until the system is rebooted. We will save the new rules and restore them on reboot.
Save the rules, enter (including quotes)
sudo sh -c "iptables-save > /etc/iptables.rules"
IF COPY & PASTING this line, replace the quotes as bash doesn’t recognize the ones the browser renders.
sudo: runs the command interpreter as the superuser to avoid any permission issues.
sh: command interpreter.
-c: reads the entire command from the quoted string.
iptables-save: dumps current iptables rules.
>: where to write the rules.
/etc/iptables.rules: filename the rules are saved to.
Enable packet forwarding, enter
sudo vim /etc/sysctl.conf
 Find the line containing
net.ipv4.ip_forward=1
Place the cursor over the “#” (comment indicator) and press the “x” key to remove it.
Then have VIM save (write) and quit by typing
:wq
Press Enter.
 Modify OpenVPN to automatically connect when the service is started. Enter
sudo vim /etc/default/openvpn
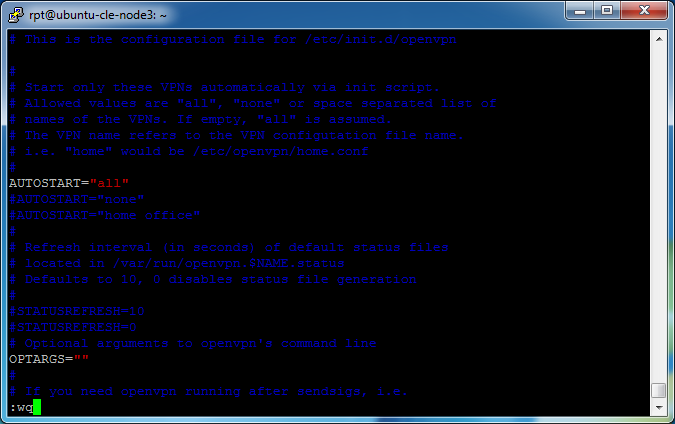 Find the line containing
AUTOSTART="all"
Place the cursor over the “#” (comment indicator) and press the “x” key to remove it.
Then have VIM save (write) and quit by typing
:wq
Press Enter.
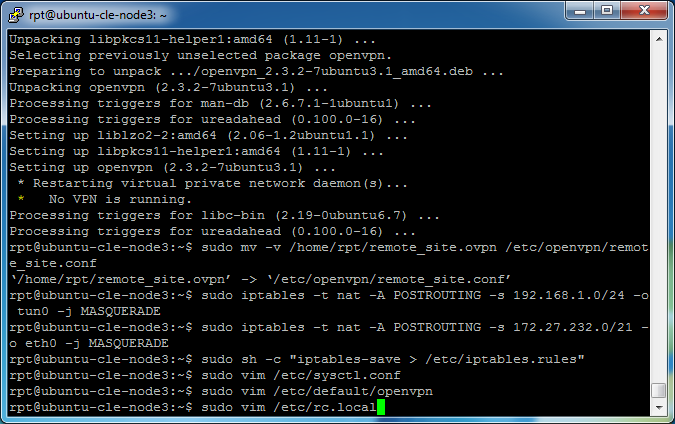 Restore the iptables rules set earlier when rebooted, enter
sudo vim /etc/rc.local
“rc” stands for RunCom or run command. “rc.local” are custom commands executed when the runlevel (mode of operation in Linux) changes.
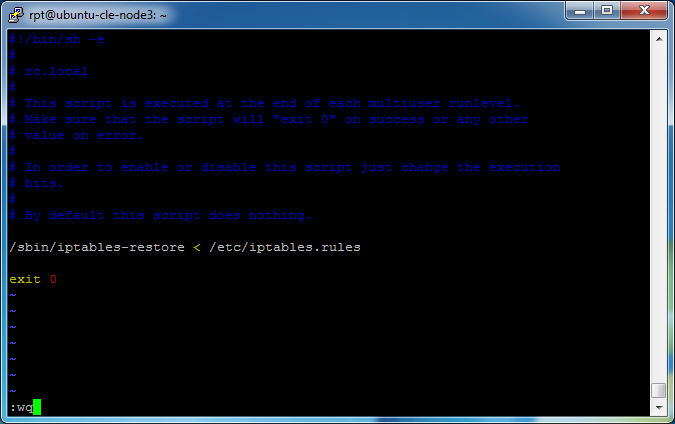 Position the cursor on the blank line before “exit 0.” This is important. It must be before “exit 0.” Put VIM in to insert mode by pressing “i” and you will see
— INSERT —
at the bottom of the window. Hit [Enter]. Paste the following
/sbin/iptables-restore < /etc/iptables.rules
Press [Enter] once more.
Press the Escape key to take VIM out of insert mode.
Then have VIM save (write) and quit by typing
:wq
Press Enter.
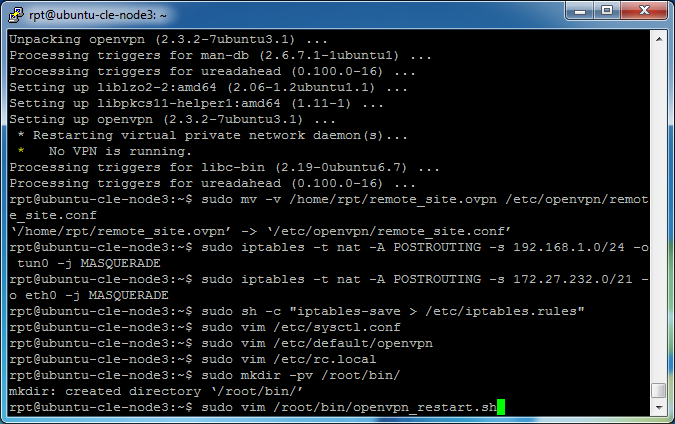 Create a directory to hold an executable script, enter
sudo mkdir -pv /root/bin/
Upload openvpn_restart.sh or create it in the text editor.
sudo vim /root/bin/openvpn_restart.sh
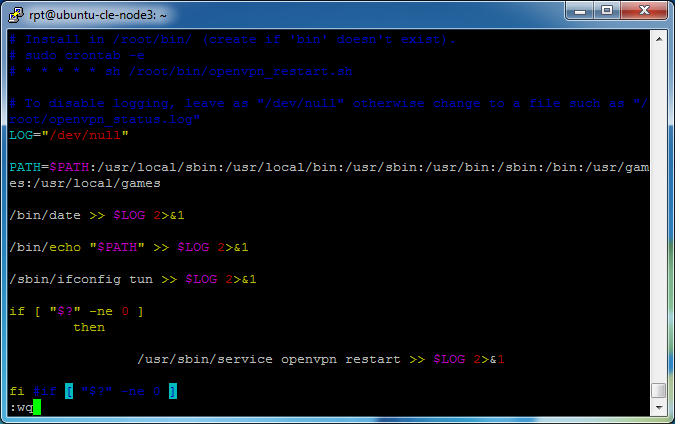 Put VIM in to insert mode by pressing “i” and you will see
— INSERT —
at the bottom of the window. Paste the following
#!/usr/bin/env bash
# Install in /root/bin/ (create if ‘bin’ doesn’t exist).
# sudo crontab -e
# * * * * * sh /root/bin/openvpn_restart.sh
# To disable logging, leave as “/dev/null” otherwise change to a file such as “/root/openvpn_status.log”
LOG=”/dev/null”
PATH=$PATH:/usr/local/sbin:/usr/local/bin:/usr/sbin:/usr/bin:/sbin:/bin:/usr/games:/usr/local/games
/bin/date >> $LOG 2>&1
/bin/echo “$PATH” >> $LOG 2>&1
/sbin/ifconfig tun >> $LOG 2>&1
if [ “$?” -ne 0 ]
then
/usr/sbin/service openvpn restart >> $LOG 2>&1
fi #if [ “$?” -ne 0 ]
IF COPY & PASTING this code, replace the quotes as bash doesn’t recognize the ones the browser renders. Instead upload this script with the name openvpn_restart.sh.
Then have VIM save (write) and quit by typing
:wq
Press Enter.
Using the free version of OpenVPN Access Server is only limited to two licenses as mentioned above. If the connection is interrupted and the bridge server replies with ‘too many concurrent connections,’ the OpenVPN service would die and no longer attempt to reconnect. Likely due to the remote client seeing the connection drop but the bridge server not realizing the previous connection was terminated. This would cause an obvious problem because that meant a manual reboot or manual restart of the OpenVPN service. I’m trying to avoid trips to the remote site!!
This script checks for the presence of the tun (tunnel) network interface. If it doesn’t find it, restarts the OpenVPN service triggering a reconnect attempt. Cron (Linux scheduler), it will run as often as you would like. You can enable logging in the script if you wish. Notes are in the script comments.
 Change the file mode to have executable permissions on the script by entering
sudo chmod -v +x /root/bin/openvpn_restart.sh
Add the script to the list of scheduled tasks by entering
sudo crontab -e
-e: edit crontab.
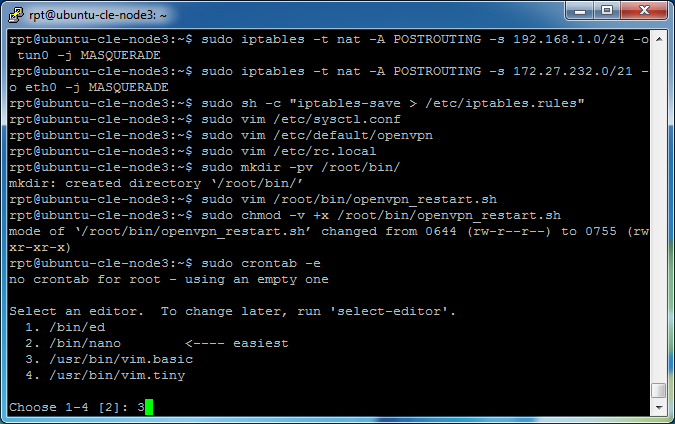 If you need to select an editor on the system, select the number for
vim.basic
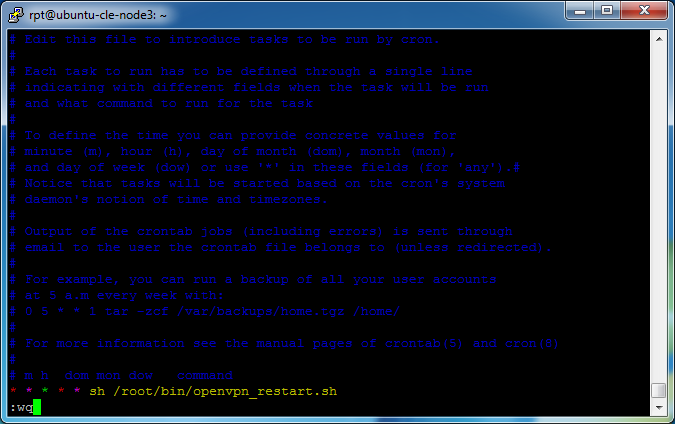 Position the cursor on the last line. Put VIM in to insert mode by pressing “i” and you will see
— INSERT —
at the bottom of the window. Hit the [End] to place the cursor at the end of the line. Press [Enter] to insert a new line. Paste the following
* * * * * sh /root/bin/openvpn_restart.sh
Press the Escape key to take VIM out of insert mode.
Then have VIM save (write) and quit by typing
:wq
Press Enter.
The check script will run every minute. To run the script every 5 minutes, change the line to read
*/5 * * * * sh /root/bin/openvpn_restart.sh
Every hour, change the line to read
0 * * * * sh /root/bin/openvpn_restart.sh
Other cron examples.
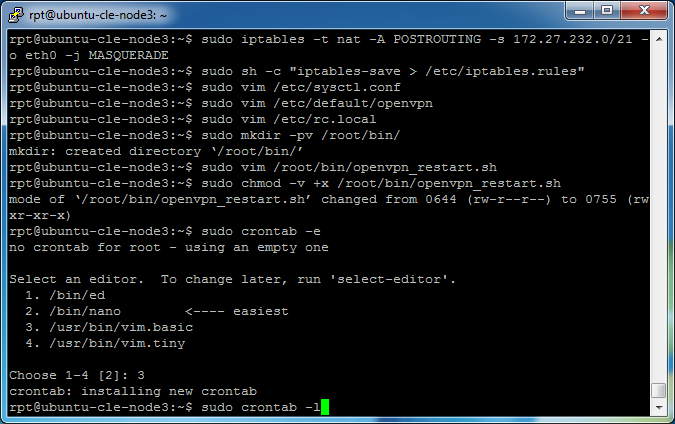 Check the change saved, enter
sudo crontab -l
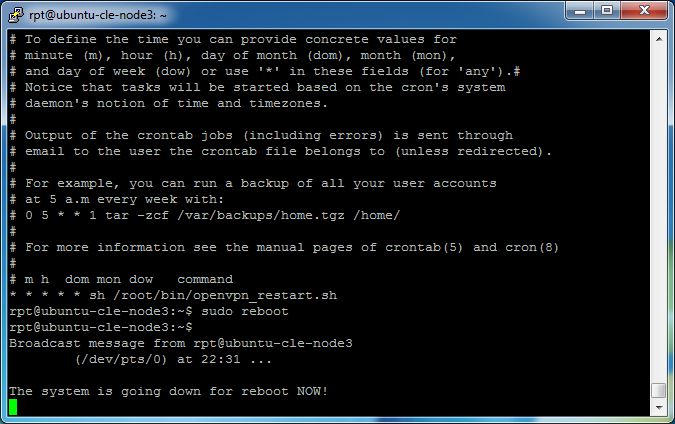 Now reboot the machine
sudo reboot
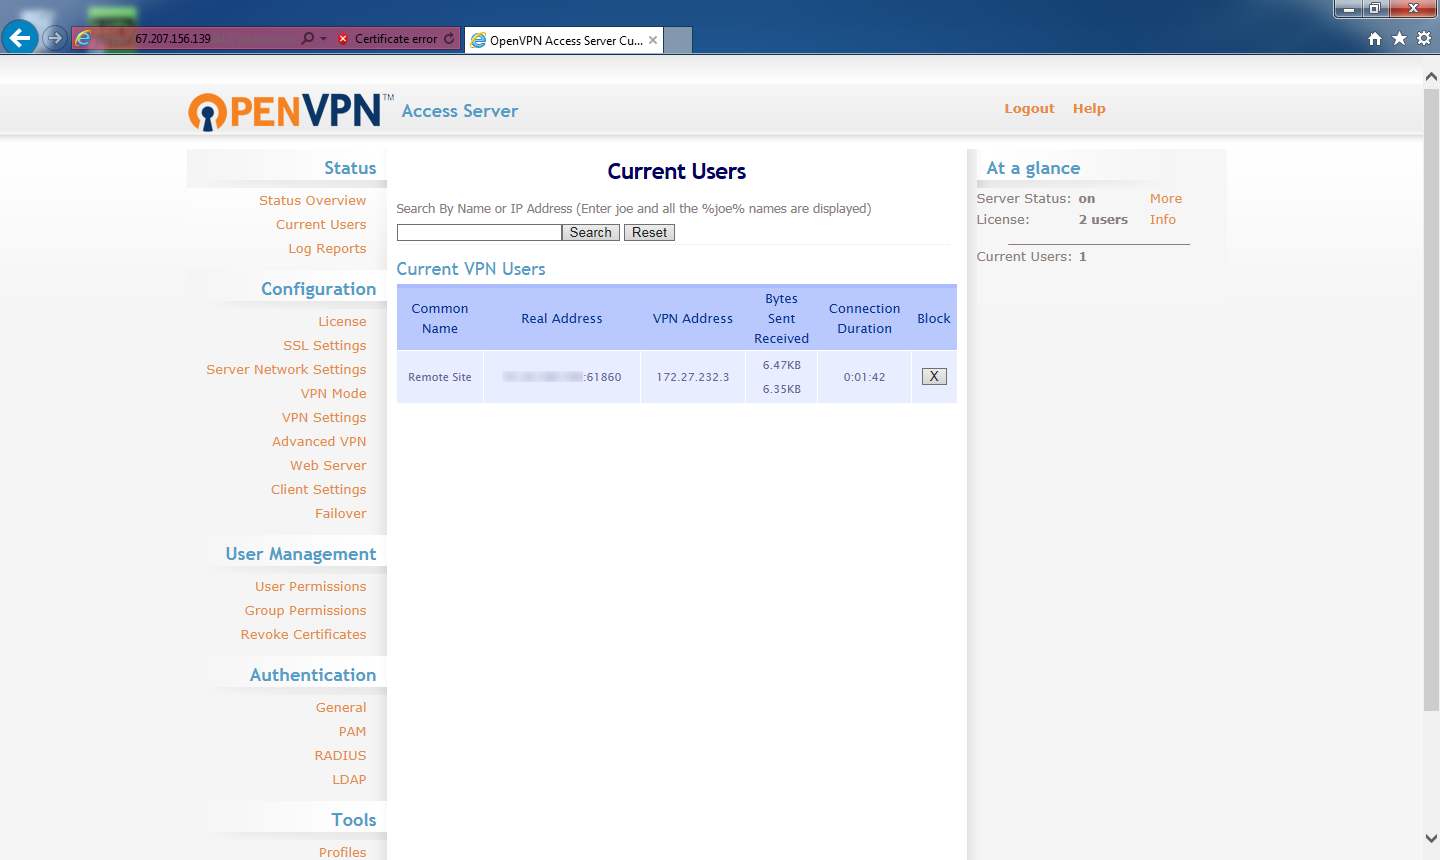 After the reboot, you should now see the Remote Site connection on the status page of the Bridge Server (Admin login and click Current Users).
The Remote Site configuration is now complete!