Tag Archives: Floppy Disks

Ohio Section Journal – The Technical Coordinator – September 2021 edition

One of the responsibilities of the Technical Coordinator in the Ohio Section is to submit something for the Section Journal. The Section Journal covers Amateur Radio related things happening in and around the ARRL Ohio Section. It is published by the Section Manager Tom – WB8LCD and articles are submitted by cabinet members.

Once my article is published in the Journal, I will also make it available on my site with a link to the published edition.

You can receive the Journal and other Ohio Section news by joining the mailing list Tom has setup. You do not need to be a member of the ARRL, Ohio Section, or even a ham to join the mailing list. Please sign up!

If you are an ARRL member and reside in the Ohio Section, update your mailing preferences to receive Ohio Section news in your inbox. Those residing outside the section will need to use the mailing list link above.
Updating your ARRL profile will deliver news from the section where you reside (if the leadership chooses to use this method).
Go to www.arrl.org and logon.
Click Edit your Profile.
You will be taken to the Edit Your Profile page. On the first tab Edit Info, verify your Email address is correct.
Click the Edit Email Subscriptions tab.
Check the News and information from your Division Director and Section Manager box.
Click Save.

Now without further ado…


Read the full edition at:

THE TECHNICAL COORDINATOR
Jeff Kopcak – TC
k8jtk@arrl.net

DSCF5081 K8JTKHey gang,

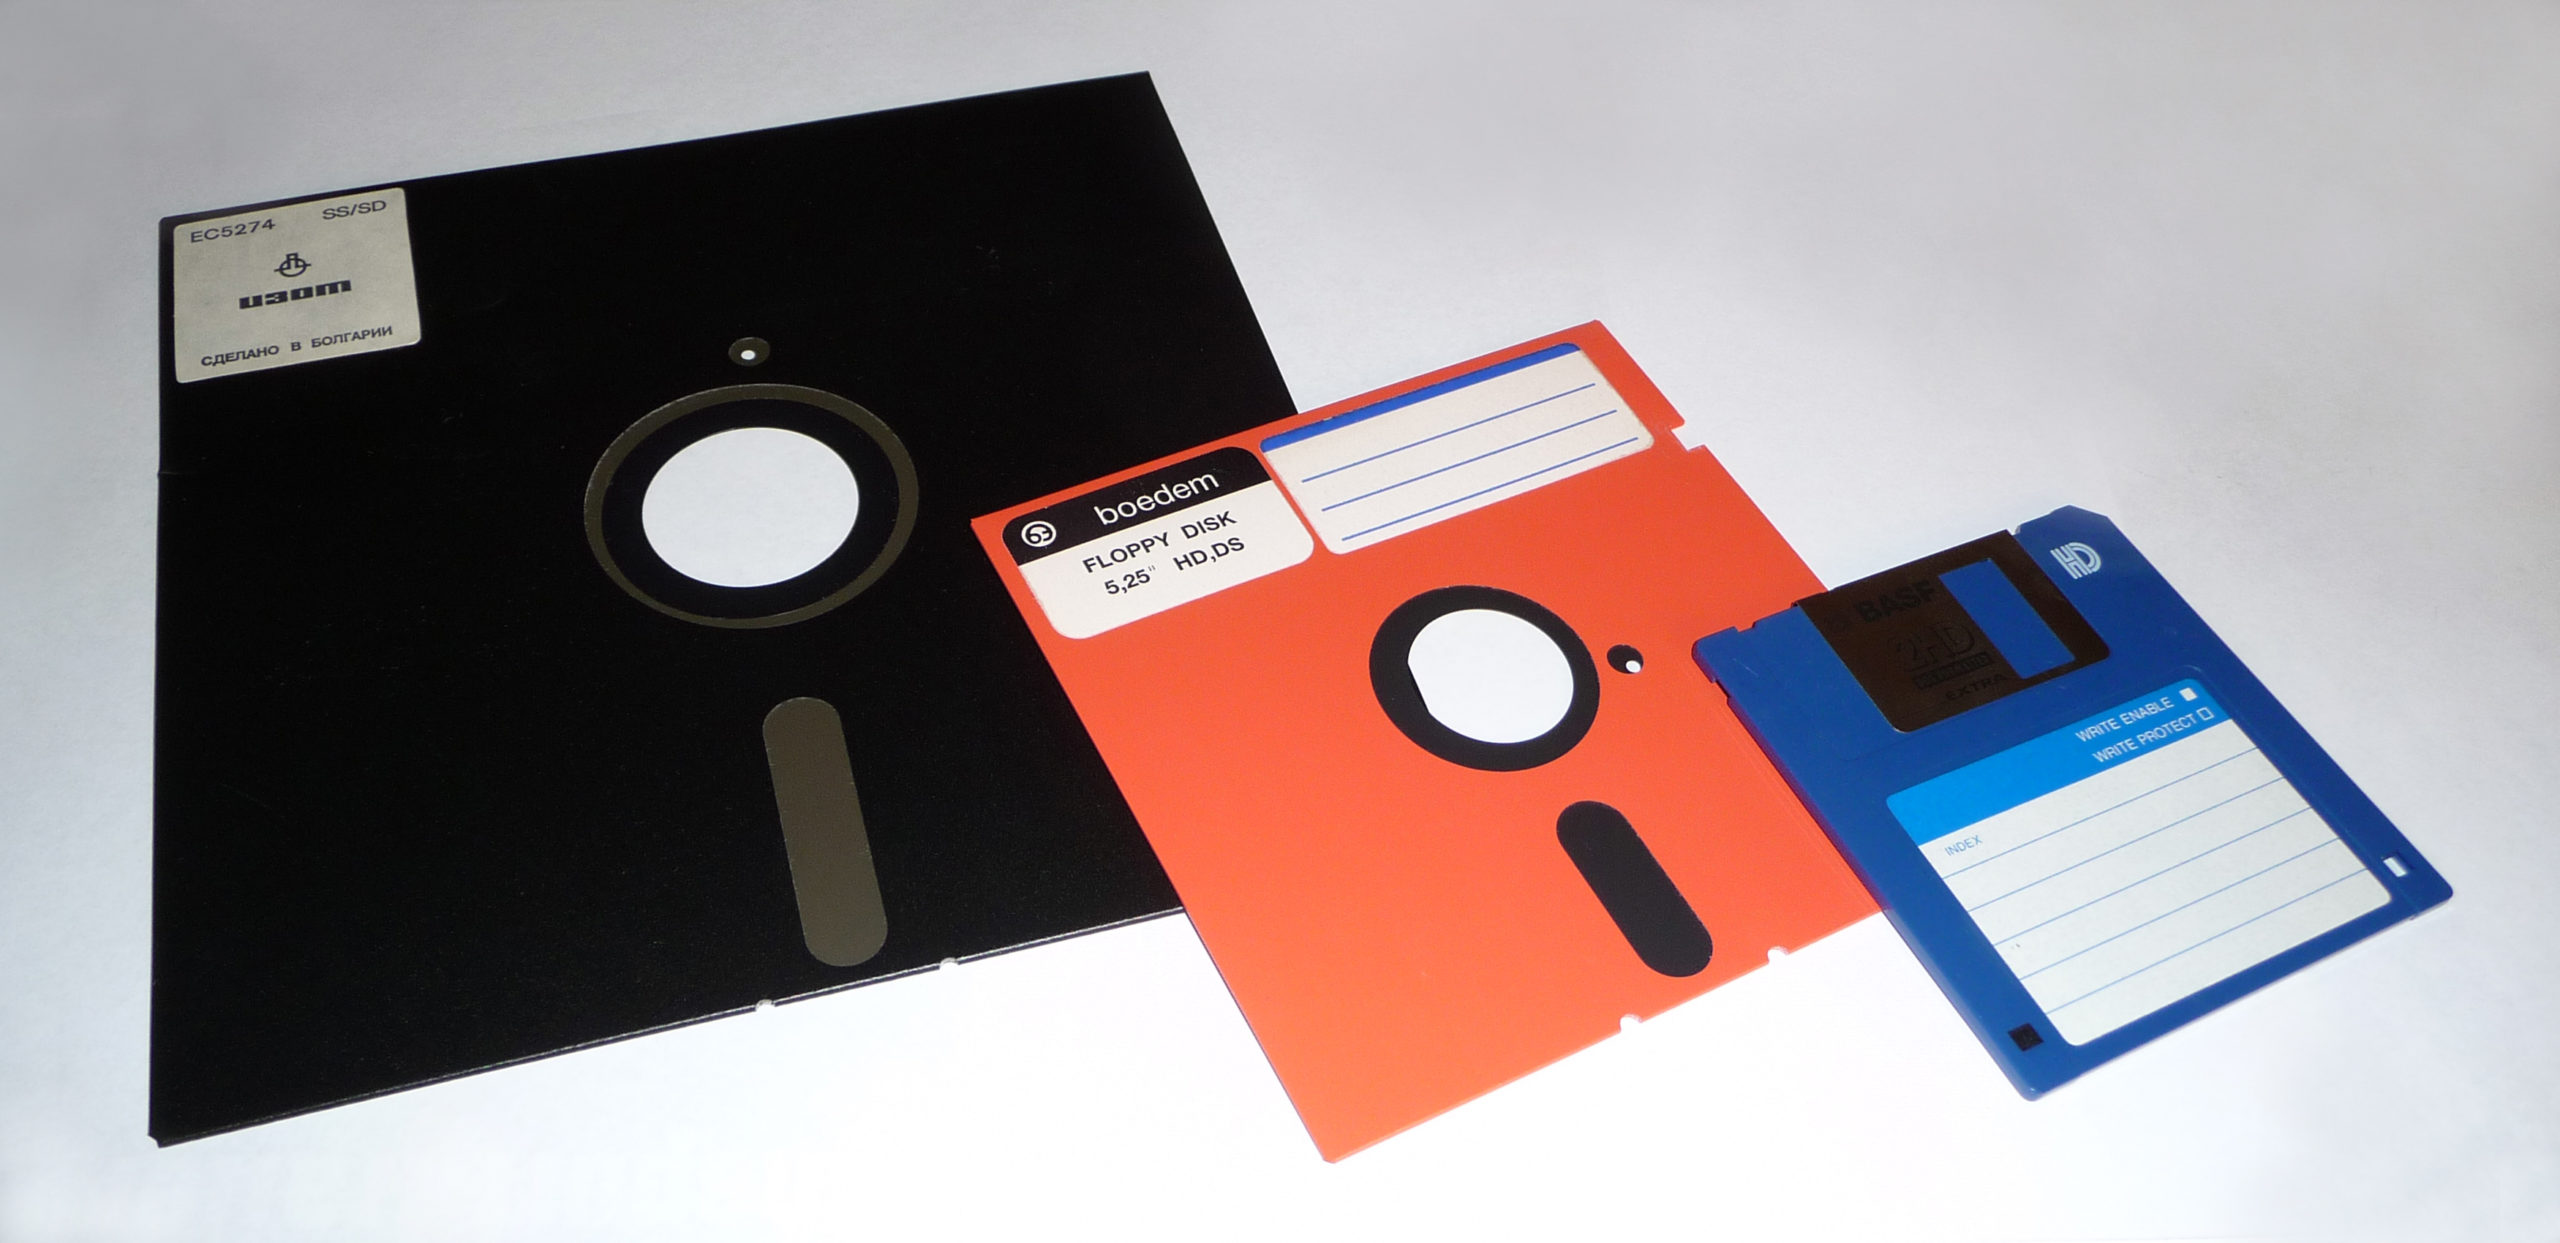
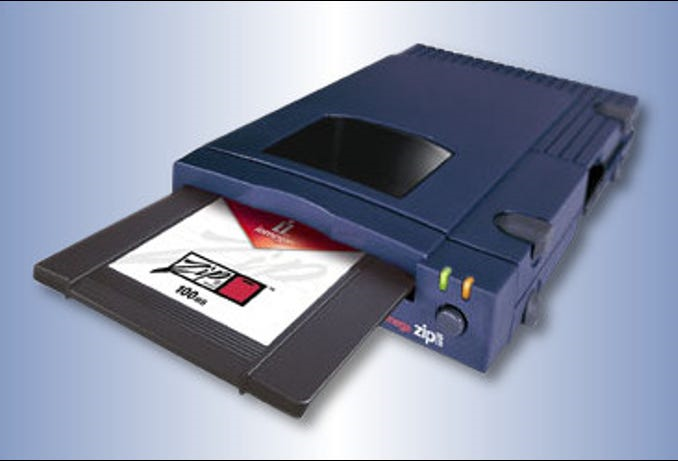
Last time, I talked about a project I am working on to save data from legacy media: floppy disks, ZIP disks, and even optical media. This month I’ll cover programs and methods for creating floppy images and how to access data in image files.

Creating floppy disk images

I needed a program to create IMG files of these floppy disks. WRITE PROTECT disks before inserting into the drive to prevent accidental overwriting of the source disk! In Windows, I couldn’t find a decent program to make floppy images that wasn’t free. My usual go-tos failed me. Ones that did work as expected were WinImage (shareware, 30-day trial) and UltraISO (trialware). UltraISO is for creating, modifying, and saving CD/DVD images but has the ability to create floppy disk images too. Though, for some reason it doesn’t mount those images to the host operating system. dd for Windows is an alternative creator. dd is a well-known Linux conversion and copying program. If those don’t meet your needs, have a look at the Wikipedia article on disk image applications for a list of alternative options.

In general, on Windows, insert the floppy. Start the program. Select Make Floppy Image or Read Floppy. Then save the image file to the hard drive.

In Linux, making a floppy image can be completed with native tools. At the command line:

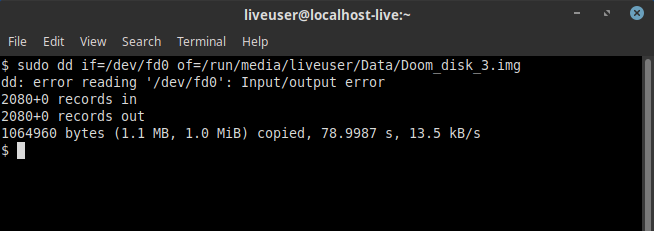
sudo dd if=/dev/fd0 of=/home/username/name_of_floppy.img
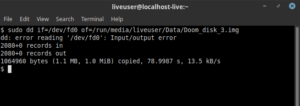
  • Failed to read from floppy using dd. dd will fail when it is unable to read a sector on the disk.

    if: “in file” or device to read data. /dev/fd0 is the common name in Linux for the first floppy disk drive

  • of: “out file” or device to write data

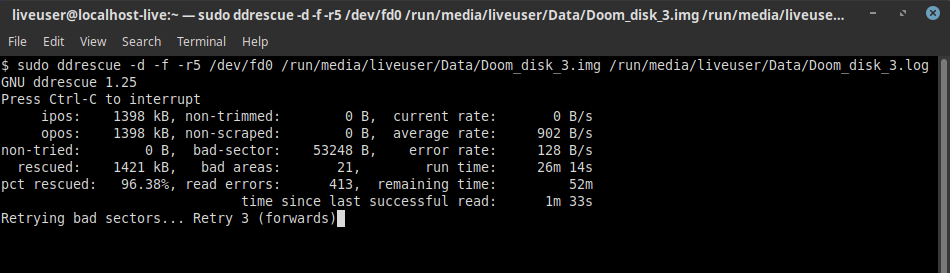
A better option to dd is ddrescue. That program is designed for data recovery, not only for floppies but CD-ROM and other media too. It will identify read errors and automatically re-read bad sectors hoping for one more successful read. Install through the Linux distro package manager. I had plenty of disks with read errors. Many were “oh, no – not that disk!” followed by moments of praying because I really, really, really wanted that data back. Some read errors were soft and easily recoverable. Others required manual intervention. My standard command line (one line):

sudo ddrescue -d -f -r5 /dev/fd0 /home/username/name_of_floppy.img /home/username/name_of_floppy.log
  • -d: direct access to the input file or device
  • -f: forces writing to the output file (if you locked the file somehow and ddrescue couldn’t write to the image file)
  • -rX: number of times to retry (X) reading bad sectors. I would set this value low initially, follow the methods below, and change to something like 150.
  • /dev/fd0: device to read (floppy drive)
  • /home/username/name_of_floppy.img: name and location of the output image file
  • /home/username/name_of_floppy.log: name and location of the output log file. This log is used to track sectors that could not be read, even across multiple runs of ddrescue.
ddrescue in progress

Once the initial run-through is completed with a couple attempts at re-reading bad sectors, the program can be terminated to blow debris off the magnetic medium or completely change out the disk drive. Re-run ddrescue with the exact same command and the program will continue retrying unreadable sectors of the same disk. Changing variables including giving things a rest for a few days will increase the chances of a successful read. One the disk is successfully read the log file is no longer needed.

My solutions for removing debris: bang the floppy physically to dislodge dust or other dirt. Blow across the magnetic medium while rotating to help do the same being careful not to introduce moisture, which would cause more harm. I saw this referred to as the “shake & blow” method. That got me through a good number of iffy disks. Trying another disk drive resolved even more errors. Some disks could not be completely read or there were so many read errors making the chances of total recovery slim to none. A number of excellent suggestions are available on this site dealing with copy protection, disk errors, and drive errors.

When ddrescue is unable to completely read the entire disk, try straight drag-and-drop copying of files to the hard drive. Entirely possible ddrescue is spending time on sectors that don’t contain usable data. Should that not work, let ddrescue do its thing as much as it can, mount the image, then try copying the files from the mounted image. ddrescue may not be able to recover the disk in its entirety but data it was able to read might be usable. I’m still praying for those disks that I considered important.

I didn’t find an exact equivalent to ddrescue for Windows. Searching online indicated a program like BadCopy Pro (trial) or TestDisk (free, open source) might be able to recover disk data at the file level, not at the sector level for the image. I’ve used TestDisk and derivative programs previously but did not test these programs for floppy data recovery.

Mounting and using floppy disk images

Pheew, making floppy images is done and the disks that were able to be read are preserved. Now, how to use these image files? They can be mounted to the operating system acting like another floppy or removable media disk drive. If so desired, the image contents can be modified. I do not recommend nor wanted any modifications to the image file once completed. If possible, through the mounting software, mount the image READ ONLY! Installers often write parameters or logs to the original media. The goal is to leave the img file completely intact as it was read form the original source disk. I didn’t want to risk having images modified from disks that took a long time to recover in ddrescue.

Mounting floppy image in ImDisk

If modifications are needed, make a copy of the image file and mount the copy for writing. If not available through the mounting software, or as an additional layer of protection, I made a file share on my NAS (network attached storage) that is marked read-only in the NAS configuration. After placing image files in that file share, setting the read-only property does not allow any write capability to that file share.

ImDisk (free, open source) worked well for mounting. It allows the device type to be changed or read-only options set to prevent modification. Selecting device type: floppy, check removable media, and check read-only are settings that worked best. In Fedora, I could use the “Disk Image Mounter” in the desktop, or at the command line (one line):

sudo mount -o ro /home/username/name_of_floppy.img /home/username/folder/to_mount_image
  • -o ro: sets the read-only flag
  • -t vfat/iso9660: maybe needed if mount cannot determine the image file system type

Many virtualization and hypervisors such as DOS-box, VirtualBox, and vSphere can mount images naively to a guest operating system.

Next time, CD/DVD disc images, storing images, and finally, the conclusion. Optical media images are harder to create, work with, and copy protection: the bane of my existence.

If you are a new ham or looking to improve your station and you weren’t able to attend Technical Specialist Jason – N8EI’s presentation “Beyond the Baofeng: Thoughts on Equipment Choices for New Hams,” you missed a great opportunity. It was a well throughout presentation and he made some great points. In attendance were a couple non-hams that wanted to become licensed. They were there trying to figure things out and he provided helpful information. The session was recorded and will be posted online at some point. I’m sure that will be announced when it is available. Don’t forget, Technical Specialists are available for presentations at club meetings or hamfests. If your club is looking to fill a program slot, reach out to Jason for his presentation or myself for ideas.

Speaking of hamfests, I made it to two more over the past month: Findlay Hamfest and the Cleveland Hamfest and Computer Show. At Findlay, I felt it was well attended. Not the numbers they’ve seen in the past, likely due to the on-going state of the world, but I was pleasantly surprised. I spent some money on connectors, couple gadgets, and found another power supply for my universal battery charger. Since it’s not available anymore, I wanted a backup incase the current one stops working. Could have spent a lot more money as I’m starting to look at smaller formfactor PCs – and they had a couple. Definitely saw a number of the disk drives I talked about in last month’s article. Good place to find them if you need ’em, just sayin’! Attendance seemed good, considering, at Cleveland too. That one is more of a social event for me as it’s my home turf and I run into a lot of hams I haven’t seen in some time. I also attended the presentation on one of my favorite linking modes, AllStar. All-in-all, two strong hamfests I recommend attending next year.

Thanks for reading and 73… de Jeff – K8JTK

Ohio Section Journal – The Technical Coordinator – August 2021 edition

One of the responsibilities of the Technical Coordinator in the Ohio Section is to submit something for the Section Journal. The Section Journal covers Amateur Radio related things happening in and around the ARRL Ohio Section. It is published by the Section Manager Tom – WB8LCD and articles are submitted by cabinet members.

Once my article is published in the Journal, I will also make it available on my site with a link to the published edition.

You can receive the Journal and other Ohio Section news by joining the mailing list Tom has setup. You do not need to be a member of the ARRL, Ohio Section, or even a ham to join the mailing list. Please sign up!

If you are an ARRL member and reside in the Ohio Section, update your mailing preferences to receive Ohio Section news in your inbox. Those residing outside the section will need to use the mailing list link above.
Updating your ARRL profile will deliver news from the section where you reside (if the leadership chooses to use this method).
Go to www.arrl.org and logon.
Click Edit your Profile.
You will be taken to the Edit Your Profile page. On the first tab Edit Info, verify your Email address is correct.
Click the Edit Email Subscriptions tab.
Check the News and information from your Division Director and Section Manager box.
Click Save.

Now without further ado…


Read the full edition at:

THE TECHNICAL COORDINATOR
Jeff Kopcak – TC
k8jtk@arrl.net

DSCF5081 K8JTKHey gang,

PSA: make copies of old computing media now before that data is lost for good. Those of us that are old enough to know or remember what floppy disks are – and no, it’s not the 3D printed version of the save icon! This is my adventure in preserving legacy media.

Floppy disks, simply “floppy” or “disk”, was a data device based on usage of a flexible magnetic storage medium. Systems dating back to the Commodore utilized floppies and other formats such as cassette tapes. PCs first used 8-inch floppy disks, then 5 1/4 or “five-and-a-quarter-inch disk,” finally 3 1/2 or “three-and-a-half-inch disk.” Most who are my age remember the 3.5″ floppy because it was a very common storage medium for transporting research, papers, and data between home and school. Never had any 8″ floppies. I’ve been around computers longer than most my age and have a couple 5.25″ disks.

Later in high school and college (through about 2005), advances in storage technologies allowed for lager capacities at roughly the same size. The Zip disk was still considered a floppy but had rigid housing to protect the medium at about the same size as a 3.5″ floppy, though twice as think. Zip disks could store 100 MB versus the 1.44 MB of the 3.5″ floppy. Writable CDs became affordable as anyone could now “burn” an optical disk with a storage capacity of 650-700 MB. DVDs for videos and large capacity 4.7 GB storage were standard mid-to-late 2000’s. Those have since been superseded by multi-gigabyte USB solid-state and “cloud storage.”

If you’re like me and hung on to those floppies because they still have old games, maybe using them for document or picture storage – for some reason, or old programs you would like to use again. I started this project as I was sorting through old computer equipment and it was probably past time to preserve the data. That is, if they could still be read. Since I was going through this work of preserving data on floppies, I decided it was probably time to save CD-ROMs and DVD-ROMs as well. In theory, medium, especially optical, should last a good long while. However, all medium will degrade over time. It’s also a factor of how the disks were stored, the quality of the drive that wrote the disk, cleanness of the head, quality of the diskette, reading drive aligns with written tracks, to name a few.

Being anywhere from 15-25 years old or more, another reason for doing this is because new computer systems (desktops/laptops) are not coming with devices to read legacy media. The new laptop I received from work doesn’t even have standard USB (A) or HDMI ports! Most keyboards, mice, USB drives, image scanners, SDR dongles, etc. still use that type of port. This machine only comes with USB-C and I need an assortment of dongles to connect standard keyboards, mice, and monitors to the new laptop. They took a cue from Apple MacBook.

While I still have 5.25″ disks, it was a much small number. Probably under 15. 3.5″ disks, I probably have 150 – 200 laying around. Whether I got lucky, the drive/medium are of better quality, or better error correction/recovery, I had no problem reading the 5.25″ disks. I thought: older medium, more problems. That was not true in my case.

Standard disclaimers: copying of some software (though the company may be long gone out-of-business), is still considered piracy – though highly unlikely really anyone cares. You are free to do with this information as you wish.

Locating drives and media

First, locate legacy media (floppies, Zip disks, CD/DVD-ROMs) to be preserved. If labeled correctly, you might be able to tell right away which ones are worth saving. Things you or your kids did when they were younger might be worth saving, but that old accounting program, probably not. Emulation and virtualization technologies have come a long way and is quite possible to get those old programs running again with a little effort. That’s another article.

Next – locate a device to read that media. Throughout the years, I’ve hung on to a handful of old floppies, Zip, and, CD/DVD drives. Before throwing in the towel this early, consider that it might be easier than you think to locate a drive – should one not be readily available. A floppy disk drive, floppy cable, and old motherboard with a floppy controller is all you really need.

8-inch, 5¼-inch, and 3½-inch floppy disks (Wikipedia)

To find 8″ drives, you’re probably going to eBay, computer surplus shops, or even a hamfest. They’re “vintage” on eBay, therefore asking prices are $100 and up for a drive. These old drives have been successfully connected to modern PCs with the help of an external controller or adapter. My 5.25″ floppy drive connected and worked just fine on a motherboard (late 2000’s era) I had laying around with a floppy controller. If a motherboard is not available, a floppy controller with USB capabilities from KryoFlux or GoTek would do the job. 3.5″ floppy drives are readily available, have USB connections and cost about $20. Consider 5.25″ and 3.5″ combination drives if both formats are needed.

Early Zip drives came as an external device with a parallel port connection. They were god-awful slow. With more than a few Zip disks to copy, look for a drive with an ATAPI (IDE) connection if you have a motherboard with an IDE controller. Otherwise, opt for the USB drive version. ATAPI isn’t breaking any speed records either. They are quicker and you don’t have to find a motherboard with a parallel port and locate Zip drive drivers. The Zip 250 and 750 drives can read lower capacity disks. The Zip disk format has been long dead and the Iomega company was bought and sold a few times, eventually being completely discontinued. All of these drives will be surplus/eBay/hamfest finds.

Operating system support still exists, at least on the PC side. A Windows 7 64-bit operating system handled all the formats I threw at it: 5.25″ floppy, 3.5″ floppy, Iomega Zip 100 ATAPI, and obviously CD/DVD. The Zip ATAPI/IDE interface showed up as a standard removable disk drive. An older PC with an older operating system increases your chances of a working combination.

Parallel port Zip drive and disk (How-to Geek)

Zip disks, in particular, had a proprietary software method of preventing accidental writing to the disk or requiring a password to read the disk. In the case where any of these protections were used, or any other proprietary method of encrypting media, those conditions under which the media was “locked” will likely need to be recreated in order to read or decrypt the data. The same legacy drive connected to a PC, same legacy operating system with drivers/applications used to write-protect or encrypt the disk – if you still have copies of all those programs. Not to mention, remembering the password.

CDs and DVDs were no problem as those formats are somewhat current and operating systems include native support for those drives. Fedora 33 worked with all, though it doesn’t automatically load the floppy driver by default. I had to:

sudo modprobe floppy

I did not test a copy of Windows 10. A Win10 rescue disk worked just fine with all formats so I suspect Windows 10 will be fine as well. Copying the data can be as easy as opening the drive in the desktop, selecting the contents, and copying files to a directory on your hard drive.

ISO files are a single file that contains the entire CD/DVD/Blu-Ray disc structure to precisely duplicate a disc. These are often used when downloading Linux/Unix distributions. Windows 10 can be downloaded as an ISO as well. Many utility and recovery tools available as ISO downloads are meant to be burned to disc or written to a bootable USB drive. Nearly all CD/DVD/Blu-ray authoring programs have the option of creating or burning ISO files.

IMG (sometimes referred to as IMA, standing for “image”) files are similar to ISOs but for floppy disks. IMG files are a single file, raw sector dump, of a medium. I have no scientific data to indicate drag-and-drop copying is just as-good-as creating an image file. If I had to guess reasons an image would be a better option: maybe a form of copy protection looks at a specific sector for a known value or possibly date & time stamps. If something wasn’t as expected, it might fail believing a copy was made. I came across one instance where straight copying files caused special characters to be converted. A “~” was converted to “_”. This is more likely to cause an issue for an installer program because a filename doesn’t match. To me, it just seems better to make a raw copy of the disk. Once again, the more complicated method is my preferred method.

My goal was to have an image made directly from the disk. In reading up, examples showed creating a ‘blank floppy image’ file, reading disk contents, and writing to the blank image. I did not want that as total disk size could be different. Disks containing my documents or picture files, I copied those to a folder on a hard drive. Disks containing programs or installation media, images of the disk were made.

A raw sector dump of a floppy disk occupying the same amount of space as if the disk was completely full. 1.44 MB disks will take up 1.44 MB, even if only 300K is written to the disk. 720K disks take up 720K. CD/DVD/Blu-ray ISO and BIN files will be the same size as the total amount of data written on the disc (333 MB disc = 333 MB ISO). For multi-gigabyte and terabyte hard drives, these sizes are nothing.

Next time, my adventures continue into creating, using, and storing image files.

The Section is sponsoring learning and exploring sessions. Technical Specialist Jason – N8EI will be presenting one of those sessions on August 31st. Details have been published in recent PostScrips and later in this edition. His topic is “Beyond the Baofeng: Thoughts on Equipment Choices for New Hams.” You received your license. Picked up a $20 Baofeng. Tried to reach some repeaters with it. Now what? Now comes a real station. He touches on prioritizing equipment purchases and gives recommendations on radios. It will be a good one not only for newly licensed hams but hams looking to improve their station.

Thanks for reading and 73… de Jeff – K8JTK