All posts by Jeffrey Kopcak

Use Soundcard Oscilloscope to understand DSP features of an HF radio

As I continue to use Soundcard Oscilloscope in the shack, I find new uses for it.  In a previous post, I showed how to use it to calibrate receive levels for Ham Radio digital modes.  I’ve used Soundcard Oscilloscope to understand DSP (Digital Signal Processing) features of my radio.  I have an ICOM IC-7000 which doesn’t have any of the features the newer/larger radios: waterfall display, frequency display, or oscilloscope.  As a substitute, I’ll fire up Soundcard Oscilloscope to set filters eliminating loud adjacent stations or set a manual notch filter for annoying stations that tune up on frequency.

Soundcard Oscilloscope is a program that emulates an oscilloscope from signal data received from a sound card. It also has a frequency graph which will be used for this tutorial.

Station setup

  • HF Radio and antenna.
  • SignaLink USB and correct cable for your radio (pictures).  Any audio interface will work or even 1/8″ male-to-male audio cable between the audio out of the radio and Line-in on any regular sound card.
  • PC computer where the radio interface is connected.

Program versions

  • Windows 7 – 64 bit
  • Soundcard Oscilloscope 1.46

Download and Installation

This will install Soundcard Oscilloscope on your PC.

hf_dsp_features-01_install-01_soundcard_oscilloscope_website

Go to https://www.zeitnitz.eu/scope_en.

Click the link to “Download the latest version.” Save it in your Downloads folder.

hf_dsp_features-01_install-02_installer-01

Launch the installer.

Click Yes.

hf_dsp_features-01_install-03_installer-02

Click Next.

hf_dsp_features-01_install-04_installer-03

Click Next.

hf_dsp_features-01_install-05_installer-04

Click Next.

hf_dsp_features-01_install-06_installer-05

Installation will begin.

hf_dsp_features-01_install-07_installer-06

Click OK.

hf_dsp_features-01_install-08_installer-07

Click Finish.

Soundcard Oscilloscope is now installed.

Configuration

This will setup Soundcard Oscilloscope to capture audio coming from your audio interface device.

hf_dsp_features-02_configuration-01_language

Start Soundcard Oscilloscope by clicking the Start orb.

Click All Programs.

Click Scope.

Click Scope.

The first time the program is run, you’ll be prompted to select a language. Select your language and click Continue.

hf_dsp_features-02_configuration-02_license

The program is not free and will ask for a License key. Not entering a license will display this screen each time the program is started. The program is less than $12.50 US. Please support the developers by purchasing a license. This is made at the download site by clicking the “private donation license” link.

Click Continue if you don’t have a license.

hf_dsp_features-02_configuration-03_audio_interface_selection

Click the Settings tab.

Under Windows Sound Parameters, Audio Devices, Input is where you select the audio interface device. For SignaLink USB, this would be Microphone USB Audio Codec. Other interfaces: Line In, or Mic In would be selected appropriately and known from my audio interface setup tutorial.

Soundcard Oscilloscope is now configured.

Loud adjacent station

An example using notch functions and filters to remove a loud and stronger adjacent station.

hf_dsp_features-ration-03_loud_adjacent_station-01_settings

Click the Frequency tab.

These settings will need to be reset after restarting the program. At this point, my radio is off but it doesn’t matter.

Along the bottom is the Frequency graph, click about 1500 Hz (1.5 kHz) on the graph.

Slide the Zoom control over about 5 ticks so that the frequency graph now shows 3000 Hz (3 kHz) near the right edge.

I unchecked Auto-scale.  This is not required and only keeps the vertical graph at the same scale for this tutorial.

Turn on the radio if it is not already.

hf_dsp_features-ration-03_loud_adjacent_station-02_loud_station_2500-3200

Between 2500 Hz and 3200 Hz is a strong adjacent station to the frequency I’m trying to work.  The station is really coming in between 2100 Hz and 3200 Hz as we’ll see in a moment.

hf_dsp_features-ration-03_loud_adjacent_station-03_manual_notch_function

I try a Notch Filter (Manual Notch Function – MNF) to notch out the signal.  The wide setting it not enough to get rid of the signal.  The signal is still peaking between 1750 Hz and 3200 Hz.  You can see the notch between 2750 Hz and 2900 Hz.  I tried adding in the 2nd notch filter and it didn’t fully notch out the entire signal.

hf_dsp_features-ration-03_loud_adjacent_station-04_manual_notch_function_radio

Notch filter settings on the 7000 radio.

hf_dsp_features-ration-03_loud_adjacent_station-05_filter

I am able to knock out the loud adjacent station by choosing a narrower filter and using pass band tuning to shift the filter.

hf_dsp_features-ration-03_loud_adjacent_station-06_filter_radio

Turn off the Notch Function.  Selected a filter bandwidth of 1.8 kHz (FIL) (SSB-3 default on the 7000 is 1.8 kHz).  I used pass band tuning (PBT) to shift both edges of the filter to the left (on screen).  In this case the Shift Frequency was -650 narrowing the bandwidth to 1.7 kHz.  The filter shape was SHARP.

These settings eliminated the adjacent station as shown in the previous image.  Everything higher than 2000 Hz is completely gone.

Ohio Section Journal – The Technical Coordinator – May 2016 edition

One of the responsibilities of the Technical Coordinator in the Ohio Section is to submit something for the Section Journal. The Section Journal covers Amateur Radio related things happening in and around the ARRL Ohio Section. It is published by the Section Manager Scott – N8SY and articles are submitted by cabinet members.

Once my article is published in the Journal, I will also make it available on my site with a link to the published edition.

You can receive the Journal and other Ohio Section news by joining the mailing list Scott has setup. You do not need to be a member of the ARRL, Ohio Section, or even a ham to join the mailing list. Please sign up!

If you are an ARRL member and reside in the Ohio Section, update your mailing preferences to receive Ohio Section news in your inbox. Those residing outside the section will need to use the mailing list link above.
Updating your ARRL profile will deliver news from the section where you reside (if the leadership chooses to use this method).
Go to www.arrl.org and logon.
Click Edit your Profile.
You will be taken to the Edit Your Profile page. On the first tab Edit Info, verify your Email address is correct.
Click the Edit Email Subscriptions tab.
Check the News and information from your Division Director and Section Manager box.
Click Save.

Now without further ado…


Read the full edition at: http://n8sy2.blogspot.com/2016/05/may-edition-of-ohio-section-journal.html

THE TECHNICAL COORDINATOR
Jeff Kopcak – TC
k8jtk@arrl.net

DSCF5081 K8JTKHey Gang,

I’ve wanted to do this article for some time but kept putting it off due to more relevant and timely topics. Ham Radio Podcasts. With Dayton quickly approaching, you’re likely to see many of these hosts at Hamvention. If you’re not, you may have seen them in the past and wondered “what’s a podcast?”

logopodcastThe word “podcast” is a mashup between the words “IPod” and “broadcast.” There is some debate on this because the word predated the IPod portable media player. Some say ‘POD’ means “portable on demand.” Either way, they are both accurate. “Net cast” is an Internet broadcast and synonymous with podcast but typically don’t make content available offline.

A podcast is a digital media file offering audio and/or video content. PDFs or eBooks (books in electronic form) can be considered podcasts too. In general, podcast refers to audio or video. The content can be whatever the creator wants each file to contain. Most are a series of episodes covering a topic of interest. Some follow a news magazine format discussing recent news and developments. Others could be clips from a longer radio show including interviews or bits made available for download. Podcasts often serve niche interests where it might not be popular as a broadcast radio show to the general public. The same content targeted toward special interests or hobbyists would do very well.

The creator or distributor maintains a list of episodes known as a “web feed” which provides users with updates. RSS (Really Simple Syndication) is used to publish frequently updated information. The RSS rippling signal icon with headphones or microphone signifies a podcast feed. An app known as a “podcatcher” monitors the web feed for new content. The app then notifies the user or downloads the episode automatically. Once the file is downloaded, it’s available offline where you don’t need to be connected to the Internet. In this way someone can download a number of episodes and listen to them at a remote camping site with no Internet. This is different than YouTube or Netflix where a connection to the internet is required to view content on demand.

The first podcast was believed to be released around 2003. This technology really became popular with the growth of the internet and portable media devices like the IPod. Podcasts cover a vast range of topics including: movies, news, science, comedy, interviews, storytelling, health, love, self-improvement, music, food, business, sports, pop culture, and farming. The list… goes on. There really is something for everyone. Podcast technology is considered disruptive because the radio business spends a lot to provide content to wide-ranging audiences. Podcasts have shown that preconceptions of audiences, production, and consumption are no longer traditional. Sure some podcasts are produced in studios with professional equipment. The majority are recorded using similar pieces of gear found in your ham shack: professional microphone, mixer, computer, internet connection to bring in guests, and maybe a video camera or webcam thrown in there too. Anyone can do it!

On the flip side, since anyone can do it, episodes depend on schedules of the host(s). Some release on a weekly schedule, some monthly, others “as time permits.” Some podcasters have been around awhile. While others try it out and decide it’s too much effort.

I consume podcasts using my phone. If you do the same, know the limits of your phone’s data plan and use Wi-Fi when possible. Video files in particular can be very large depending on quality (hundreds of megabytes to a gigabyte). Podcatcher apps are available on every platform. Check the ‘app store’ for your device. PocketCasts is my favorite. It’s available on Apple and Android devices for about $4. I think it’s the nicest looking app and it’s easy to discover podcasts. Stitcher is another popular app, and free. Apple ITunes, Google Play, and TuneIn have podcast directories. Poddirectory (poddirectory.com) is great for desktop users. Also devices like the Roku, Chromecast, and Apple TV allow for viewing on a TV.

Podcasts are free. Many are supported through sponsors. In the same way that podcasts are targeted for special interests, the ads typically are too. Some ask for support and donations in lieu of advertisements. Others don’t ask for any support. If you find any podcast useful or you regularly listen, show your support for the work they are doing by throwing them a couple bucks or visiting their sponsors. It does cost money for equipment, bandwidth, storage, projects demonstrated, and services needed to bring you a wonderful podcast.

For content and podcast creators, gain lots of exposure for your work. Post new episodes and show notes on places where likeminded people hang out (QRZ.com). Even though ITunes is a terrible experience all around, nearly all podcatcher applications get their directories from ITunes. Get listed there so all the podcatcher apps pick up the show!

Below is a list of ham radio podcasts I’ve found. It includes the ARRL! I’m sure this list is not complete because I’m constantly finding new ham radio podcasts. This list mainly came from headline posts on QRZ.com or I discovered them in my podcatcher app.

Podcasts:

100 Watts and a Wire (100wattsandawire.com) – Experiences of a new ham operator hosted by Christian K0STH.

Amateur Logic and Ham College (amateurlogic.tv) – Ham Radio and technology show hosted by George W5JDX, Tommy N5ZNO, and Peter VK3PB. They do a second podcast covering theory, history, and topics that appear on the Technician exam.

Amateur Radio Newsline (arnewsline.org) – News for Radio Amateurs. You’re probably heard this newscast on a local repeater.

ARRL Audio News (arrl.org/arrl-audio-news) – News of the week from the ARRL hosted by Sean KX9X.

Everything Hamradio (everythinghamradio.com) – Ham radio topics hosted by Curtis K5CLM.

Ham Nation (twit.tv/hn) – Ham Radio topics covered by Bob K9EID, Gordon WB6NOA, George W5JDX, Don AE5DW, Amanda K1DDN, Val NV9L, and Dale K0HYD. I host the D-STAR After Show Net for this podcast.

Ham Radio Now (hamradionow.tv) – Covers ham radio topics, forums, and seminars with Gary KN4AQ.

Ham Talk Live (hamtalklive.com) – Call-in ham radio show with Neil WB9VPG.

HamRadio 360 (hamradio360.com) – Ham Radio topics hosted by Cale K4CDN.

ICQ Podcast (icqpodcast.com) – Talk-radio style podcast.

Linux in the Ham Shack (lhspodcast.info) – Covers Linux, Open Source, music, and food for the shack hosted by Russ K5TUX (get it?) and his YL Cheryl.

PARP [Practical Amateur Radio Podcast] (myamateurradio.com) – Operating with Jerry KD0BIK.

QSO Radio Show (qsoradioshow.com) – Ham Radio talk show on WTWW shortwave hosted by Ted Randall WB8PUM.

QSO Today (qsotoday.com) – Interviews with Eric 4Z1UG.

SolderSmoke (soldersmoke.com) – Radio-electronic homebrewers.

TX Factor (txfactor.co.uk) – Professionally produced programs dedicated to ham radio.

Net casts (typically online only):

DX Engineering Interviews (youtube.com/user/DXEngineering) – Tim K3LR interviews guests.

Ham Sandwich (thehamsandwich1.blogspot.fi) – “Off beat” show about Amateur Radio with Steve KD0PXX and Greg OH2FFY.

Ham Sunday (youtube.com/user/adafruit –then search “Ham Sunday”) – “Lady Ada” Limor AC2SN of Ada Fruit learning ham radio.

K6UDA (youtube.com/user/bondobob) – Bob K6UDA, the Elmer with an attitude. This one can be NSFW (not safe for work).

W5KUB (w5kub.com) – Tom W5KUB, you know him as the guy who documents his trip to Dayton Hamvention using the “Helmet cam.” He hosts roundtable events on Tuesday nights.

YHAMRADIO (w5mhg.com/yhamradio) – Interviews “Y” hams got into ham radio with Mark W5MHG.

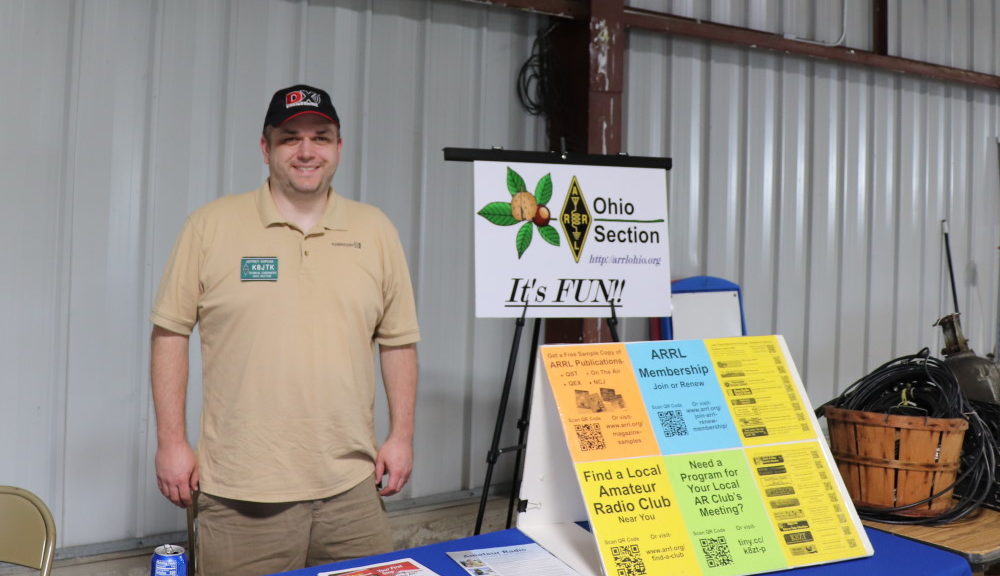
I will see you at Dayton! Stop by the ARRL Ohio Section table at the ARRL Expo in the Ballarena late afternoon on Friday and early afternoon on Saturday. Hope you stop by and say ‘hi.’

Thanks for reading and 73… de Jeff – K8JTK

Digital Communications in Amateur Radio: Station Setup

This article appeared in the The Wood County Amateur Radio Club newsletter CQ Chatter May 2016 edition.

Read the rest of the series in the Digital Communications in Amateur Radio articles category.


This time in our quest to get on the air with digital, I’ll discuss station setup. For most of this article, it will be related to HF and sideband operation. I’ll talk about FM near the end.

For a Ham Radio digital setup, three things are needed: a radio, computer, and an interface to connect the two.

First the radio. Theoretically, any radio can be put into digital service. Two things are important to consider: frequency stability and switching speed. Frequency stability is critical to digital operations because drift is deadly. Tube and older radios tend to drift in frequency as they warm up. For a mode such as PSK, drifting a few hertz puts you into someone else’s conversation. Switching speed and fast turnaround times are needed. The switching speed of older radios can be hard on relays. Solid-state radios manufactured in the last two decades are recommended. Radios that cover HF/VHF/UHF all mode – open up even more operating possibilities.

icom_ic-7000_(accessory_&_data_ports)
ICOM IC-7000 rear view showing data and accessory ports.

Most radios are designed with digital modes in mind. Radios with an “accessory port” or “data port” built in are ready to go, though not plug-and-play. The data port is the recommended way to connect an interface to the radio. These ports have pins for keying, transmit audio, and received audio. The audio pins have fixed audio levels and do not change based on the volume setting of the radio. If the radio doesn’t have accessory or data ports, microphone and audio out can be used. It’s not an ideal situation but it will work. An important thing to keep in mind, some radios mix various audio inputs. An example is an external mic connected to the accessory port maybe mixed with audio coming into the data port. This means audio generated by the computer will mix with ambient noise picked up from the microphone. You don’t want this because you’ll interfere with other digital exchanges. It’s important to know your radio and how it operates in different configurations. Test with a buddy or Elmer first before jumping in.

CAT (Computer Aided Transceiver) ports on the radio including RS232 (serial port) and CI-V are useful when creating your own interface. Audio cables between your radio and computer would provide transmit and receive audio but these won’t key the radio. CAT ports provide a lot of functionally including the ability to change settings in the radio, update memory channels, change frequency, etc. Keying the radio via CAT is universally supported in applications. A configuration example would be using the soundcard for audio in/out to the audio out/mic-in on the radio. A separate cable between the computer and radio provides CAT commands, usually via a COM port.

Duty cycle is the amount of time the radio is generating RF. When operating SSB voice, the amount of RF the radio generates depends how loud your voice is at that moment. In CW, RF is generated with each dot and dash. In both cases, the radio is operating at less than 100% duty cycle due to pauses in between words and characters. Many digital modes operate the radio near 100% which causes a lot of heat. Heat causes components to fail. Radios are designed for SSB voice though some newer models are including 100% duty cycle. Operate the radio at a power setting of 50% or less (30% recommended) of the total output power. A 100 watt radio would be set between 30 and 50 watts. FM, by nature, is the exception because voice or digital over FM uses the same bandwidth. The typically longer key down times for digital will still generate more heat.

Radios have different operating modes: USB, LSB, FM, AM, RTTY, DATA, DIGITAL and possibly others. HF digital mostly uses Upper Sideband regardless of frequency. In most cases the USB setting is what you want. Some radios will not allow keying from a computer unless they’re in a ‘digital’ mode setting. Check your operating manual and, again, practice and test with a buddy first. Turn off all filters, blankers, attenuation and the like or set it to the least disruptive setting. Set transmit and receive bandwidths to the full SSB bandwidth allowed (2.8 kHz). No filtering and wide bandwidths have less of a chance to distort or modify the signal. Modification of the signal affects the ability to decode a signal. Filtering can be used but after practice and understanding how they affect decoding. Contests usually warrant filtering to keep loud adjacent signals from affecting the exchange.

The interface. It serves two main purposes: act as a modem and the device that keys the radio. It acts like a modem by taking modulated audio from the software application and sending to the radio for transmit and taking received audio from the radio and sending it to the application for demodulation. Nearly all computers and laptops in the last decade have on-board audio while older configurations utilize an addon soundcard. Most computers don’t have serial ports these days. If a serial port is needed for CAT, options such as a USB (Universal Serial Bus) to serial adapter, serial port addon cards, or cables manufactured with USB to serial adapters built in are available.

rigbaster_advantage
RIGblaster interface–front view.

All-in-one interface solutions make the connection between the radio and computer easy. Solutions offer a built in sound card and fewer cables needed to make the connections. Offerings include products from West Mountain Radio, MFJ, MicroHAM, or RigExpert. These options free your on-board soundcard to listen to music or surf online minimizing the possibility of transmitting audio not suited for the airwaves. Adjustments on these interfaces are audio levels and speed (delay) at which the interfaces switches the radio from transmit to receive. Newer models include all functionality integrated into a single USB port requiring only one cable.

signalink_front
SignaLink USB interface–front view.

The recommended solution for a radio without integrated USB audio is the Tigertronics SignaLink USB. Two cables are needed to make all connections. A USB cable connects the computer and SignaLink for the audio (soundcard) and a cable to the radio for audio and keying. The cable for the radio is specific to connector type or manufacturer. A list of cables is available and simple internal wiring diagram to match the cable to the radio.

signalink_back
SignaLink USB interface–rear view.

Unterminated cables are available to create custom solutions. The SignaLink and cable are about $120 and available at all ham radio retailers. It is a simple VOX (“voice” operated switch) device. When sufficient audio is generated by the computer it keys the radio. It unkeys the radio when that audio has fallen below a threshold.

signalink_diagram
SignaLink USB connection set up.

If you have an interface or are setting one up for the first time, I wrote a tutorial on configuring the interface in Windows. It shows setting default devices and audio levels. These settings help avoid splattering on the bands (taking up more bandwidth than intended) due to too much audio fed into the transmitter. Again, practice with a buddy or Elmer to verify optimal audio settings. Included is a section showing how to record digital transmissions and play them back for decoding at a later time (time shift) such as a net: http://www.k8jtk.org/2015/04/16/radio-interface-setup-for-getting-started-with-ham-radio-sound-card-digital-modes/

The computer. Aside from the requirements to make connections, most computers work fine for digital operation. Ones made within the last decade seem to work without issue. Some older ones tend to have issues. A computer with a 1.5 GHz CPU and 4GB of RAM is sufficient. As always, more is better. Windows is the operating system of choice for digital programs. Mac and Linux are well represented with a program or two less viable than their Windows counterparts. Let’s not forget portable devices like tablets and smartphones. Digital applications are available for those devices too. My operating has been on a Windows 7 64 bit desktop computer.

Up to this point I’ve talked about operating digital on HF and Sideband. What about Technicians who don’t have access to digital portions of the HF bands? All of these digital modes can be operated over FM so you Technicians can get in on the fun too. Won’t be able to transmit as far as an HF station but digital can be transmitted over simplex or even a net on a repeater using an HT! On HF, audio tones are generated by Audio Frequency Shift Keying (AFSK). Audio generated by the computer is converted into RF frequencies when transmitted. Only those frequencies in use at that time are transmitted by the radio. This allows hundreds of exchanges to take place on the same frequency. FM on the other hand occupies the full 10 to 15 kHz, even though the bandwidth of the audio generated by the computer is less. So it still stands only one transmitting station can have the frequency at a time. Yes, this defeats the purpose of narrow bandwidth modes. Someone wanting to learn and experiment with these modes may get bitten by the bug and lead to a license upgrade. I say let them have at it. That’s how I did it.

To this point, Stephen Cass – KB1WNR, Senior Editor for the IEEE magazine built a low power FM digital transmitter for just that reason, get more people interested in digital. It’s a great maker project or demonstration tool for digital. I also mention it because he used my instructions to get Fldigi running on the Raspberry Pi! http://spectrum.ieee.org/geek-life/hands-on/hands-on-a-ham-radio-for-makers

Next time, I’ll start covering specific digital modes, software, and operation.

Images: F8DZY, W3YJ, West Mountain Radio.

Calibrate Receive Audio for Ham Radio Soundcard Digital Modes

This tutorial will show to determine an optimal Receive Volume (RX) level on your audio interface for operating (or only receiving) digital modes.  My tutorial showing how to setup your audio interface in Windows is the starting point for this tutorial.  Please review it, specifically the “Recording” settings as this tutorial builds upon it including having an existing audio interface setup.

The audio level from the radio into the audio interface is typically a fixed level.  Once the audio enters the audio interface, the level sent to the computer is adjustable by the RX or Receive Level controls.  This tutorial will help determine the optimal setting for the RX level.

Soundcard Oscilloscope is a program that emulates an oscilloscope from signal data received from a sound card.  The radio will need to monitor active digital transmissions.  Tuning to HF frequencies where PSK31 (7.070/14.070), JT65 (7.076/14.076), or RTTY (7.080-7.125/14.080-14.100) transmissions can be observed are great places.  The 40 and 20 meter frequencies for those are listed as those bands are more active.

This tutorial can help set the transmit level of another station by observing or monitoring their transmissions.  Do this only after you’ve calibrated your receive audio and spent a good amount of time operating with no audio issues of your own.  Use a quiet simplex frequency both can hear the other station.  This way adjustments will not be effected by other stations on the same sideband frequency.  FM won’t matter because only one station can occupy the frequency at a time.

A similar tutorial appeared in QST recently.  They beat me to it, lol!

Program versions

  • Windows 7 – 64 bit
  • Soundcard Oscilloscope 1.46

Download and Installation

This will install Soundcard Oscilloscope on your PC.

receive_level_calibration-01_install-01_soundcard_oscilloscope_website

Go to https://www.zeitnitz.eu/scope_en.

Click the link to “Download the latest version.”  Save it in your Downloads folder.

receive_level_calibration-01_install-02_installer-01

Launch the installer.

Click Yes.

receive_level_calibration-01_install-03_installer-02

Click Next.

receive_level_calibration-01_install-04_installer-03

Click Next.

receive_level_calibration-01_install-05_installer-04

Click Next.

receive_level_calibration-01_install-06_installer-05

Installation will begin.

receive_level_calibration-01_install-07_installer-06

Click OK.

receive_level_calibration-01_install-08_installer-07

Click Finish.

Soundcard Oscilloscope is now installed.

Configuration

This will setup Soundcard Oscilloscope to capture audio coming from your audio interface device.

receive_level_calibration-02_configuration-01_language

Start Soundcard Oscilloscope by clicking the Start orb.

Click All Programs.

Click Scope.

Click Scope.

The first time the program is run, you’ll be prompted to select a language.  Select your language and click Continue.

receive_level_calibration-02_configuration-02_license

The program is not free and will ask for a License key.  Not entering a license will display this screen each time the program is started.  The program is less than $12.50 US.  Please support the developers by purchasing a license.  This is made at the download site by clicking the “private donation license” link.

Click Continue if you don’t have a license.

receive_level_calibration-02_configuration-03_audio_interface_selection

Click the Settings tab.

Under Windows Sound Parameters, Audio Devices, Input is where you select the audio interface device.  For SignaLink USB, this would be Microphone USB Audio Codec.  Other interfaces: Line In, or Mic In would be selected appropriately and known from my audio interface setup tutorial.

Soundcard Oscilloscope is now configured.

Setting receive level audio

These screenshots will help determine optimal audio RX setting for receive audio.  It is important to leave the audio level settings alone in Windows.  These settings were shown in my audio interface setup tutorial.  Adjust the settings in Windows ONLY when where is not enough audio when RX level is at the maximum setting or there is too much audio with RX set to the lowest setting.

receive_level_calibration-03_calibration-01_settings

Click the Oscilloscope tab if you are not there already.

These settings will need to be reset after restarting the program.  At this point, my radio is off but it doesn’t matter.

Set the Amplitude to 250mv.

Set Time to 10ms or less.

Turn on the radio if it is not already.

Examples

Adjust the RX level until there are no peaks with flat-tops on the oscilloscope.  Flat-tops indicate the audio level is too high and digital programs will have a hard time decoding the signal.  These examples were taking monitoring PSK31 on 20 meters.

receive_level_calibration-03_calibration-02_best_example

This is the best example.  No flat-top peaks.  Peaks appear about two divisions from the center line.  There is plenty of headroom for louder signals.  My RX setting was about the 10 o’clock tick-mark on my SignaLink.

Anything lower than two divisions will still work.  There maybe issues pulling out weaker stations.

receive_level_calibration-03_calibration-03_ok_example

Here is a good example but I would not be comfortable with this audio level.  The peaks do not have flat-tops which is good.  However, the peaks are reaching well into the third division.  My RX setting was about the 11 o’clock tick-mark on my SignaLink.

receive_level_calibration-03_calibration-04_bad_example

This is an example of what the scope should not look like.  Peaks have flat-tops at the fourth division.  The audio level is too high into the computer and RX volume needs to be dialed back.  My RX setting was about the 1 o’clock tick-mark on my SignaLink.

When optimal level is reached, the audio interface receive audio level is calibrated!

Ohio Section Journal – The Technical Coordinator – April 2016 edition

One of the responsibilities of the Technical Coordinator in the Ohio Section is to submit something for the Section Journal. The Section Journal covers Amateur Radio related things happening in and around the ARRL Ohio Section. It is published by the Section Manager Scott – N8SY and articles are submitted by cabinet members.

Once my article is published in the Journal, I will also make it available on my site with a link to the published edition.

You can receive the Journal and other Ohio Section news by joining the mailing list Scott has setup. You do not need to be a member of the ARRL, Ohio Section, or even a ham to join the mailing list. Please sign up!

If you are an ARRL member and reside in the Ohio Section, update your mailing preferences to receive Ohio Section news in your inbox. Those residing outside the section will need to use the mailing list link above.
Updating your ARRL profile will deliver news from the section where you reside (if the leadership chooses to use this method).
Go to www.arrl.org and logon.
Click Edit your Profile.
You will be taken to the Edit Your Profile page. On the first tab Edit Info, verify your Email address is correct.
Click the Edit Email Subscriptions tab.
Check the News and information from your Division Director and Section Manager box.
Click Save.

Now without further ado…


Read the full edition at: http://n8sy2.blogspot.com/2016/04/april-edition-of-ohio-section-journal.html

THE TECHNICAL COORDINATOR
Jeff Kopcak – TC
k8jtk@arrl.net

DSCF5081 K8JTKHey Gang,

So — Windows 10. This topic was brought up during the after meeting at my local club. Many of you are undoubtedly seeing the upgrade nag-screens. You too might be wondering: what’s changed in Windows 10, might have heard some of the issues surrounding the new operating system, and why the big push to upgrade. This month I’ll cover the new operating system from the perspective of what has happened so far and not from a ham radio perspective. Also to preface this whole thing, Microsoft has never been very clear about their statements and often retracts or goes back on things they’ve said. In other words, any of this may change as we go along.

windows-update-impending-upgradeWhat is Windows 10?… why not Windows 9? There are many theories surrounding the choice in numbering. The named version of Windows hasn’t matched the real version number since Windows NT 4.0. Windows 10 is the successor to Windows 8.1, but not Windows as you know it. It represents a shift in the direction of Microsoft as a company. Microsoft indicated this is the “the last version of Windows.” While they’re not killing it off, Microsoft is moving to a model they call “Windows as a service.” This means Microsoft will deliver innovations and updates in an ongoing manner instead of separate releases (versions) of Windows. The ultimate goal is to have one version of Windows that will run on all platforms. Everything, including Raspberry Pi, phones, tables, HoloLens (wearable, so called “smart-glasses”), laptops, desktop PCs, Surface Hubs (interactive whiteboards), and Xbox entertainment systems. Having one version of an operating system means all of these systems will become integrated and share information easily.

windows-product-family

A large part of this shift includes the use of “the cloud.” The cloud is a fancy term for someone else’s equipment on the Internet. The most common example is ‘cloud storage.’ Services like DropBox, Google Drive, or OneDrive allow you to save your documents and pictures elsewhere. You upload files to these services and you can access those files or share them with others on the Internet. The cloud is heavily integrated into Windows 10. After installing Windows 10, it will prompt you to sign in using a Microsoft Account. This syncs your user profile with the Microsoft cloud. When you sign into another device using your Microsoft Account, your settings will be the same across those devices. You can use Windows 10 without a Microsoft account. The computer will operate in standalone mode similar to previous versions of Windows. Microsoft’s online storage service called OneDrive is integrated into the operating system as well. Other new features include your new personal assistant, Cortana. She will help find things on your computer and the web, set reminders, similar to Apple’s Siri or Google Now.

Universal apps: These first appeared in Windows 8 as “Metro Apps.” This concept is to have developers write one application and have it work the same way on any Windows platform. These apps are found and delivered via the Microsoft Store (similar to the Android Play Store or Apple’s App Store), and again – available on all platforms. Some games and applications that came preloaded in previous versions of Windows have been replaced with Universal Apps in 10.

Edge browser: Microsoft Internet Explorer has been replaced with Microsoft Edge. It’s been touted as a more secure browser. However, this has yet to play out because browser extensions are very limited.

upgrade-is-readyFree upgrade: Legal copies of Windows 7/8/8.1 are eligible for a free lifetime upgrade to Windows 10 until July 29, 2016. There are some stipulations to this free upgrade. “Lifetime” means the lifetime of the device eligible for the free upgrade. When that device fails, you cannot transfer the free upgrade to another device. What happens after July 29th? Microsoft hasn’t said. The free upgrade is expected to become a premium upgrade that you’ll have to purchase, even for a device that was previously eligible for the free upgrade. Versions prior to Windows 7 are not eligible for the free upgrade. To be honest, if you’re running a version of Windows prior to 7, you probably want to upgrade your hardware for 10.

Now reality.

Big upgrade push: Windows users have seen the icon in the system tray nagging them to upgrade. Why the big push? Microsoft is trying to avoid another Windows XP. At the time Windows XP was declared “end-of-life,” it accounted for about 10% of all computers on the Internet. Two years later, about 7% are still using XP. That’s a lot of users running a dead operating system. On top of that, Windows 7 will be 7 years old in July and only supported for 4 more years (until January 2020).

While Windows XP maybe working great, there are reasons to get off of it. Google has been leading a push for a more secure Internet. Windows XP cannot handle many modern security methods in use today. All browsers in XP (except Firefox) will display ‘your connection is not private’ when connecting to a website that has more modern security then XP can understand. Since Windows XP is not a supported operating system, it won’t be updated to handle modern security methods. While the website will still work, your connection will be less secure. A work around for this security issue is to use Firefox. Though no known vulnerabilities exist in XP, best practice dictates users should remove unsupported operating systems from the Internet if it doesn’t need to be on the Internet. Another reason to upgrade is new hardware and software will not have support for old operating systems.

upgrade-is-waitingThe upgrade push for Windows 10 has been nothing short of a disaster. Last year, users eligible for the upgrade began seeing a Windows icon in the system tray saying ‘you’re PC is ready for your free upgrade.’ This deplorable tactic is commonly used by malware and spyware authors to trick you into installing software you don’t want or need. As an Information Technology professional with an interest in cyber security, this is the type of message I tell users NOT to acknowledge. Kind of ironic. Initially this tray icon came in the form of a Windows “Recommended” update. Then Microsoft upgraded it to a “Critical” Windows Update -yet another deplorable tactic. Despite this maneuver, Windows 10 is NOT a critical update. The upgrade popups are very confusing as the clickable options are: “upgrade now,” “upgrade later,” “OK,” or “Get Started.” Oh, it gets worse. Users are reporting they vigilantly closed the prompts to upgrade (clicked the red “X”) but their system was still upgraded automatically against their wishes. They went to bed with Windows 7 and got up the next morning to Windows 10. Surprise.

Once the upgrade happens, you do have 30 days to revert back to your previous version of Windows. The problem here is users have found the roll back frequently fails. Imagine that. ‘Don’t worry, you can go back… if you want. Opps, the roll back just failed! Guess you’re stuck.’ Thanks.

Start Menu: Microsoft tried to remove the Start menu in Windows 8 and replaced it with a full screen tile menu. This was an attempt start a unified experience between PCs and mobile devices. The change worked fine on small screen devices but was a terrible experience on PCs. It was met with much outcry. The Start menu has returned in Windows 10 with something that kind of resembles the Start menu from Windows 7. It’s more of a combined Start menu — “Live Tile” experience. Live Tiles display updates like weather, news, and photos, while others are just a static application icon.

windows-10

Adding to the confusion, there now two places where system settings reside: “Settings” and “Control Panel.” Settings typically run between devices like time zone, personalization, notifications, and user accounts. The Control Panel is mostly desktop specific settings.

Tracking: Microsoft Windows 10 tracks much of what you do and where you go. Their claim is they provided a free upgrade so you can give some information back to Microsoft on your usage. Two problems with this: even if you pay for the Windows 10 upgrade, this information is still shared with Microsoft. The other, this tracking is now rolled into Windows 7 and 8. Privacy advocates feel this is a violation of user’s privacy. The argument on the other side is most use Google or Apple’s services and they know just as much about you. This Ars Technica article explains tracking is a growing trend in technology: http://arstechnica.com/information-technology/2015/08/windows-10s-privacy-policy-is-the-new-normal/

Upgrade tips: create a full system backup using a backup service or create an image of your current installation on an external hard drive before attempting to upgrade. This is a backup incase the rollback fails. Check the vendor’s website of your hardware and critical software applications. Look for driver support or knowledge base articles about Windows 10 before upgrading. Knowing whether your devices and software are supported will help minimize regret because your favorite app or device no longer works.

Certainly some of these concerns have caused me to look at alternative operating systems. I have found in my deployments (I have yet to upgrade all of my desktops) with a little work, I can get 10 to act a lot like (my favorite) Windows 7. Turning off or uninstalling cruft helps a lot: turning off notifications, disabling camera & microphone usage, disable Cortana, remove many Universal Applications, and turn off background apps. I use Classic Shell to return a normal looking Start menu and Anti-Beacon to disable tracking. Links to those applications and ones to disable the upgrade nag-screens are below. Seriously, if you find any of these apps useful, consider donating to the author because we need to support those doing the right thing and allowing choice.

Thanks for reading and 73… de Jeff – K8JTK

Image sources: thurrott.com, zdnet.com, and blogs.windows.com.

As always, use these at your own risk.
Disable Windows 10 upgrade and notifications in Windows 7 & 8/8.1:
Never 10: https://www.grc.com/never10.htm
GWX Control Panel (advanced users): http://ultimateoutsider.com/downloads/

Start menu replacement for Windows 8 & 10:
Classic Shell: http://www.classicshell.net/
Start 10 (trial): http://www.stardock.com/products/start10/

Disable Windows tracking:
https://github.com/10se1ucgo/DisableWinTracking
https://www.safer-networking.org/spybot-anti-beacon/ (from the makers of SpyBot Search and Destroy, works on all versions of Windows).
A more manual approach is presented: http://arstechnica.com/information-technology/2015/08/windows-10-doesnt-offer-much-privacy-by-default-heres-how-to-fix-it/

SSTV Transmissions from the International Space Station – April 2016 edition

An ARISS Commemorative SSTV Event Set for April 11-14 recently concluded. This event was longer than usual and I received alot of pictures. Check the ISS tag for my other ISS SSTV posts.

Station setup: MP Antennas Classic Mobile NMO Antenna – This is a local company in Cleveland and were reviewed in QST. Been using their antennas for a long time with great success. Since the antenna is multi-polarized (the MP in the company name), it is supposed to be a good substitution for receiving satellite transmissions without a directional antenna and not worrying about Doppler Shift (which needs to be accounted for in some cases). The height is about 15 feet.

The antenna was connected to my ICOM IC-7000 with DSP settings turned off on 145.800 MHz FM. Used this radio only because my SignaLink USB is connected to it and the one I use for digital operation on all bands. MMSSTV is the Slow-Scan TV program I use.

I have tutorials available to help get your station setup and getting started with MMSSTV to receive images from the ISS.

I received 14 images total from my location near Cleveland (EN91bl).

SSTV-Transmissions-from-the-International-Space-Station-2016-04-12-1959
2016-04-12 1959 UTC
SSTV-Transmissions-from-the-International-Space-Station-2016-04-12-2004
2016-04-12 2004 UTC
SSTV-Transmissions-from-the-International-Space-Station-2016-04-12-2138
2016-04-12 2138 UTC
SSTV-Transmissions-from-the-International-Space-Station-2016-04-12-2315
2016-04-12 2315 UTC
SSTV-Transmissions-from-the-International-Space-Station-2016-04-13-0051
2016-04-13 0051 UTC
SSTV-Transmissions-from-the-International-Space-Station-2016-04-13-0230
2016-04-13 0230 UTC
SSTV-Transmissions-from-the-International-Space-Station-2016-04-13-0404
2016-04-13 0404 UTC
SSTV-Transmissions-from-the-International-Space-Station-2016-04-13-1907
2016-04-13 1907 UTC
SSTV-Transmissions-from-the-International-Space-Station-2016-04-13-2046
2016-04-13 2046 UTC
SSTV-Transmissions-from-the-International-Space-Station-2016-04-13-2222
2016-04-13-2222 UTC
SSTV-Transmissions-from-the-International-Space-Station-2016-04-14-0000
2016-04-14 0000 UTC
SSTV-Transmissions-from-the-International-Space-Station-2016-04-14-0139
2016-04-14 0139 UTC
SSTV-Transmissions-from-the-International-Space-Station-2016-04-14-0312
2016-04-14 0312 UTC
SSTV-Transmissions-from-the-International-Space-Station-2016-04-15-1859
2016-04-15 1859 UTC

Ohio Section Journal – The Technical Coordinator – March 2016 edition

One of the responsibilities of the Technical Coordinator in the Ohio Section is to submit something for the Section Journal. The Section Journal covers Amateur Radio related things happening in and around the ARRL Ohio Section. It is published by the Section Manager Scott – N8SY and articles are submitted by cabinet members.

Once my article is published in the Journal, I will also make it available on my site with a link to the published edition.

You can receive the Journal and other Ohio Section news by joining the mailing list Scott has setup. You do not need to be a member of the ARRL, Ohio Section, or even a ham to join the mailing list. Please sign up!

If you are an ARRL member and reside in the Ohio Section, update your mailing preferences to receive Ohio Section news in your inbox. Those residing outside the section will need to use the mailing list link above.
Updating your ARRL profile will deliver news from the section where you reside (if the leadership chooses to use this method).
Go to www.arrl.org and logon.
Click Edit your Profile.
You will be taken to the Edit Your Profile page. On the first tab Edit Info, verify your Email address is correct.
Click the Edit Email Subscriptions tab.
Check the News and information from your Division Director and Section Manager box.
Click Save.

Now without further ado…


Read the full edition at: http://n8sy2.blogspot.com/2016/03/march-edition-of-ohio-section-journal.html

THE TECHNICAL COORDINATOR
Jeff Kopcak – TC
k8jtk@arrl.net

DSCF5081 K8JTKHey Gang,

It’s been a busy month for yours truly. Things got started off with a drive down to Columbus with my dad N8ETP. We visited the Columbus Radio Enthusiasts Society (CRES) on February 16th. It was touch-and-go for a while due to the weather. Snow hit both areas the night before and hoped it would hold off for the meeting. It did. We made it there and back, no problem. It was our first meeting in Columbus and we couldn’t have had a better time. I was contacted by Steve – N8WL to troubleshoot an RFI issue he was experiencing. CRES_N8ETPWe got to talking and he invited me to come down and speak about, well, myself –what the Technical Coordinator does and projects I’ve worked on. The presentation consisted of: my history in Ham Radio and how I got to where I am, laid out the ARRL and Field Services structures, section level positions and the Ohio Section, my responsibilities as Technical Coordinator, and projects I’ve worked on. In addition gave some pointers for troubleshooting RFI problems. Our Section Manager was on hand and helped answer specific questions about the section. It was an informative meeting. CRES: http://www.w8zpf.net/, presentation: http://www.k8jtk.org/2016/02/16/about-the-arrl-ohio-section-technical-coordinator/

The following weekend I presented at the Mansfield Hamfest during the Digital Forum. Danny – W8DLB, who is in charge of the Hamfest, was at my NBEMS training session in Medina County and asked me to present it during the Digital Forum. The Digital Forum covered voice and text based digital modes. Duane -K8MDA demonstrated FreeDV. FreeDV is a mode used on HF for voice communication. It’s impressive because the bandwidth is about one-third of sideband! I gave a portion of my training session on Narrow Band Emergency Messaging using Fldigi.

K1NAt the LEARA meeting in Cleveland, I showed the video for the Navassa Island K1N DXpedition which happened in February of last year. A DXpedition is an expedition to a remote location, usually uninhabited, for the purposes of activating the location and making as many contacts as possible. Navassa was my first time trying to chase a “most wanted” entity for my log. I was able to log them twice. Bob Allphin – K4UEE has participated in many DXpeditions and has released the story of many on DVD. I had no idea what it took to put on a DXpedition of that magnitude. After seeing his DVD on Navassa, I now have a better idea. It is a phenomenal video that got rave reviews and comments at the meeting. The main video runs about 45 minutes. The wrap-up from the Dayton forum is included which has some great background details. These are great for club meetings, introducing newcomers to Ham Radio, and gifts. Purchasing the video helps supports future DXpeditions and supports other hams: http://t-rexsoftware.com/k4uee/dvds.htm

Last, and certainly not least, Ken – KG8DN instructor at Gilmour Academy in Gates Mills, Ohio has been in charge of the Gilmour Academy Radio Club – ND8GA for as long as I’ve known him. During the school year, organizations are in charge of running Convocation for a week. This is a gathering of the entire school for announcements, happenings, events, and entertainment. Ken asked me to speak at Convocation one morning. This was a different type of presentation than I was expecting. I figured I would be there to talk-up Ham Radio and get kids interested. Nope. It was more about life experiences with a little Ham Radio sprinkled in. Things students could relate to. I have to be honest this was more challenging than I anticipated. A lot of time was spent searching for topics that students would care about, relate to, and how those experiences got me to where I am now. There was a visual portion which included many pictures from my high school years. When looking back on friends and people I shared those experiences with, it make me wish I was back in that time. I’m sure I’ll feel the same way when I look back on today. The presentation turned out great and I have to thank Ken for all of his help. ND8GA: https://sites.google.com/a/gilmour.org/gilmour-amateur-radio-club/

Thank you to everyone for coming to my various appearances and the organizers for asking me to speak with your organizations.

ham_radio_for_makers_2_KB1WNRham_radio_for_makers_1_KB1WNRI received an email from a fellow Trustee of LEARA, Marv – W8AZO, asking if I had seen my name mentioned in a post on a website. I had not. What website did he find my name on? The IEEE website. Now, I know the fine folks over at IEEE (Institute of Electrical and Electronics Engineers) are wicked smart. Much smarter than I am. They come up with solutions to technical problems which usually turn into established standards. Additionally, they publish one-third of the world’s technical literature. Why the heck would they be talking about me? Stephen Cass – KB1WNR, Senior Editor for the IEEE Spectrum magazine wrote an article titled “Hands on: A Ham Radio for Makers.” He built an FM transceiver using an RS-UV3 transceiver board and Raspberry Pi to take advantage of digital modes. I was mentioned because Stephen used the instructions I posted to compile and run Fldigi on the Raspberry Pi. Super cool! ham_radio_for_makers_3_KB1WNRI emailed Stephen and thanked him for the plug. He was very appreciative of the well written instructions. His article may have glossed over some important points relevant to hams but the goal of the article was to draw others in from the wider community. The article will be in the March printed edition of IEEE Spectrum and should be available by the time you read this. It hasn’t hit the shelves in my local bookstore yet. Online version: http://spectrum.ieee.org/geek-life/hands-on/hands-on-a-ham-radio-for-makers

That is what ham radio and makers are all about. I wanted to figure out how to run Fldigi on the Raspberry Pi, came up with a way to do it, documented it thoroughly, and shared it online. Stephen came across my instructions and used them as part of his project to create something greater; perpetuating the cycle.

Thanks for reading and 73… de Jeff

Bridge a Remote Site Network with OpenVPN Access Server

Having access to your devices over the Internet is a requirement for any admin deploying a project. Instead of running to a remote site to administer devices (making changes, applying updates and patches), it’s easier to connect remotely and make changes. Remote access poses many issues and concerns.

Security

First and foremost is security. You always, always, ALWAYS want devices connected to the Internet behind a router with a built-in firewall (NAT router). A firewall filters traffic between two networks (your ISP and home for example) and will block attempts to connect to your internal (private) network.

Device manufacturers take security for granted. Little testing and auditing takes place because the analysis is expensive for throw-away devices. This is noted in many stories including Bug Exposes IP Cameras, Baby Monitors where simply clicking “OK” on the login dialog allowed access to the Internet connected video camera. It is trivial to find these devices on the Internet because of Shodan. Shodan is dubbed the “Internet of Things Search Engine.” If you’re not familiar, think of it as the Google for devices connected directly to the internet. These could be: web servers, printers, cameras, industrial machines, bitcoin mining… Putting devices behind a firewall minimizes the risk because anything trying to peer into the network would be blocked by the firewall.

This holds true for networks you don’t control (granted access on someone else’s network). Put your stuff behind a router/firewall so they can’t see your devices and you can’t be exploited by devices on the other network.

Port Forwarding is a popular technique to only allow traffic on a specific port to a device you specify in your firewall (router). This provides little security as it still allows a potentially vulnerable service to accept incoming connections from the Internet.

Choose a good router

Couple of tips for a good router:

  • You get what you pay for. Don’t opt for cheap.
  • Opt for ones that support third-party firmware like DD-WRT and Tomato or setup a dedicated computer running pfsense or Untangle. These have proven to be more secure than stock firmware in addition to offering a more complete feature set.
  • Stick with popular models as found on Amazon, Newegg, or other tech store. They’re more likely to be reliable, well updated models.
  • Look for ones that accept USB cellular modem dongles for installations that have no accessible network connection like a remote site.

Virtual Private Network

The preferred way to connect to a remote network is to use a VPN. A VPN connects to a private network securely over the Internet. It allows the user to exchange data, use services, and connect to devices as if they were directly connected to that network. An open-source project that implements VPN technologies security is OpenVPN. OpenVPN is an application that allows for secure point-to-point communication. There are many implementations of OpenVPN including using it in many third-party router firmware (mentioned above). OpenVPN Access Server is one of the many implementations and the one used for this project.

This project was inspired by Hak5 1921 – Access Internal Networks with Reverse VPN Connections. As an Amateur Radio operator into the newer computer and digital technologies, more devices are located at remote sites.

This setup consists of:

  1. A remote network behind a firewall where devices exist you want to access. This will be a Linux server on the remote network that will act as the gateway and persistently connected to the bridge. This could be a full desktop computer purposed for something else or Raspberry Pi. Also on the same network will be a Windows machine.
  2. An unsecure/unknown network, AKA the Internet.
  3. A private server that will act as the bridge between the remote network and a device you choose.
  4. A device in a separate location that will connect to the cloud server and will be able to access the remote network. I will use a Windows machine to act as a ‘home’ computer.

This setup works in nearly all cases because the only device receiving incoming connections is the bridge server in the cloud. Firewalls block incoming connections by default. Very few block connections originating inside the network out to the Internet (egress). If a device along the way filters by content, connection attempts will be blocked. Many corporate networks are doing this kind of filtering. Otherwise the traffic looks the same as secure web traffic on port 443. No port forwarding is used.

Hosting

I recommend using an infrastructure hosting provider for the bridge server. This can cost anywhere from $5-$15 per month. The device can be anywhere on the public Internet. It must accept multiple connections on different ports but only by a couple users at a time are needed. Minimal configuration is more than sufficient. Bandwidth, latency, and up-time of all points in this setup effect reliability. My personal recommendations for infrastructure hosting providers are: Rackspace and DigitalOcean.

IP addressing

All remote networks and the home user networks cannot overlap in address space. That is they need to be differently numbered. For example, typically home networks have addressing as 192.168.1.x. The remote site(s) can’t have the same numbering (192.168.1.x). It must be different. I suggest making the remote site different enough to not cause conflict with any home users’ networks. Remote sites as 192.168.25.x, 192.168.26.x, and 192.168.27.x would work fine when the home users’ networks is addressed 192.168.0.x, 192.168.1.x, 192.168.2.x, and so on (except 25-27). Similarly addressed networks create routing conflicts and the packets will not reach the correct network.

Downsides

Cost.

In addition to hosting, a downside to using OpenVPN Access Server is licensing. While OpenVPN is Open-Source Software and OpenVPN Access Server is free, the license allows for only two concurrent tunnel connections at any one time. This means the remote site counts as one connection and the home device the second. If a second person (third device) needed access to the remote network, they would get a message saying ‘Access Server has reached its concurrent connections limit.’ The first person would need to disconnect first before the second could connect otherwise current connections will begin to be booted. Additionally, connecting two or more remote sites and a home user is not possible without purchasing licenses or running an additional bridge server. Additional licenses can be purchased for “$9.60 License Fee Per Client Connection Per Year. Support & Updates included. 10 Client minimum purchase.” $96 per year.

An alternative to OpenVPN Access Server is to setup your own (roll your own) OpenVPN server which is free. I hope to do an OVPN server setup at some point in the future.

Assumptions

This guide is step-by-step in nature, meant for beginners, with brief explanations of the steps. It will help to have an understanding of Linux commands and scripting. Capitalization is important in Linux! Understanding of basic networking concepts including determining network prefixes and CIDR notation is also required.

Program versions

I used a Windows 7 64 bit PC for configuration (and Home PC). Applications and versions used in this writeup:

  • OpenVPN Access Server 2.0.24
  • Putty 0.67
  • Ubuntu 14.04 x64 (bridge and remote servers)
  • Filezilla 3.16.0

Ohio Section Journal – The Technical Coordinator – February 2016 edition

One of the responsibilities of the Technical Coordinator in the Ohio Section is to submit something for the Section Journal. The Section Journal covers Amateur Radio related things happening in and around the ARRL Ohio Section. It is published by the Section Manager Scott – N8SY and articles are submitted by cabinet members.

Once my article is published in the Journal, I will also make it available on my site with a link to the published edition.

You can receive the Journal and other Ohio Section news by joining the mailing list Scott has setup. You do not need to be a member of the ARRL, Ohio Section, or even a ham to join the mailing list. Please sign up!

If you are an ARRL member and reside in the Ohio Section, update your mailing preferences to receive Ohio Section news in your inbox. Those residing outside the section will need to use the mailing list link above.
Updating your ARRL profile will deliver news from the section where you reside (if the leadership chooses to use this method).
Go to www.arrl.org and logon.
Click Edit your Profile.
You will be taken to the Edit Your Profile page. On the first tab Edit Info, verify your Email address is correct.
Click the Edit Email Subscriptions tab.
Check the News and information from your Division Director and Section Manager box.
Click Save.

Now without further ado…


Read the full edition at: http://n8sy2.blogspot.com/2016/02/february-issue-of-ohio-section-journal.html

THE TECHNICAL COORDINATOR
Jeff Kopcak – TC
k8jtk@arrl.net

DSCF5081 K8JTKHey Gang,

I was contacted this month by someone concerned that Fldigi would install a “trojan” on their computer and wanted to know where to get a clean download of the program. Before panic sets in, there is no reason to smash your hard drives. Why did I receive this question? I’ll explain the tech behind the issue.

The place that Fldigi, Flmsg, Flrig, and all other applications are now hosted is at a place called SourceForge (also abbreviated “SF”). SourceForge is a web service launched in 1999 that offers tools for developers to manage their projects for free. They host source code (for those who wanted to read, audit, modify, or learn from raw code), web pages for the project, mirrors (hosting in multiple locations in case any-one server is down), bug tracking, and many other features. It was the place for hosting free and open-source software. A ton of very well-known projects were (some still are) hosted on SourceForge: Apache Server, GIMP, OpenOffice, Firefox, Thunderbird, Audacity, Filezilla, Drupal, WordPress, JT65-HF… list goes on.

Some users were discouraged by the number of advertisements on the site. Though it is an ad-supported free service, there weren’t any viable alternatives.

In July 2013, SourceForge created an optional service available to developers called “DevShare.” Any developer who participated in the service would knowingly push additional unwanted programs to anyone downloading their project. This is commonly referred to as ‘crapware’ encompassing adware, download managers, antivirus programs, browser toolbars, homepage modifications, search engine replacements, and the like.

In May 2015, it was reported that SourceForge seized control of what they considered ‘deprecated or abandoned’ Windows projects. In taking control, they locked out the developer and “updated” project downloads to push similar ad-supported content.

This is a problem because the open-source community is just that, a community. They are made up of enthusiasts that like developing programs. Much like ham radio, they donate their time and do it for free. When a company takes the good name of a well-known project and tarnishes it by installing adware on users’ computers, this doesn’t go over well with the community. Their business practices effectively destroyed what was left of SourceForge’s reputation.

The DevShare project started a movement within the community to find replacements for SourceForge; GitHub primarily. SF since stated they are not taking control of unmaintained projects. It was too-little, too-late. Many developers deleted their projects from SF and moved their content elsewhere. It is up to each developer to make a decision about their project. I’ve provided links at the end of the article that go more in-depth for those into tech stories. SourceForge is not the only site that bundles crapware in downloads. Download sites like CNet’s Download (dot) com and many other free file hosting services also push ads and unwanted programs.

slusb
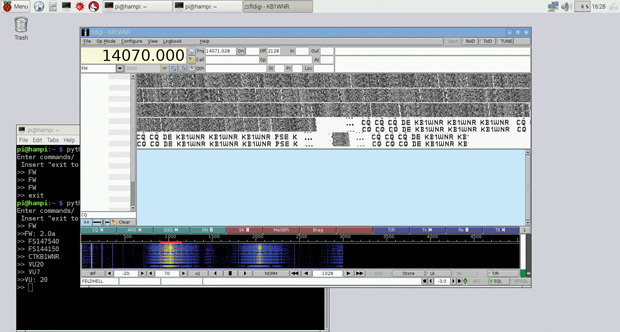
Back to Fldigi. The developer of Fldigi maintained the installer and source files on his own server. Somewhere near the end of last year, his site was hacked. The decision was made to move the files from his server over to SourceForge. Likely in an attempt to be more secure.

This created a problem for many who are aware of the issues with SourceForge. Unfortunately, it is the only place where the Fldigi Suite updates and downloads reside. I have installed many Fldigi updates since the move to SourceForge and have not seen anything to suggest any unwanted programs are included. The issue is something to be aware of.

Good security practice dictates not downloading anything you-yourself didn’t go looking for. If you do download Fldigi and it is prompting you to install an antivirus program, this is a huge red flag. Another example: never click anything that says ‘your plugins, Java, Flash, antivirus, or system… is out of date’ because you weren’t looking for those updates.

In other news, I would like to welcome Technical Specialist Eldon – W5UHQ. If that sounds familiar, it’s because he is the Net Manager for the OHDEN HF digital net. The Ohio Digital Emergency Net meets Tuesday evenings at 8pm on 3585 using OLIVIA 8/500 at 1 kHz. The purpose is to provide statewide communications to EMA and EOC’s in Ohio using sound card digital modes. If that wasn’t enough, he brings an extensive background in communications and electronics to the group. OHDEN net: http://ohden.org/

I will be at the Mansfield Hamfest on February 21. I’ve been invited to present during the Digital Forum at noon. This is assuming the weather is better than it has been the last few days, hi hi. The Digital Forum will contain a presentation on digital voice by Duane – K8MDA and I will present passing messages using Fldigi. Hope to meet you at Mansfield! More: http://hamfest.w8we.org/

Thanks for reading and 73… de Jeff – K8JTK

Articles on SourceForge:

http://www.infoworld.com/article/2929732/open-source-software/sourceforge-commits-reputational-suicide.html

http://arstechnica.com/information-technology/2015/05/sourceforge-grabs-gimp-for-windows-account-wraps-installer-in-bundle-pushing-adware/

About the ARRL Ohio Section Technical Coordinator presentations

I was asked to give a presentation about the ARRL Ohio Section Technical Coordinator and projects I’ve worked on.

Framework

The framework I chose to use for the presentation slides is called reveal.js. It is an HTML framework meaning it will run in any HTML 5 capable browser. Looks a little better than a PowerPoint presentation.

Navigation

Useful navigation keys in the presentation. In addition to navigating with the keys below, you can swipe (tables/smartphones) or use the navigation arrows on screen in the lower right.

Toggle full screen: press [F11].

Advance to the next slide: press [n] or [SPACEBAR].

Go back to the previous slide: press [p] or press and hold the [SHIFT] key while pressing the [SPACEBAR].

Display presentation overview: [ESC] then use the arrow keys or mouse to select a slide. [ESC] again will exit overview mode.

Links

Clickable links are colored in blue text.

Presentations

Three variations are available: presentation version is viewable in a browser. Printable version for printing or saving in a different format (Chrome, Chromium, and variants compatible only). Finally a PDF version.

They may take some time to load because I left original images untouched and some were a couple MB in file size.

Slides

Version 3

The presentation is about 45 minutes in length.

Presentation version
Printable version
PDF version

This presentation was given at the following meetings:

Version 2

The presentation is about 45 minutes in length.

Presentation version
Printable version
PDF version

This presentation was given at the following meetings:

Version 1

The presentation is about 45 minutes in length.

Presentation version
Printable version
PDF version

This presentation was given at the following meetings: